How to Navigate Nav Builder (Detailed)
This guide provides a step-by-step approach to creating a navigation menu in PodUp, essential for enhancing user experience on your website. It simplifies the process of organizing and managing your site's links, making it easier for visitors to navigate different sections. By following these instructions, you can create a clear and functional navigation structure, including dropdown menus, that improves accessibility and engagement on your site.
1. Nav Builder
Navigation menu: The roadmap for your website visitors. It's a collection of links, usually displayed prominently at the top of a webpage, that allows users to easily find and access different sections or pages of your website

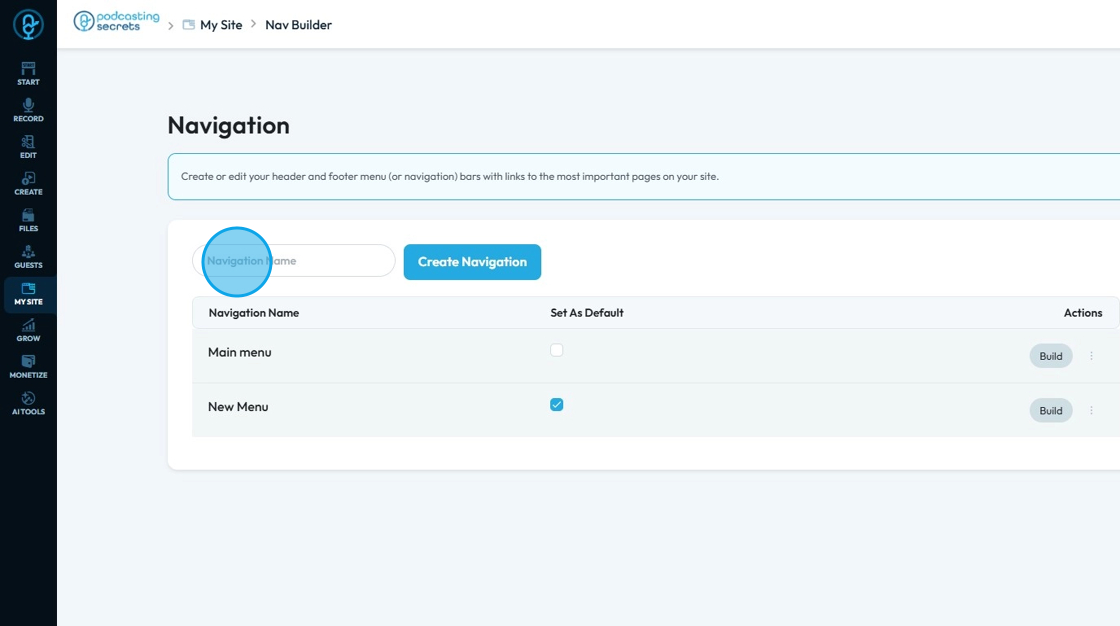
2. Click "My Site"
3. Click "Nav Builder"

4. Click the "Navigation Name" field and enter the name then click "Create Navigation"
- This is the name that will appear on the menu itself
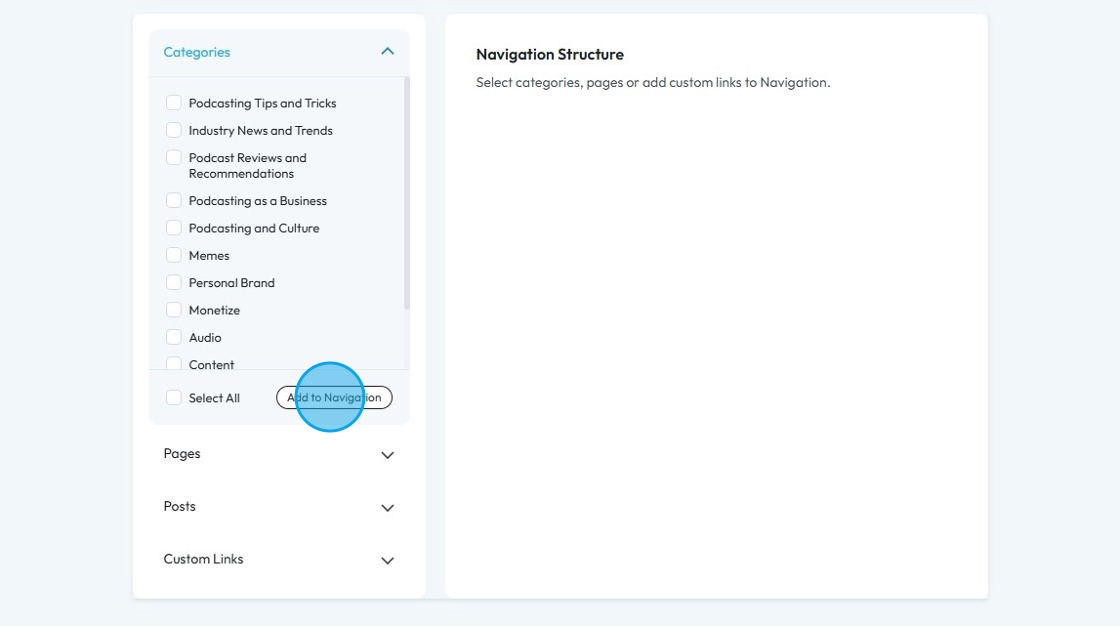
5. You will enter the "Add Navigation Items" page
You can define the content and structure of your website's navigation. It's the central hub for managing what links appear in your menu, how they are organized, and where they lead

6. Click "Categories" and select the categories you want to include. The categories that appear here have been created in "Categories" under "Create"
- You can select one or multiple categories
- Select all categories at the same time by clicking "Select All"
Once you have selected the categories, click "Add to Navigation"
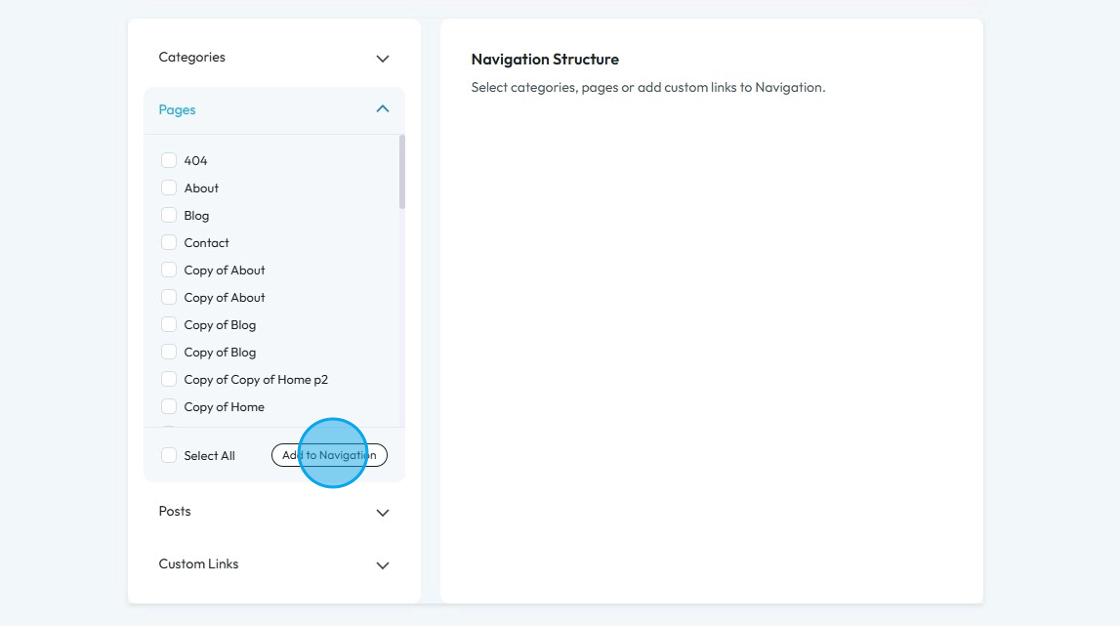
7. Click "Pages" to add a page link to the Navigation. The pages here have been created in "Page Builder" in "My Site"
- You can select one or multiple categories
- Select all categories at the same time by clicking "Select All"
Once you have selected the pages click "Add to Navigation"
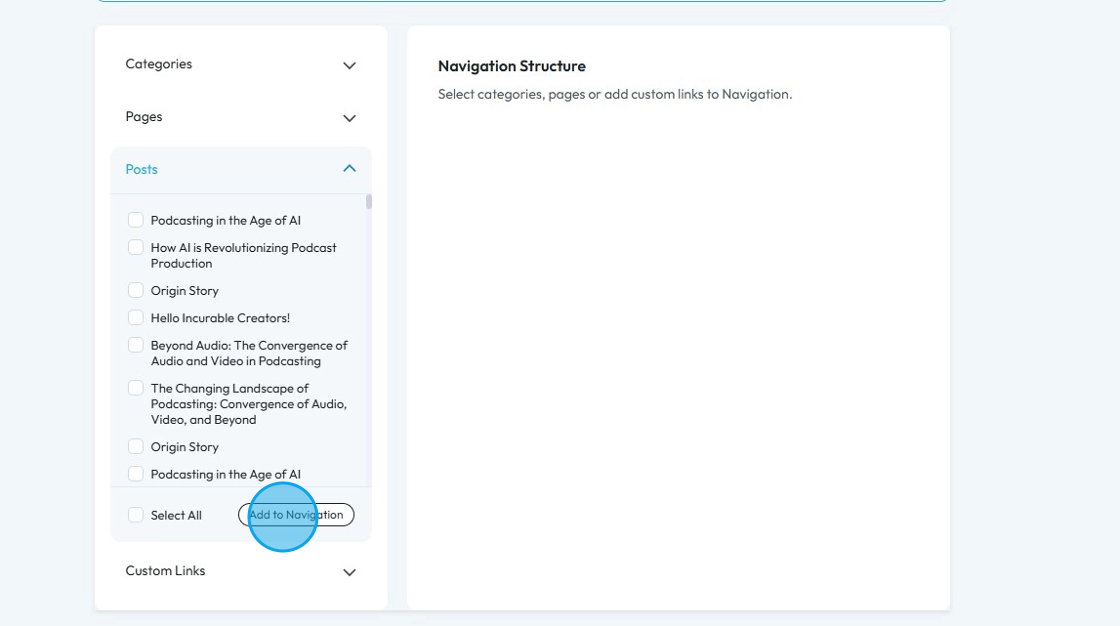
8. Click "Posts" to add a post to Navigation. These are the files you have posted or that have a "Published" status
- You can select one or multiple categories
- Select all categories at the same time by clicking "Select All"
Once you have selected the post "Add to Navigation"
9. You can enter a "URL" in Navigation through the URL field and enter the Link text.
- The URL could link to an affiliate page or to a form to be filled out
- Link text: The visible, clickable text on a webpage that takes users to another page, section, or website when clicked.
Once you have entered the link and the link name, click "Add to Navigation"

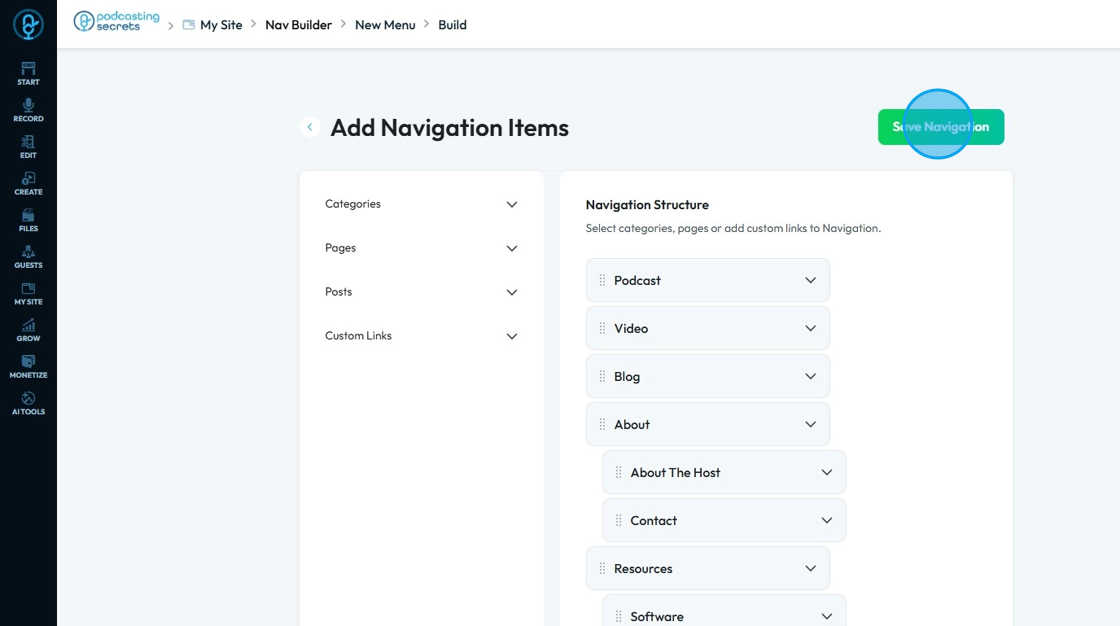
10. Once you have added the needed elements to the Navigation
All the selected elements will be presented as a list
You can move the element using the 6 dots on the side as shown in the image. Click the 6 dots icon and hold it as you drag it to the desired place
- Using this feature you can rearrange the elements to put them in the order you want
- You can indent a feature to create a drop-down menu

11. To add a dropdown list to your Navigation, reposition the elements (as shown in the image)

12. The dropdown list will appear (website view) as shown

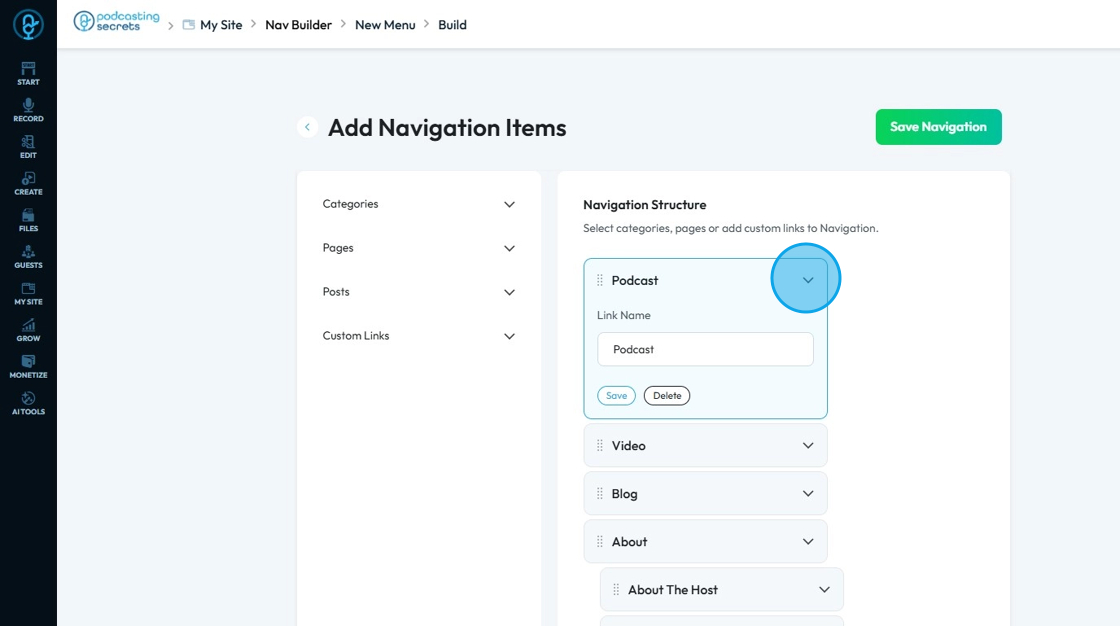
13. You can change the link name by clicking the down arrow in respective element
Once entered, click "Save" to keep the name or "Delete" to remove that element
14. Click "Save Navigation" to save the progress that you made
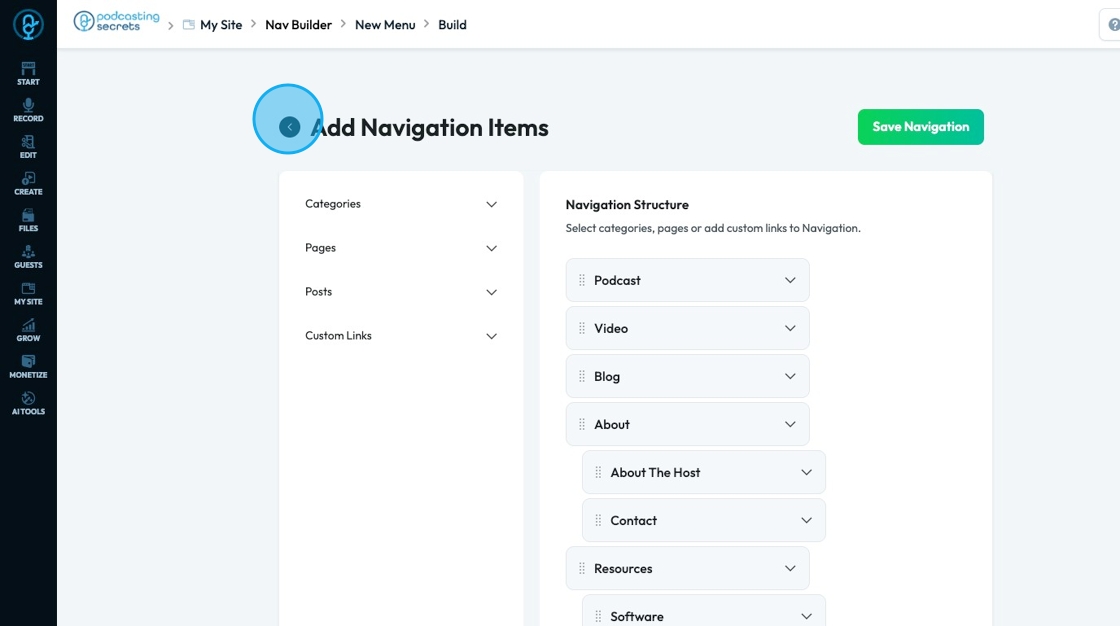
15. Click the back arrow to return to the main page
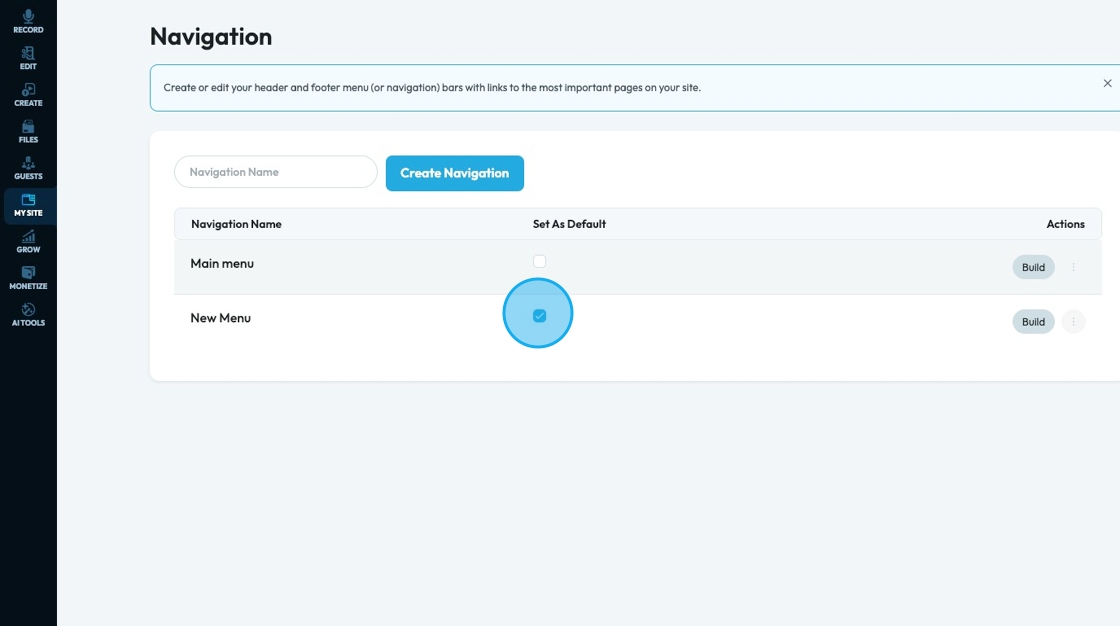
16. Check "Set As Default" for the navigation that you want to be the default menu for your website
A popup will appear to inform you that you have successfull changed the menu
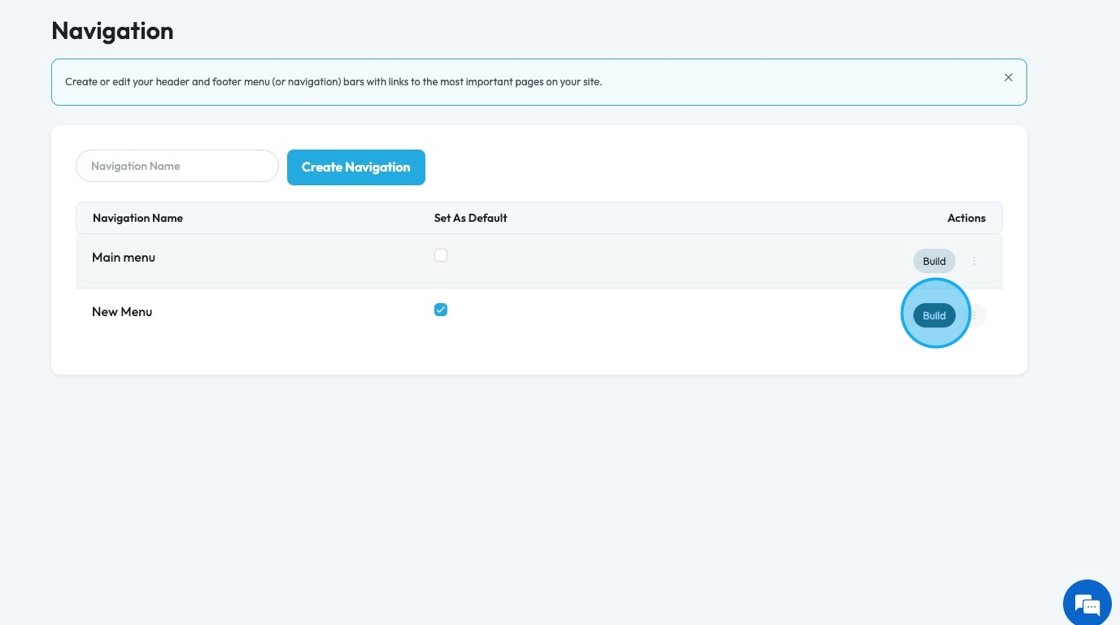
17. Click "Build" to return to the navigation builder to edit the menu
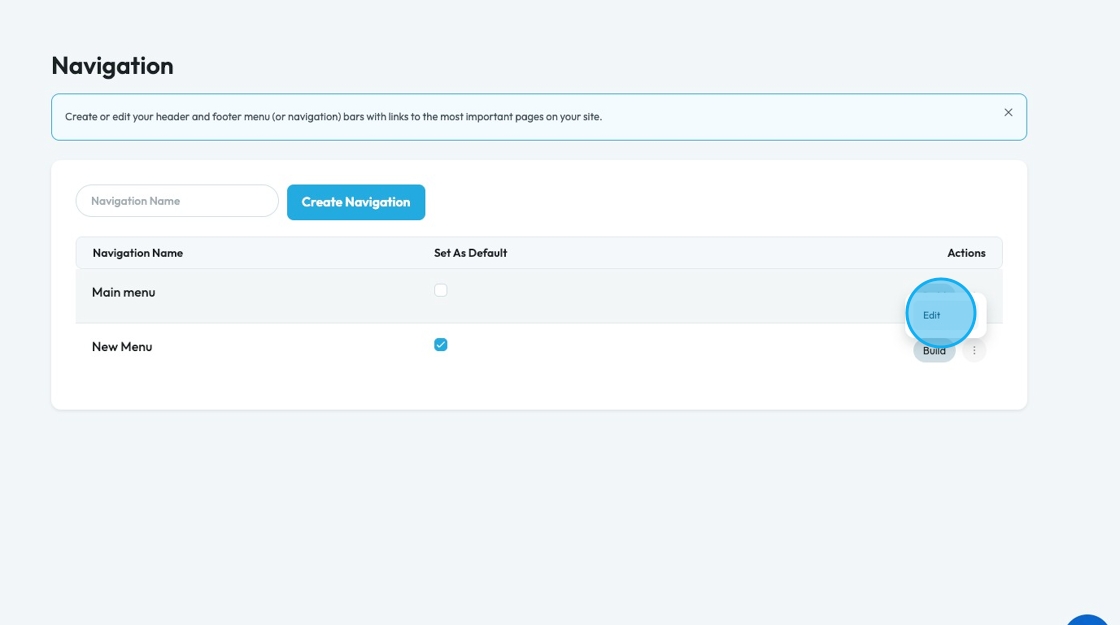
18. Click "Edit" to edit the name of the navigation menu
- Note: This navigation name is an internal resource to help you find the right navigation but external users won't see the name
Related Articles
How to Navigate Post Page Builder (Detailed)
This guide offers a straightforward approach to creating and customizing post pages using PodUp's Post Page Builder, making it ideal for bloggers, video creators, and podcasters. It provides step-by-step instructions for adding and enhancing post ...How to Navigate Page Builder (Detailed)
This guide provides a straightforward method for creating and customizing website pages using PodUp's Page Builder, making it ideal for users of all skill levels. It outlines each step in the process, from accessing the page builder to editing ...How to Add an Image from a URL to PodUp Page Builder using Quick Add (Detailed)
This guide offers a straightforward approach to adding images from URLs in PodUp Page Builder, making it ideal for users looking to enhance their website visually and interactively. It provides detailed steps for customizing images, managing styles, ...How to Navigate Analytics (Detailed)
This guide offers a comprehensive overview of accessing and understanding podcast analytics through PodUp Analytics, making it essential for podcasters aiming to optimize their content reach. By breaking down key metrics and providing step-by-step ...How do I customize Web builder Quick Add (Detailed) - Collapse
By following this guide, you will be able to easily customize the Quick Add feature in the PodUp Web Builder from adding a collapse block to adjusting its visual properties ensuring an interactive and visually appealing website. 1. Navigate to ...