How To Navigate Editor (Detailed)
This guide is essential for anyone looking to effectively edit audio and video using Podup's Editor. It provides a comprehensive overview of the platform's features, from navigating the interface to utilizing various editing tools and elements. With clear instructions on how to customize layouts, adjust audio, and enhance your project with stock media, this guide empowers users to create professional-quality content effortlessly. Whether you're a beginner or experienced editor, this resource streamlines your editing process and helps you achieve your vision.

Tip: Words to know
Episodes: An individual installment, segment, or part of a podcasting series
Studios: A place that houses your recordings on a specific subject
Clips: A short video generally taken from an episode
Layer: A piece of video, audio, text, or image that you add to your project. Layers sit on top of each other to build your final video.
Element: A small visual item—like an emoji, shape, or sticker—that you can add to your video to help tell the story, show emotion, or make it more fun and interesting.
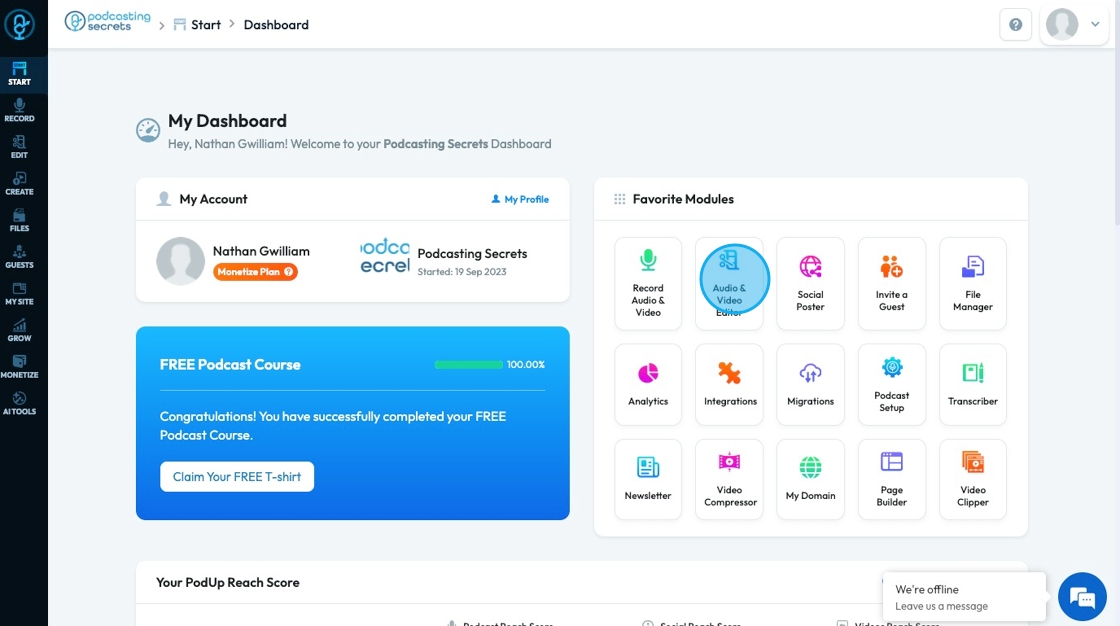
1. Navigate to https://app.podup.com/home
There are 2 ways to access the Editor

2. Click "Audio & Video Editor" in "Favorite Modules" on the Dashboard
3. Click "Edit"
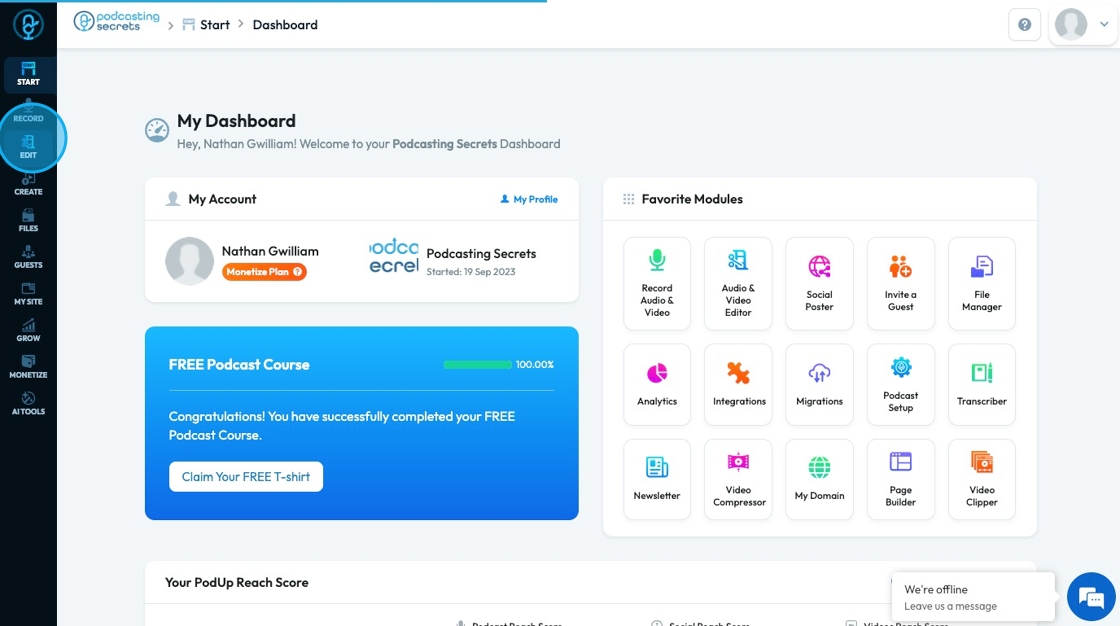
4. Click "Editor"

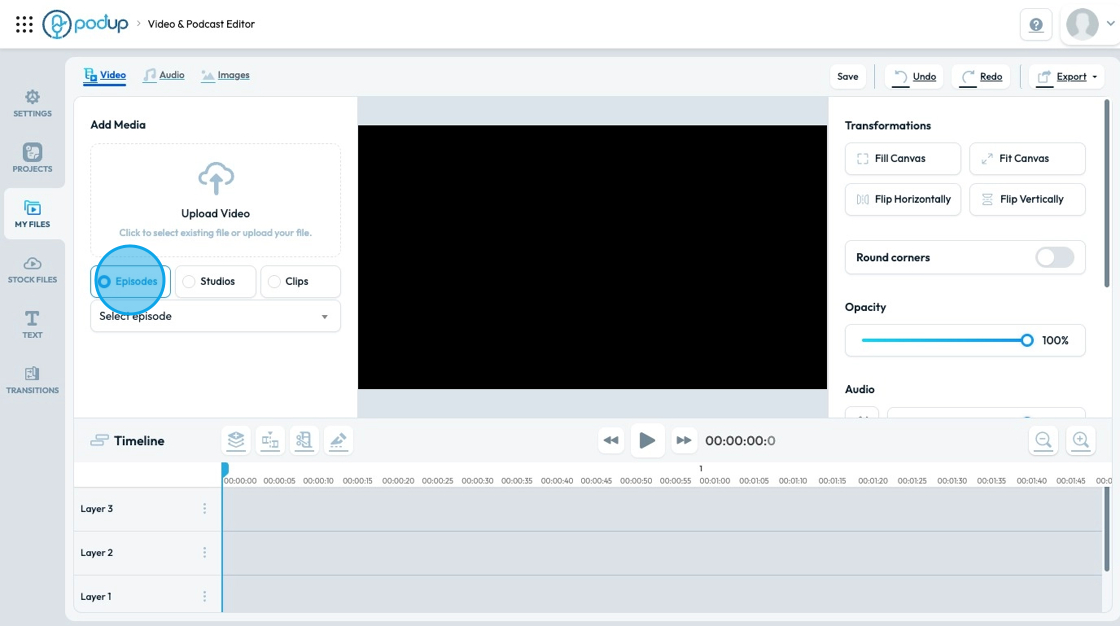
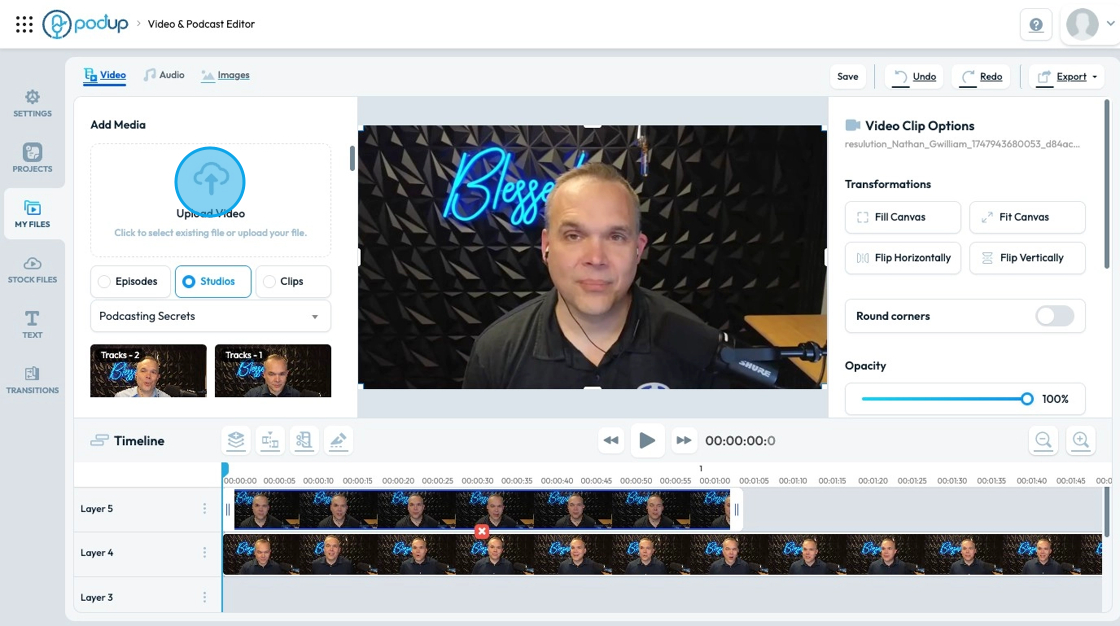
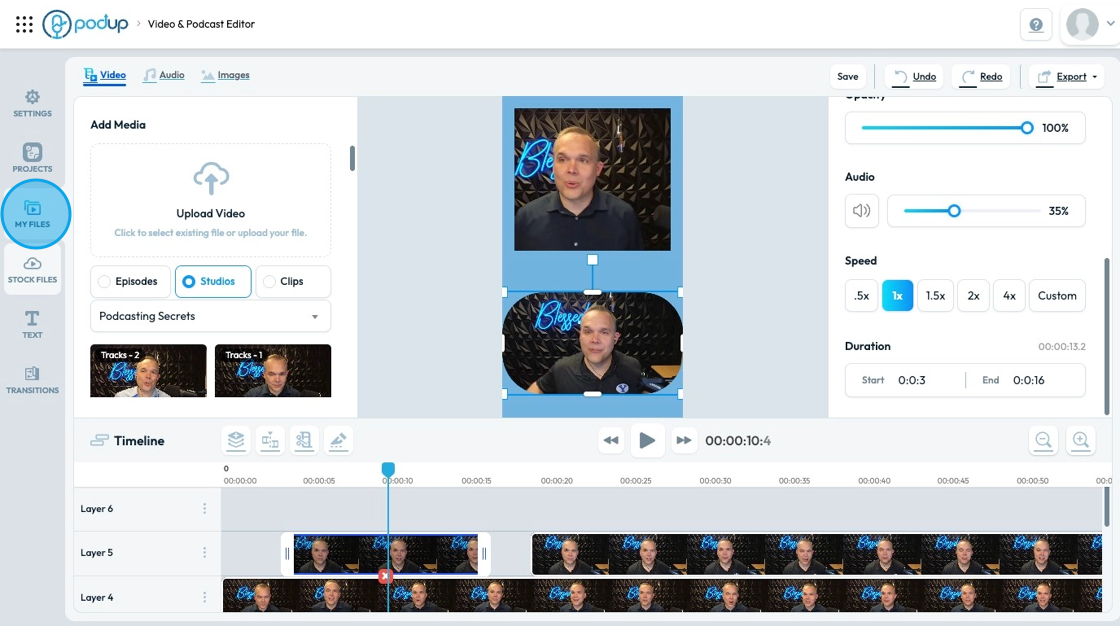
5. Click "My Files" to add your files to the editing platform
- You can add select files from episodes, studios, and clips
- You do not need one from all of them

6. Click "Episodes" to select from your published episodes
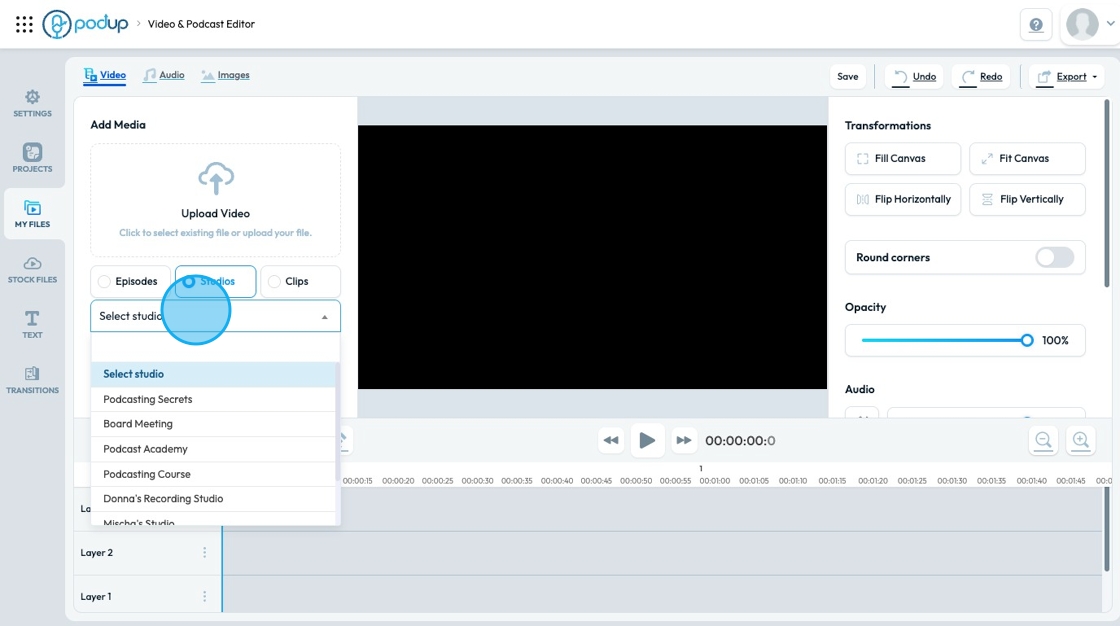
7. Click "Studios" to open all the studios. The drop-down menu will list all the studios. Select a studio to open all the videos in that studio
8. Click "Clips" to view the clips

9. Select the media that you want to add to your "Timeline"

10. To upload videos from your laptop - recordings, b roll, etc, click "Upload Video"
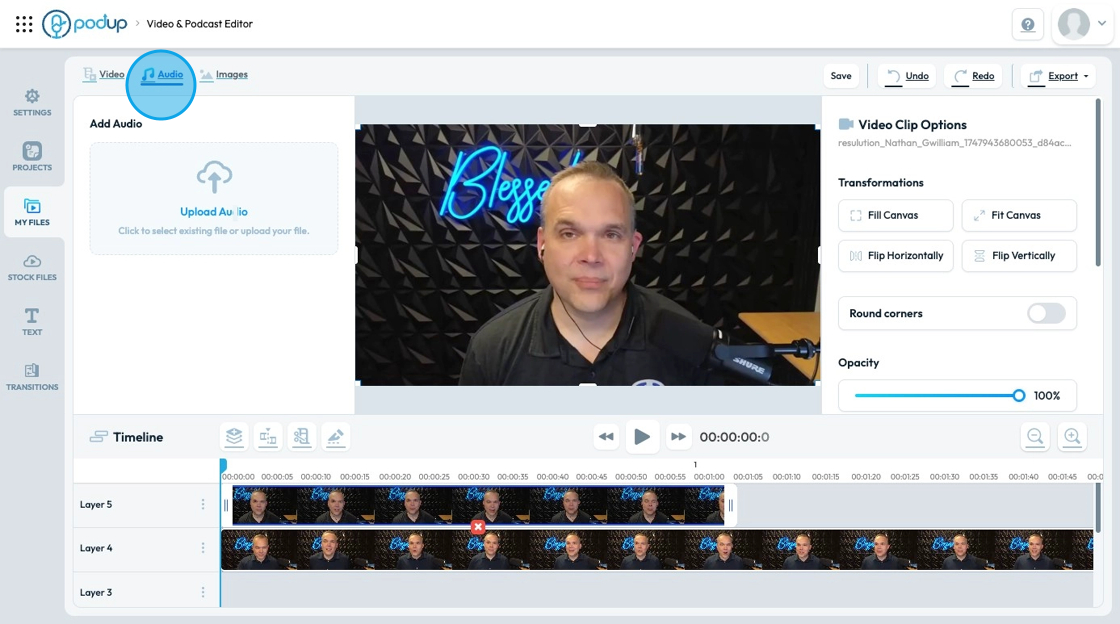
11. To add existing audio or to upload your own file that you have created or bought, click "Upload Audio"
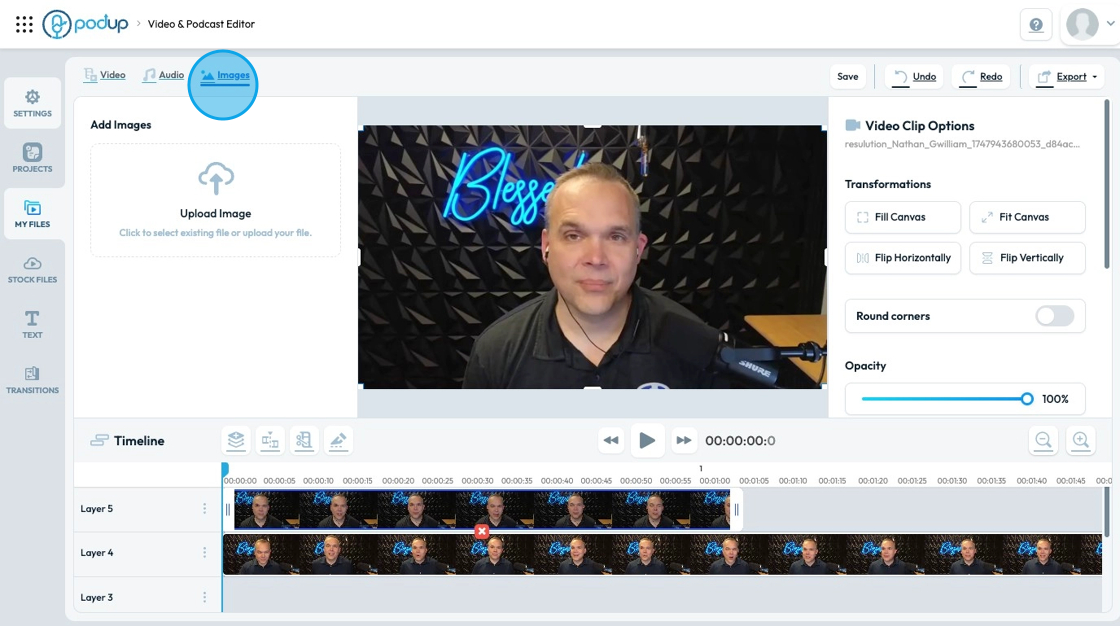
12. To add your images to the project, click "Images"
13. Now that you have selected your files, navigate to Settings.
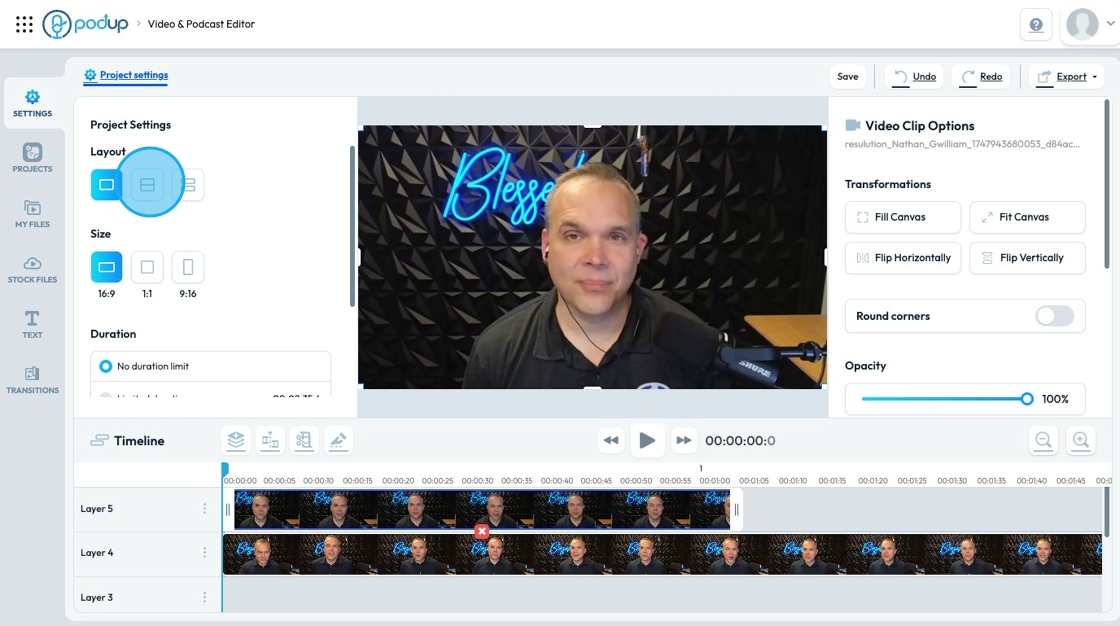
14. Choose 1 of 3 layouts of your files
- Option 1 will only show 1 speaker
- Option 2 will show all speakers with no space between their videos
- Option 3 will show all the speakers with space between their videos which allows for a frame or photo to be placed behind them
15. Change the size of the video by selecting 1 of 3 options
- 16:9 - Landscape, perfect for YouTube, Facebook and LikedIn
- 1:1 - Square, recommended for Facebook, Instagram, LinkedIn, and Twitter
- 9:16 - Portrait, recommended for TikTok, YouTube Shorts, Instagram Reels, and Facebook Reels

16. "Duration" allows you to set a maximum length of time that your video can be
- "No duration limit" indicates no time limit
- "Limited duration" allows you to set a time limit for your show
- Change the time by selecting the time and typing in your desired time
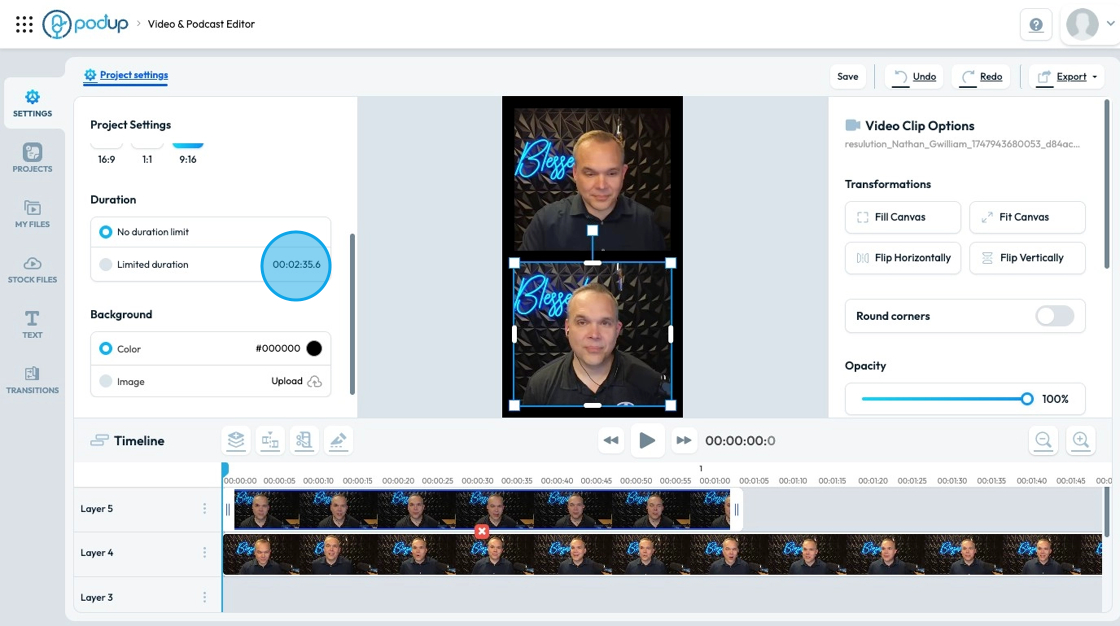
17. "Background" allows you to change the background behind your video
- You can add a solid color by selecting the colored dot next to the hex number
- You can select your own color or input your hex color
- You can add an image by selecting the upload icon and pulling an image from your computer

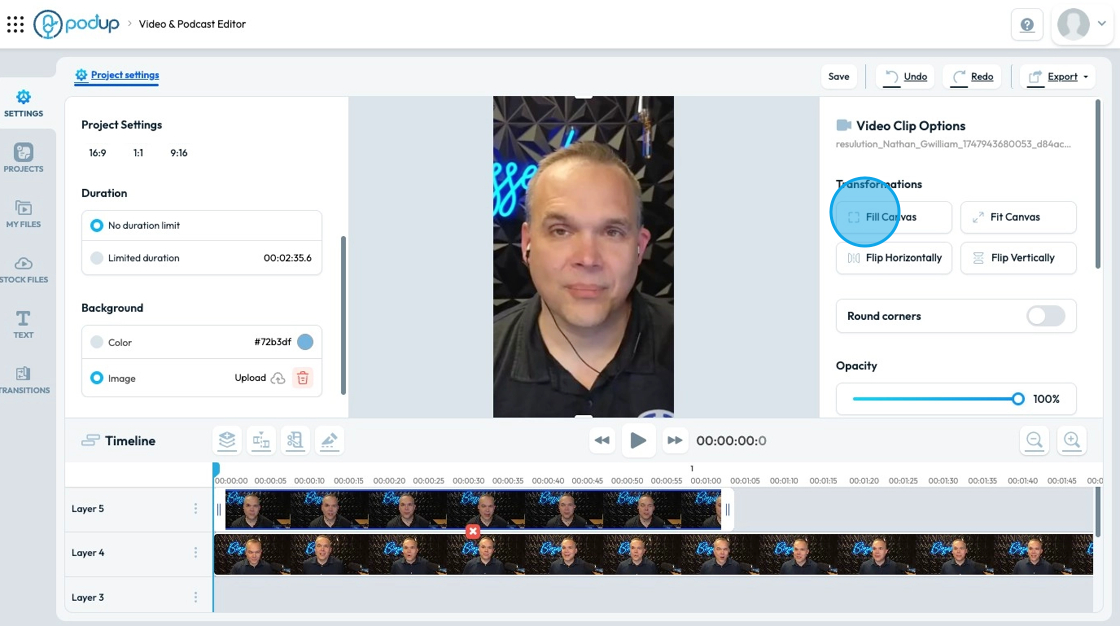
18. Click "Fill Canvas" to enlarge the selected video to fit the size of canvas
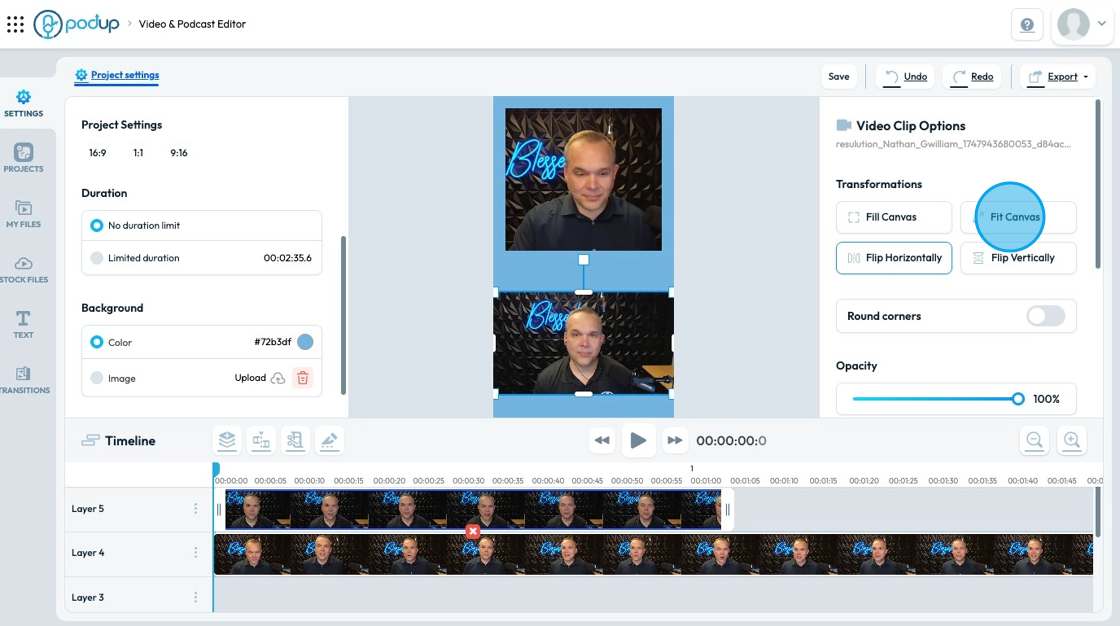
19. Click "Fit Canvas" to make the video fit the canvas in its original form
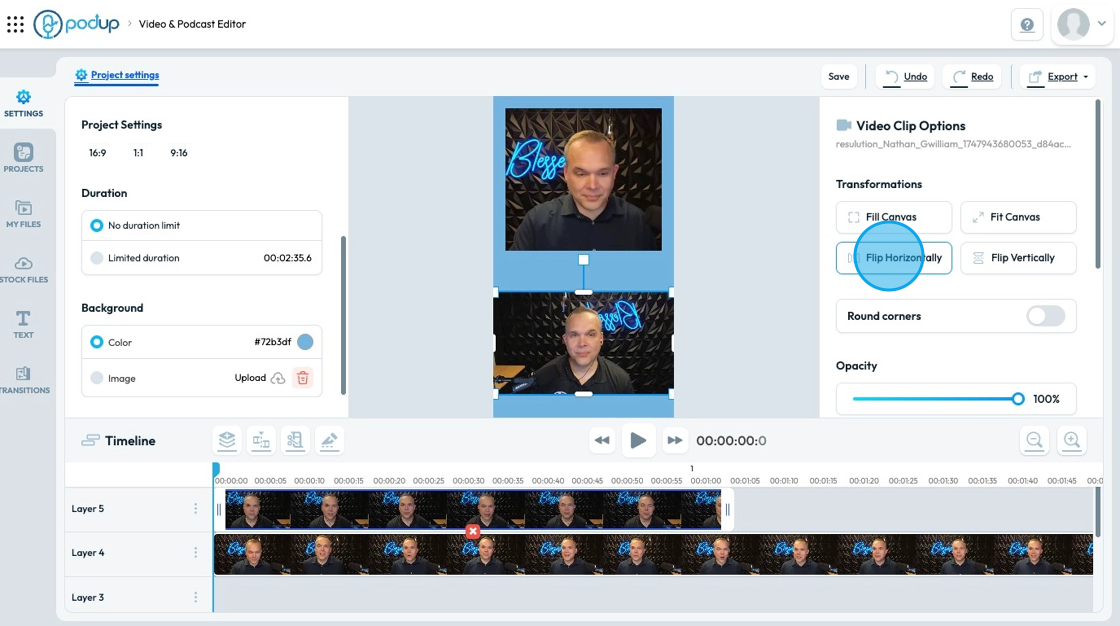
20. Click "Flip Horizontally" to make the video flip across its horizontal axis
- Ex. This bottom video was flipped so Nathan and the Blesses sign are now inverted
- This tool can be helpful for videos filmed in an inverted fashion like selfie mode
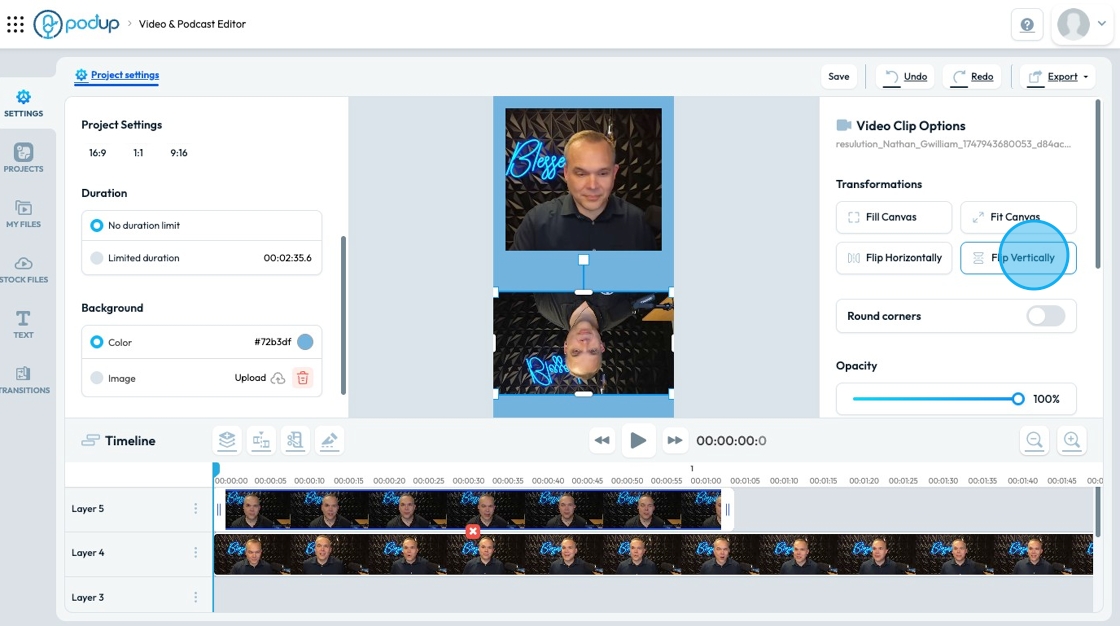
21. Click "Flip Vertically" to flip the video on its vertical axis
- Ex. Flipping this video on a vertical axis leads Nathan to look upside down
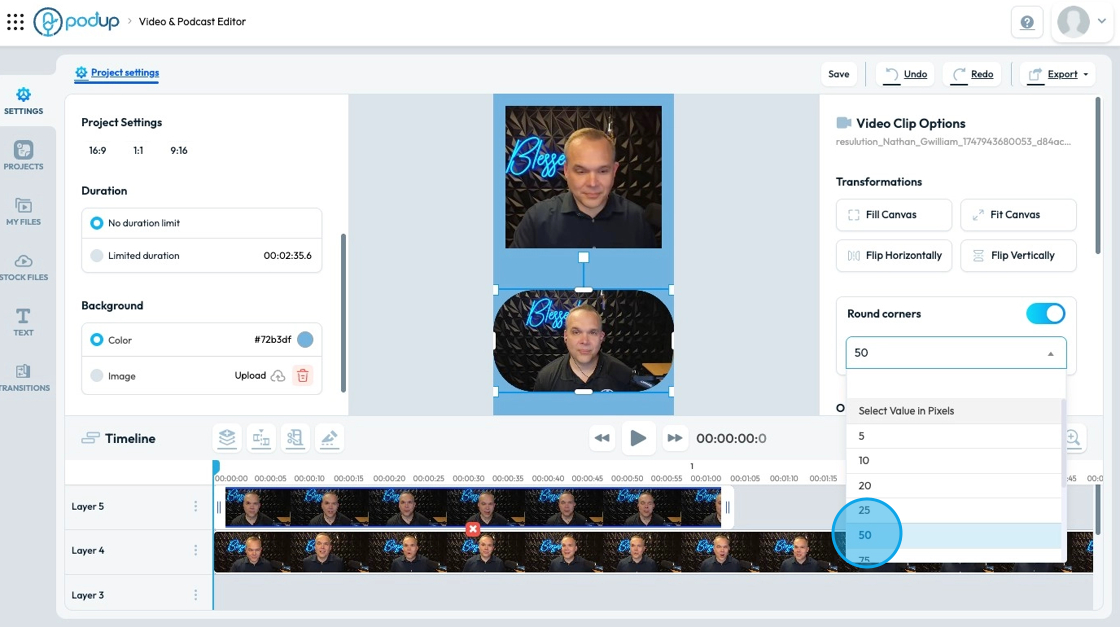
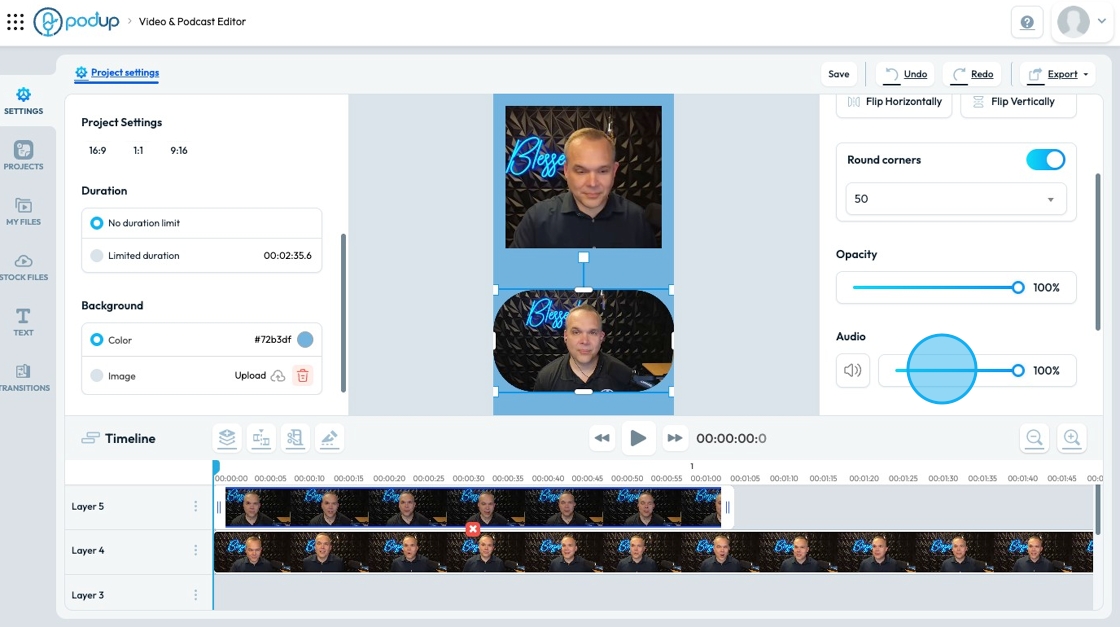
22. Click "Round Corners" to round the corners of your video.
- "Select Value in Pixels" to indicate the severity of the rounded corners. The smaller the number (minimum 5) the less the corners will be rounded. The bigger the number (maximum 300) the more the corners will be rounded
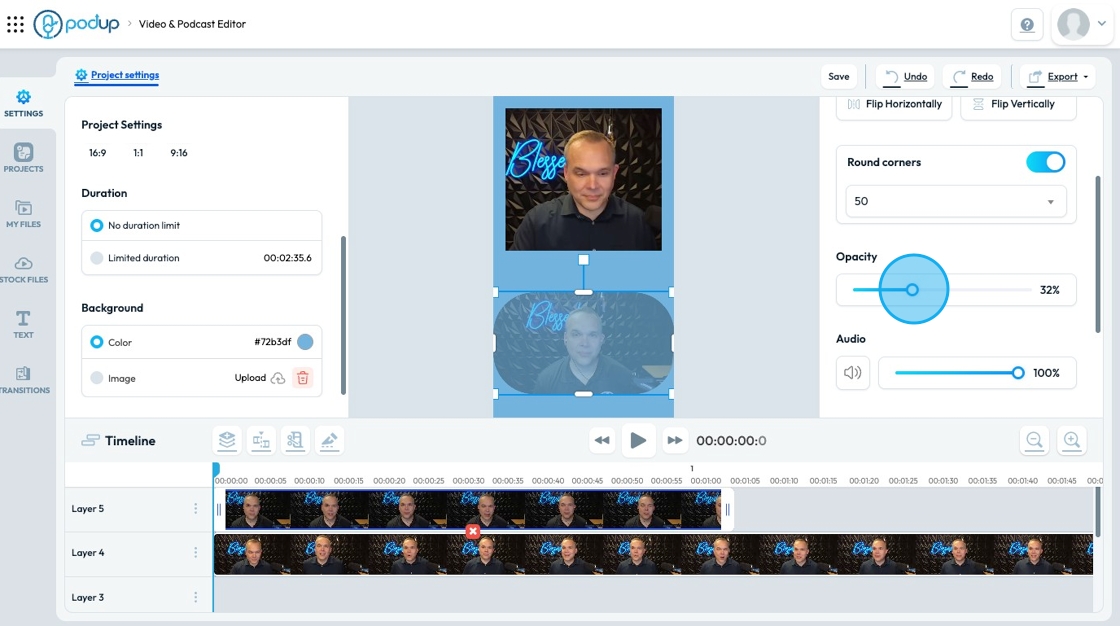
23. Adjust opacity by selecting a percentage on the slider
- Opacity: How see-through the video is
- 100% is fully visible
- 0% is completely invisible
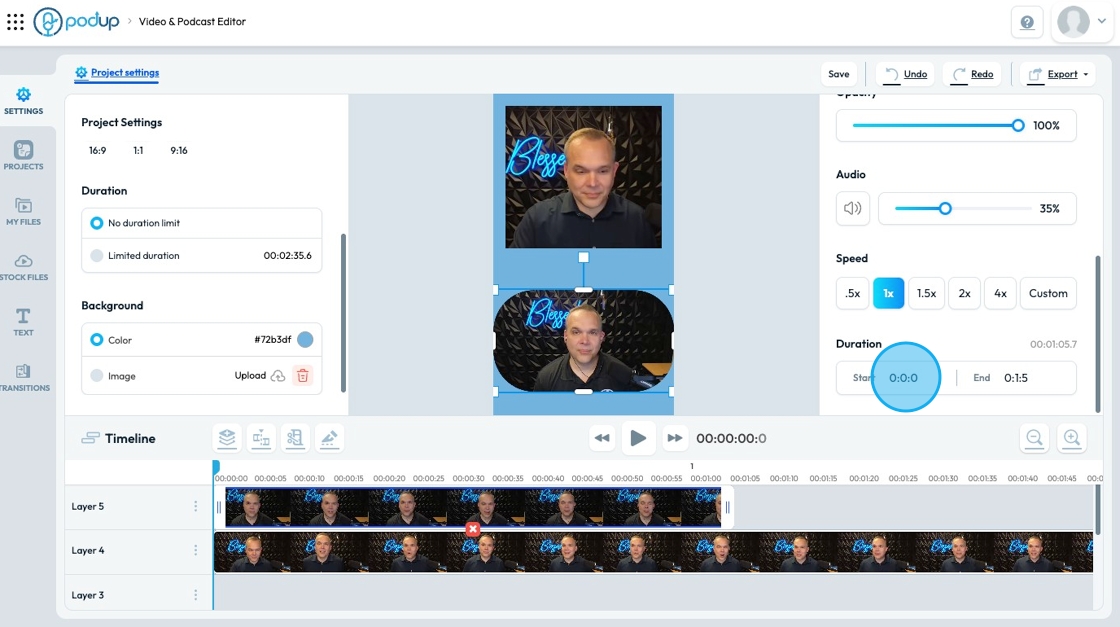
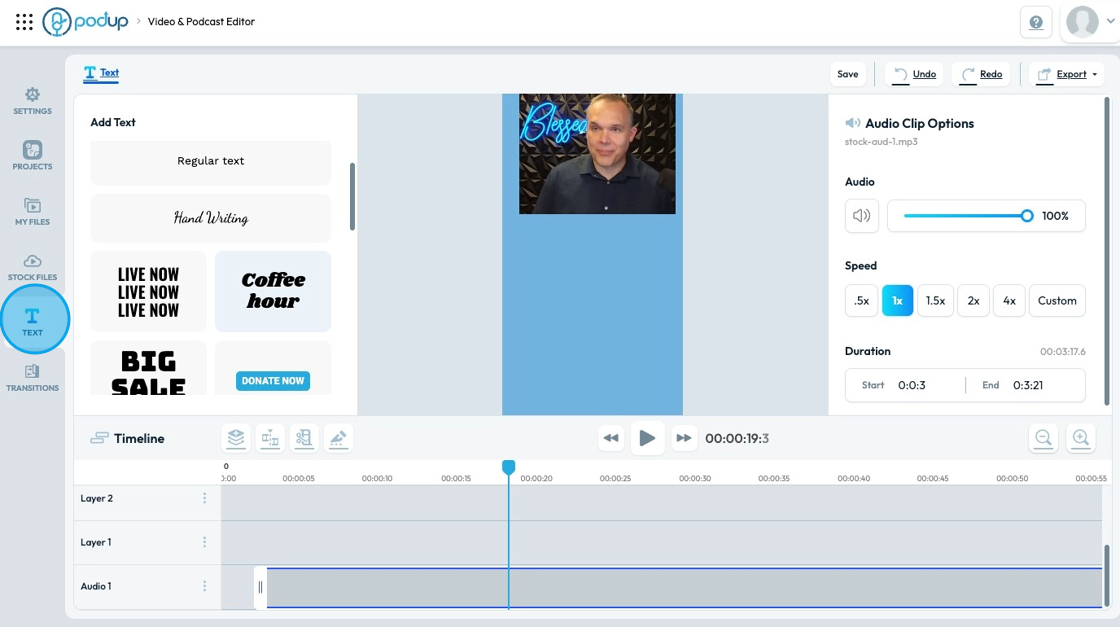
24. Adjust audio volume by moving the circle on the slider or selecting the audio symbol to completely mute
- 100% is full audio capacity
- 0% is muted with no audio
25. Adjust the playback speed of the video by selecting the desired speed
- 0.5x is half the normal speed so it is slow
- 1x is the normal speed that you recorded at
- 2x is twice the normal speed so it is fast
- You can also customize the time to get it exactly how you want it

26. "Duration" shows you when to start and end the episode
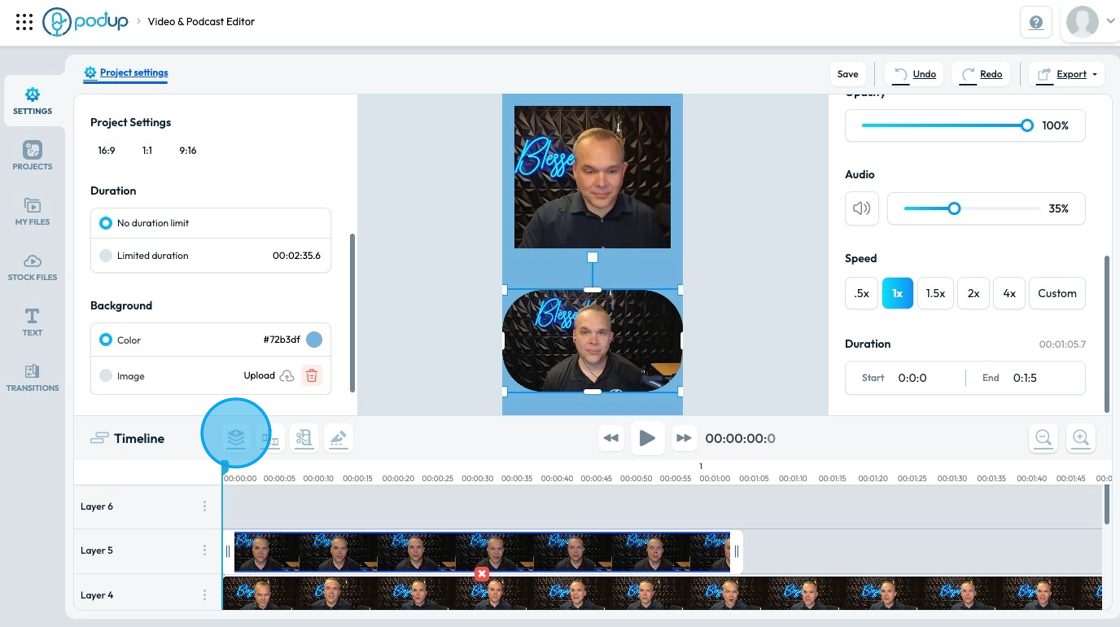
27. Click "Add layer" to add another layer to the video timeline
- A layer is an element to your video
- The layer closest to the top on the timeline will be the most visible layer on the video
- Scroll through the layers by hovering over the layer name and scrolling
Tip: Tip: If an element is hidden on a bottom layer you can right-click on the canvas and adjust its placement in the frame
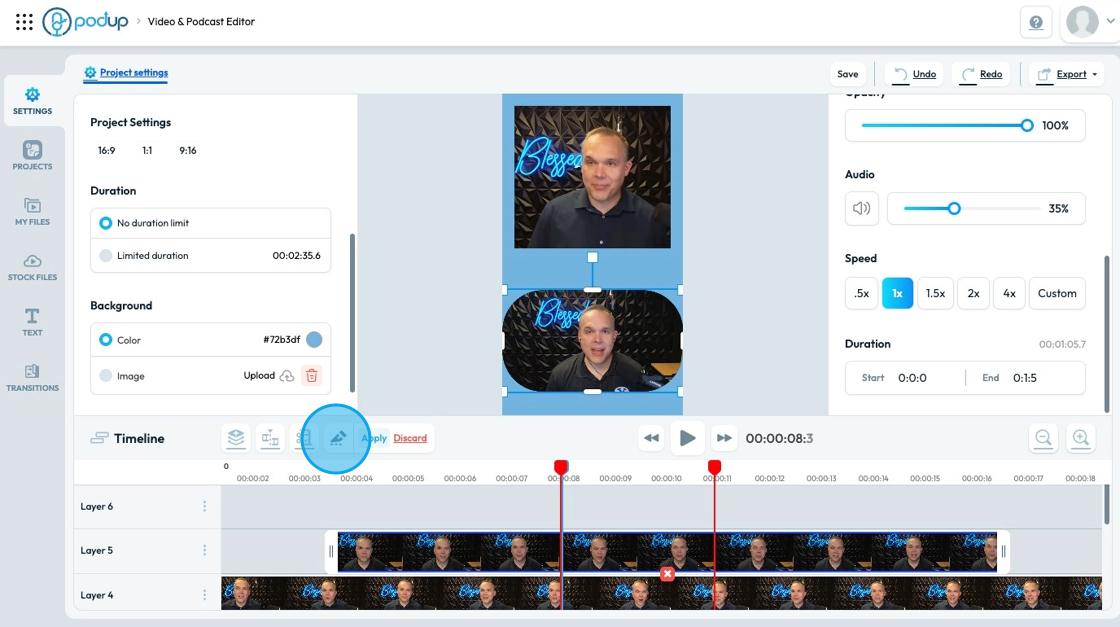
28. Click "Split" to slice a video into 2 pieces
- Set your blue line to where you want to cut the video and click split

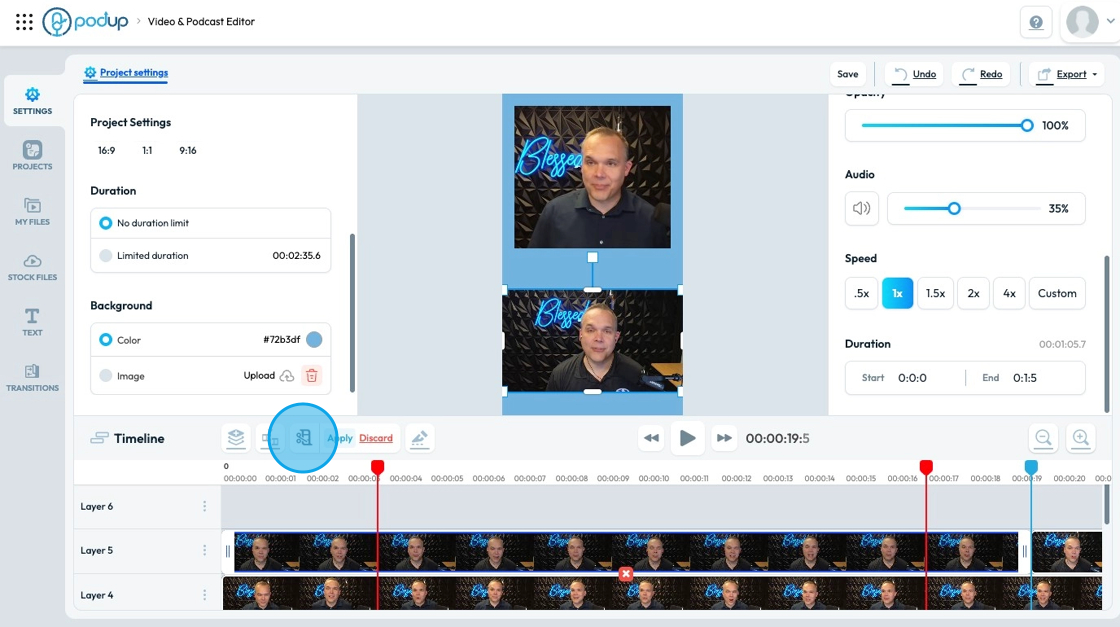
29. Click "Trim" to get rid of excess material. This is the opposite of "Blade"
- When you select trim 2 red lines will appear. Move the lines to the exact time you want them
- Select "Apply" to trim the file
- Anything outside of the 2 red lines will be deleted
30. Click "Blade" to cut the unnecessary material. This tool is the opposite of "Trim"
- When you select blade, 2 red lines will appear. Move the lines to the exact time you want them
- Select "Apply" to cut the file
- Anything inside the 2 red lines will be deleted
31. Play the video in the center using the "Play video" icon

32. Click "Minimize" to shrink the timeline display. This zooms out so you can see the whole project
- This feature helps you easily jump between parts of a big project
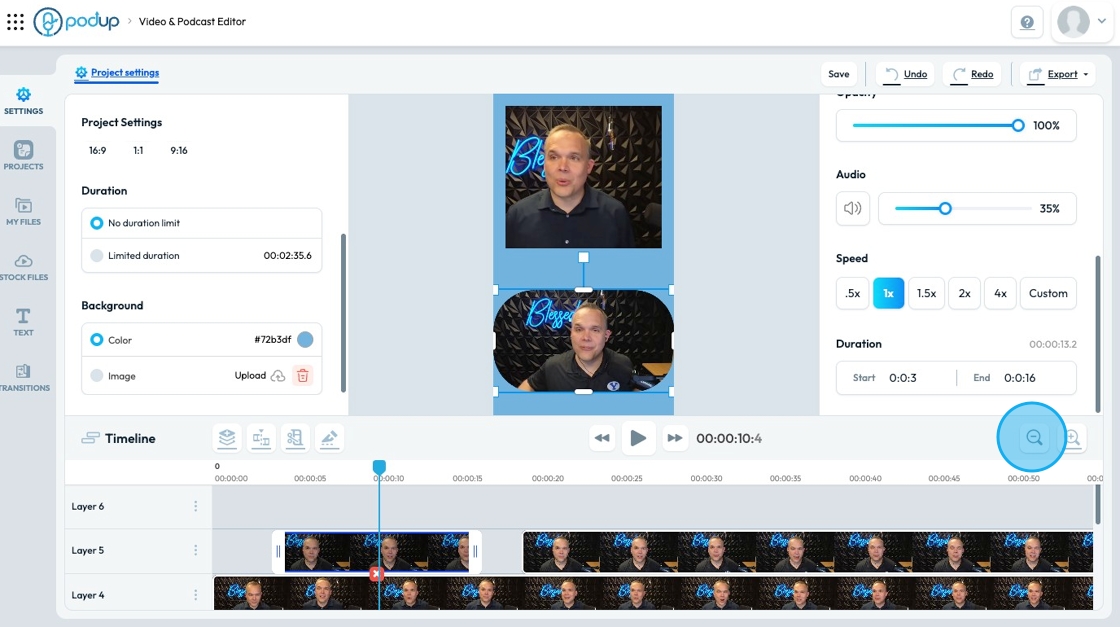
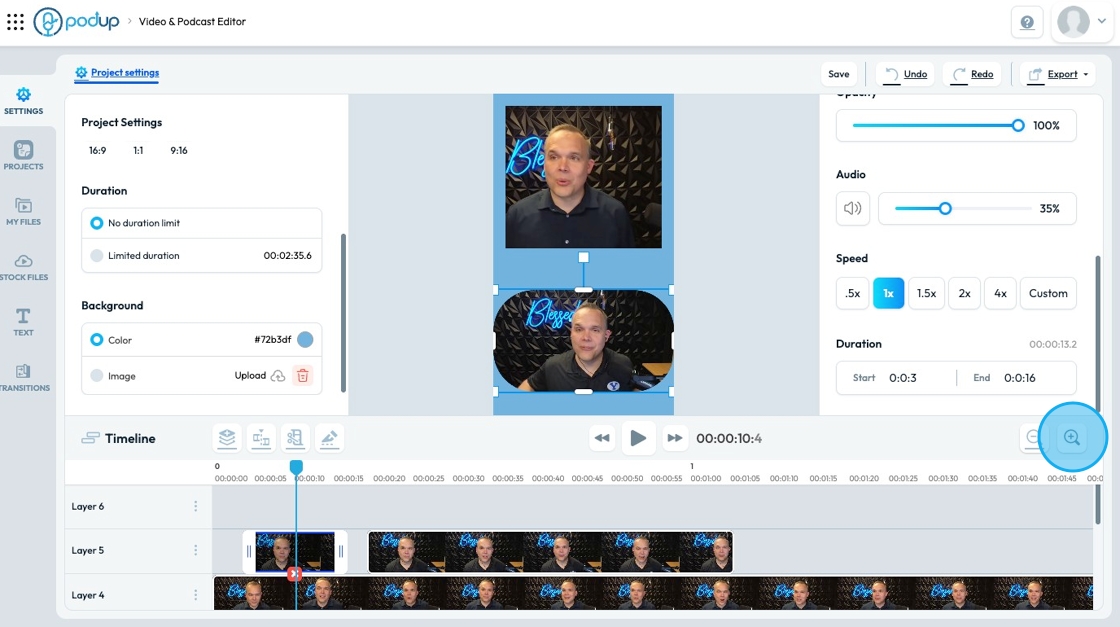
33. Click "Maximize" to zoom in on the timeline display. This feature allows you to take a closer look at the project
- This feature helps you work on details of your project for minor errors. You can edit it second by second
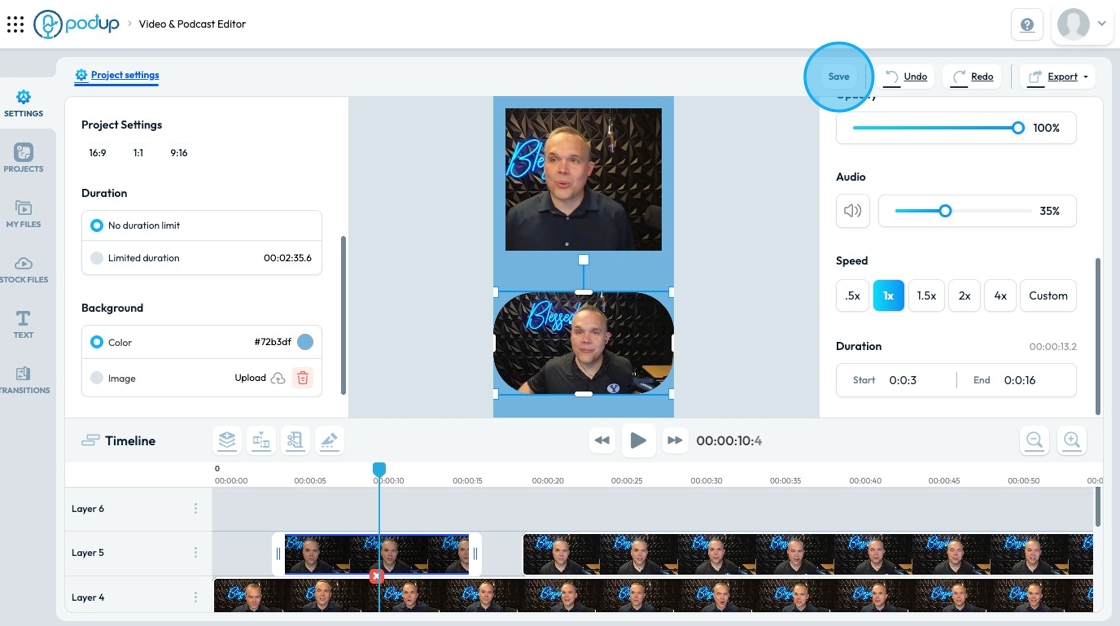
34. Click "Save" to save your project
35. Click "Undo" to undo the most recent change that you've made

36. Click "Redo" to reapply a change that you've undone

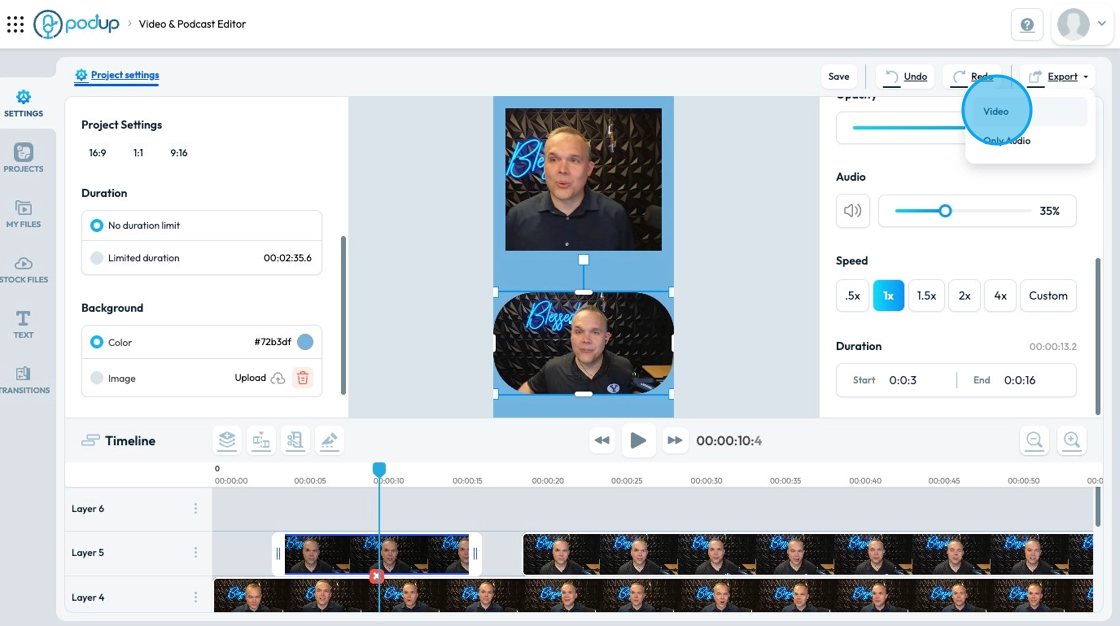
37. Click "Export" to export or share the edited file
- You can export audio and video or just audio
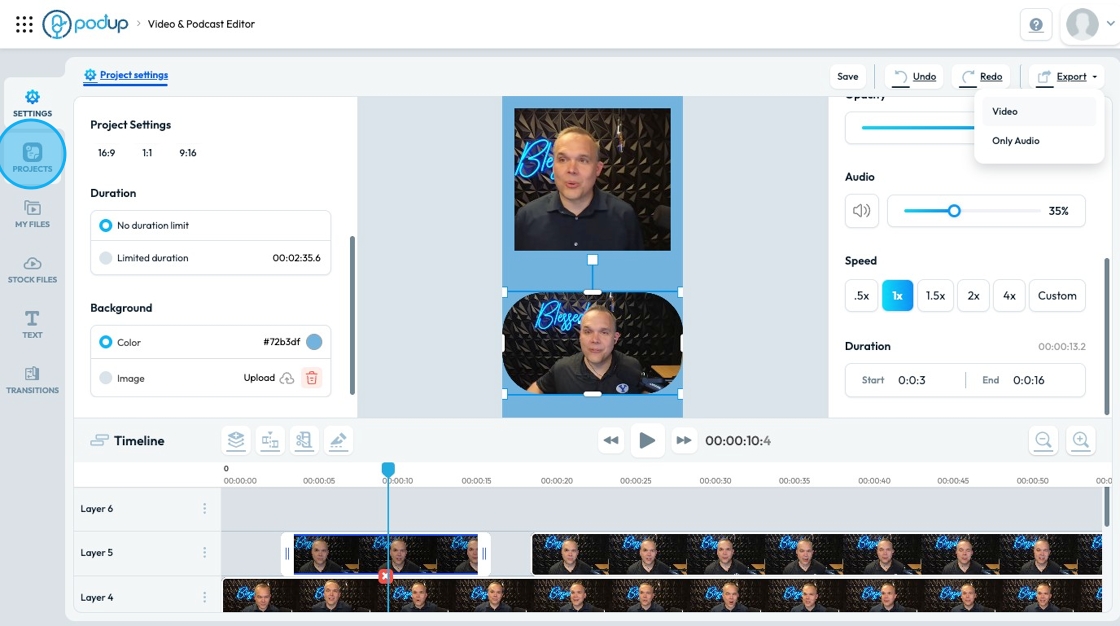
38. Click "Projects" to open your projects
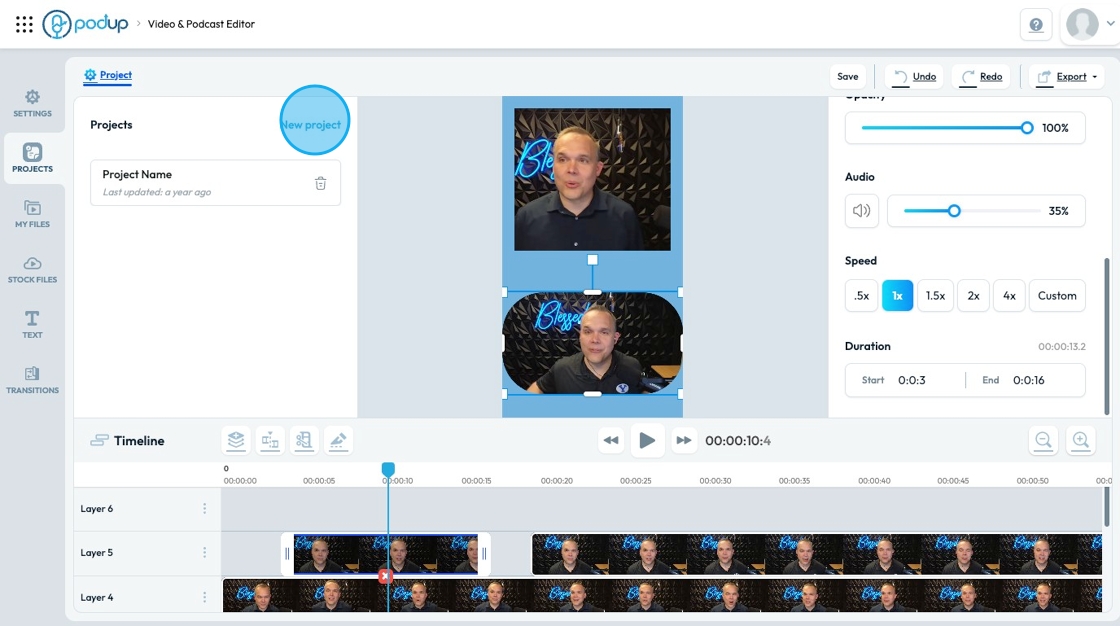
39. "New project" allows you to create a new project
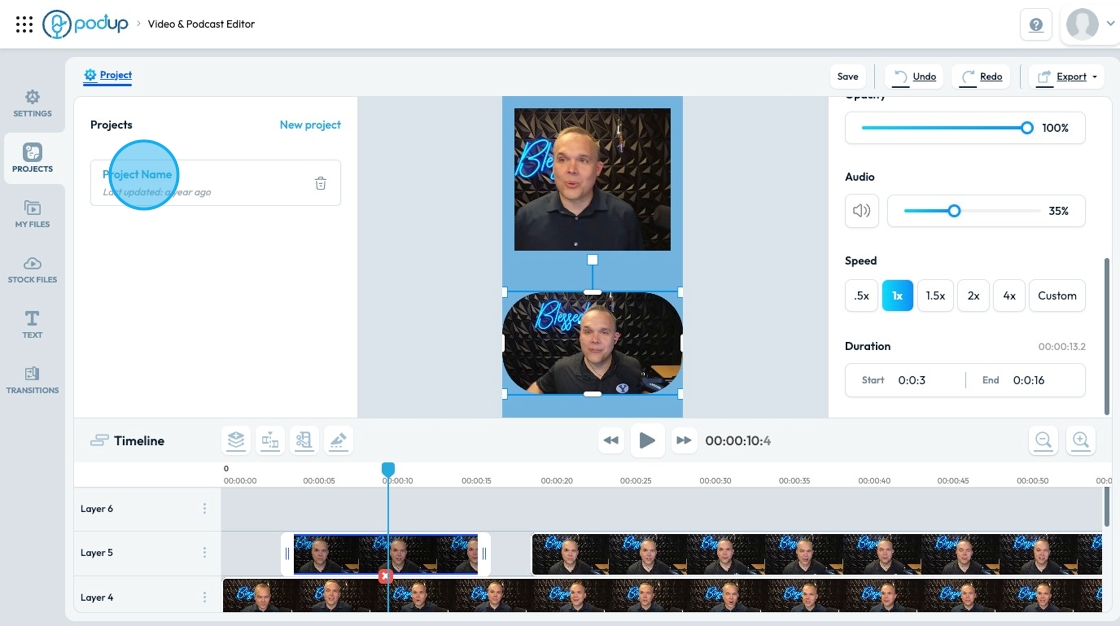
40. Click "Project Name" to access a current project
41. View slides 5-12 for a guide of "My Files"
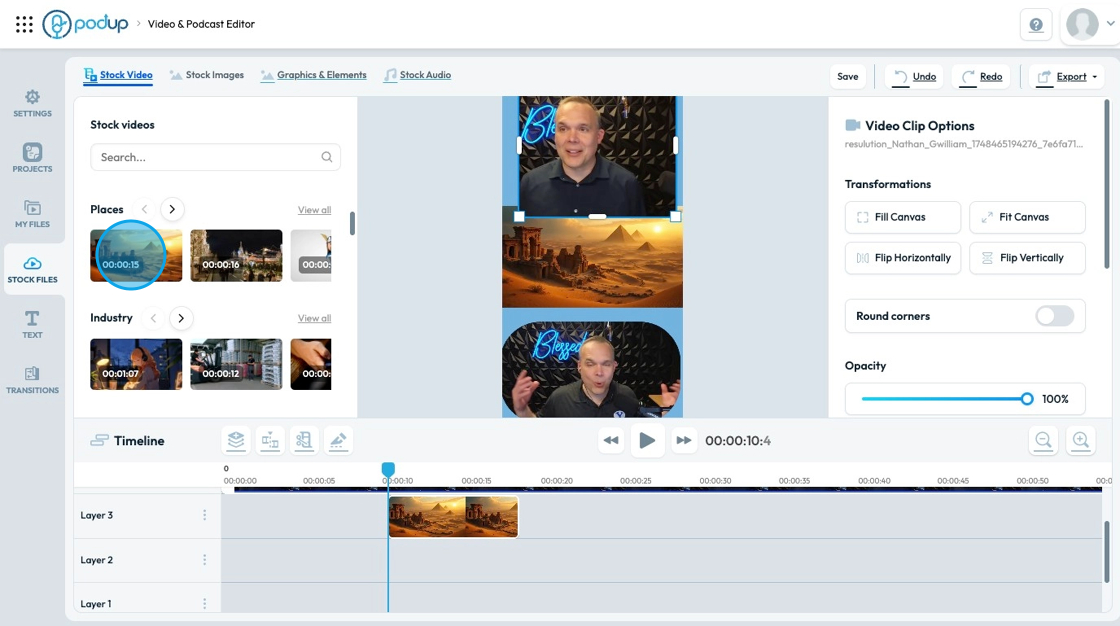
42. Click "Stock Files" to view available stock options

43. "Stock Video" offers many free video footage options that can be used to show what the person is talking about, add visual interest, or cover up cuts
- Drag and drop the video to add it to the timeline
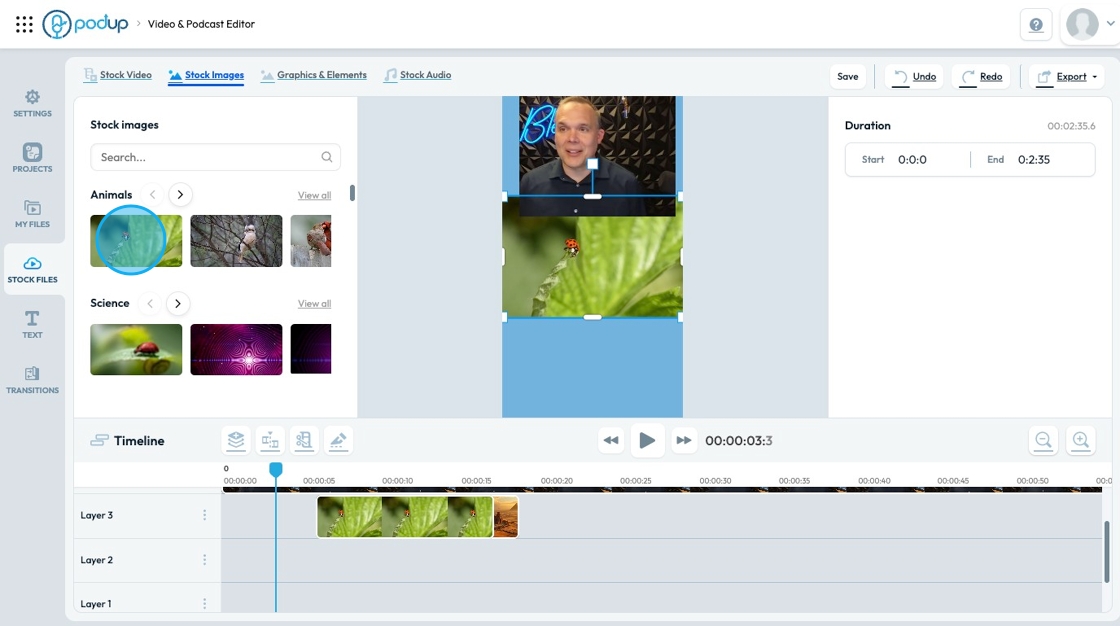
44. "Stock Images" offers many free images that can be used to show what the person is talking about, add visual interest, or cover up cuts
- Drag and drop the image to add it to the timeline
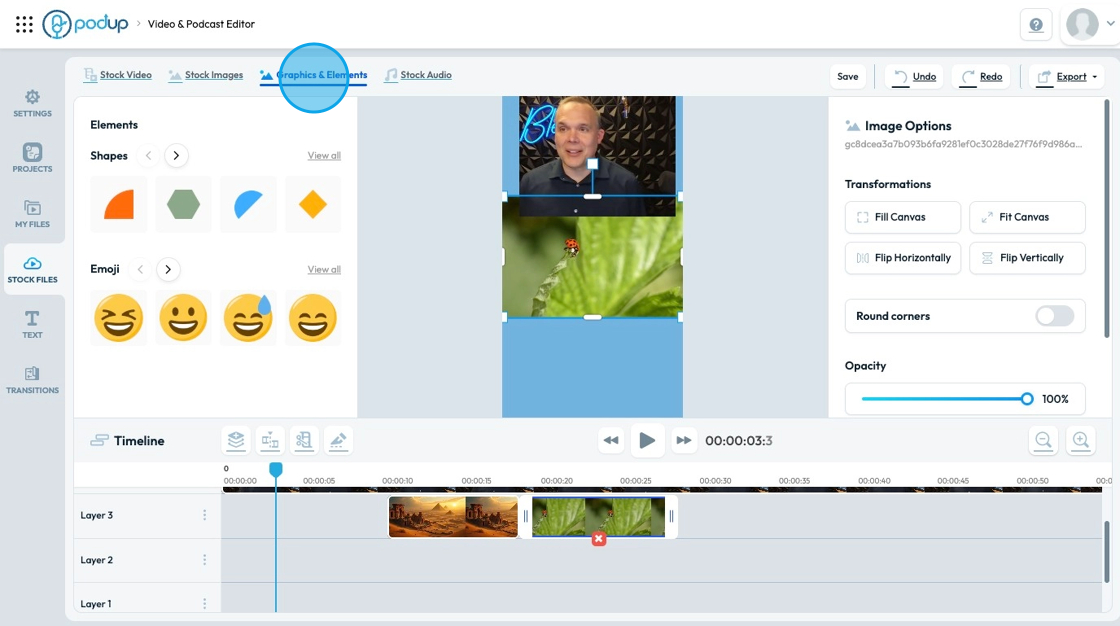
45. Click "Graphics & Elements" to add shapes and emojis to your video file.
- Drag and drop the element to add it to the timeline
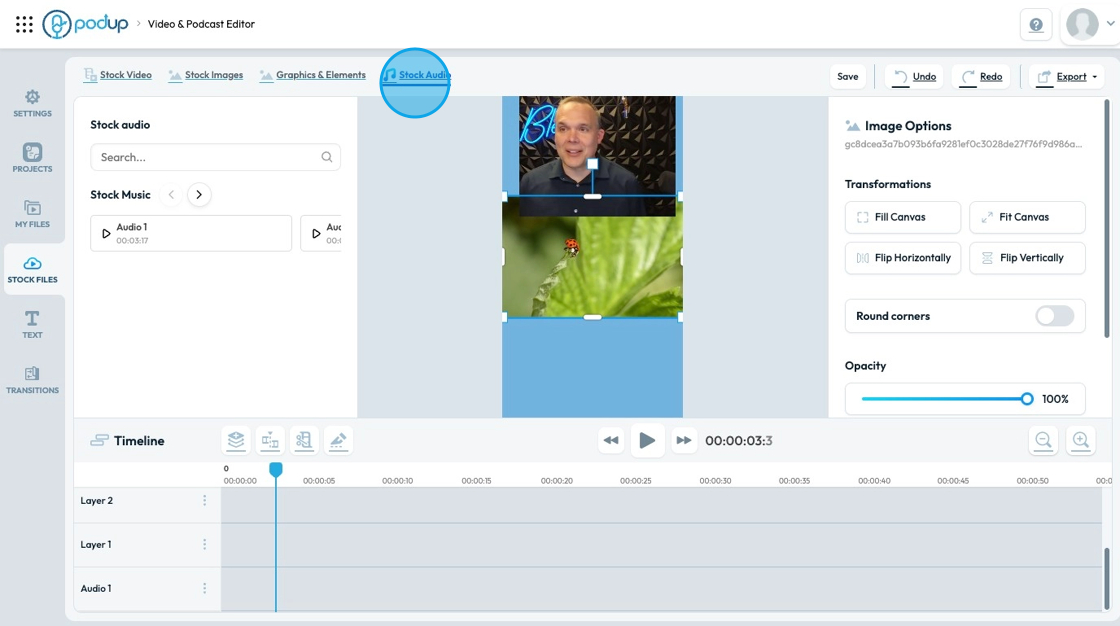
46. Click "Stock Audio" to access free audio that you can add to your video file
- Drag and drop the audio file to the timeline
- Audio files will be at the bottom-most layer
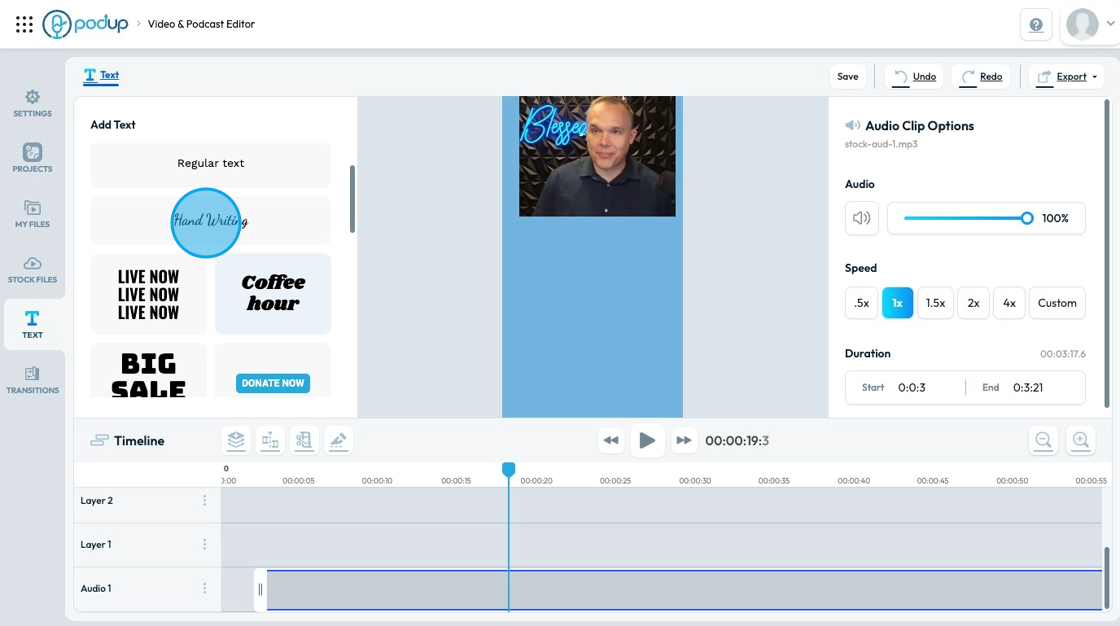
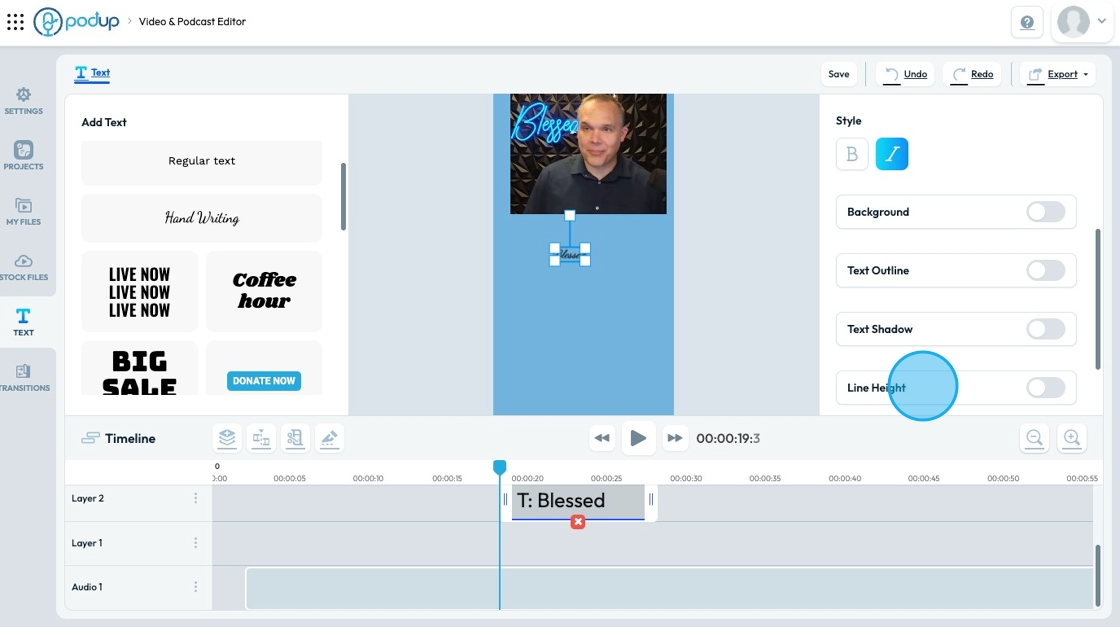
47. Click "Text" to open a variety of text options to add to your video
- These are not captions. This is a block of text that will stay on the screen for the duration of the text box.
48. Select the format and style of your text on the right hand side
49. Use the options on the left-hand side to customize the text, font style, font size, text color, and style
- Text cannot be edited in the time - edit text in the text box on the left hand side
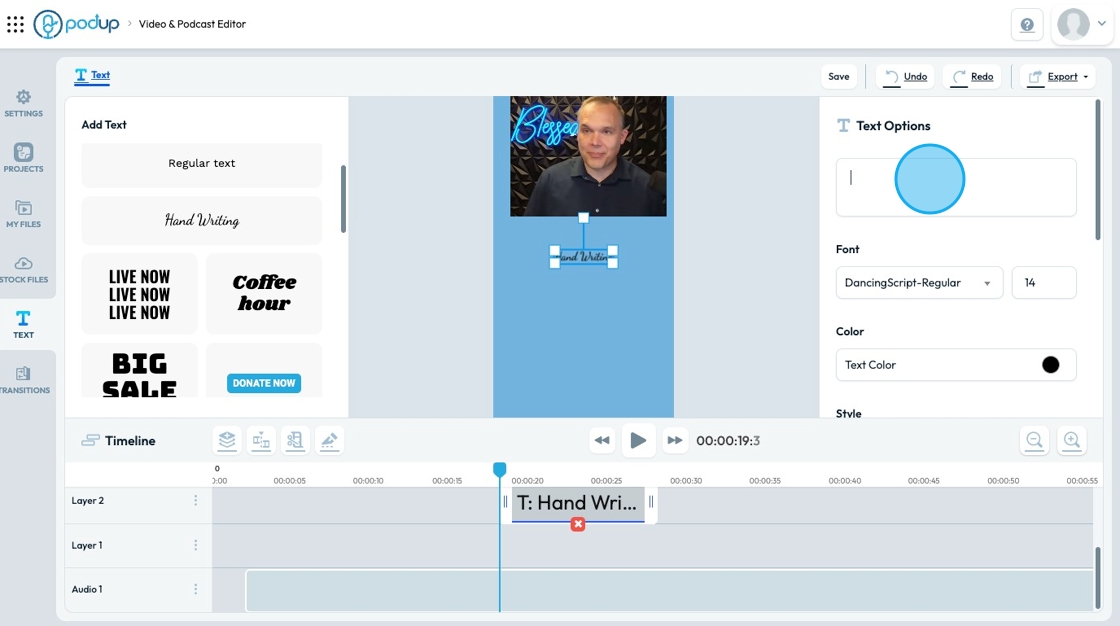
50. On the left-hand column, you can also add background, text outline, text shadow and line height by switching the toggle
51. Click "Transitions" to adjust how videos will transition from one video to another

Related Articles
How To Navigate Transcriber (Detailed)
This guide offers a straightforward approach to creating and customizing captions using the PodUp Transcriber, making it ideal for content creators looking to enhance their videos. It outlines essential steps for uploading videos and creating ...How To Navigate Transcriber (Detailed)
This guide offers a straightforward approach to creating and customizing captions using the PodUp Transcriber, making it ideal for content creators looking to enhance their videos. It outlines essential steps for uploading videos and creating ...How To Navigate Recorder (Detailed)
This guide gives you clear steps to record and manage a podcast studio. It covers setup, adding guests, recording, and editing. With this easy-to-follow resource, you can improve your podcast quality and work more efficiently. Tip: Words to know ...How To Navigate the PodUp Dashboard (Detailed)
This guide is essential for anyone looking to navigate the PodUp dashboard efficiently. It offers a step-by-step approach to accessing vital account information, tracking your podcast reach across platforms, and utilizing helpful tools. Additionally, ...How To Navigate Video Clipper (Detailed)
This guide offers a comprehensive walkthrough for creating engaging video clips using Podup Video Clipper, making it invaluable for content creators. It simplifies the process by detailing steps for uploading videos, selecting captions, and ...