How To Navigate Audio Denoiser (Detailed)
This guide provides a step-by-step approach to using the Audio Denoiser feature on PodUp, ensuring that your audio quality is enhanced efficiently. It simplifies the process, making it accessible even to beginners who may be unfamiliar with audio editing tools. By following these instructions, users can significantly improve their podcast audio, resulting in a more professional and polished final product. This valuable resource is essential for anyone looking to elevate their audio content.
1. Navigate to https://app.podup.com/home
There are 2 different ways to access the Audio Enhancer
- 1: Steps 2-3
- 2: Septs 4-5

2. 1. Click "Edit"

3. Click "Audio Denoiser"

4. Click "AI Tools"

5. Click "Audio Denoiser"

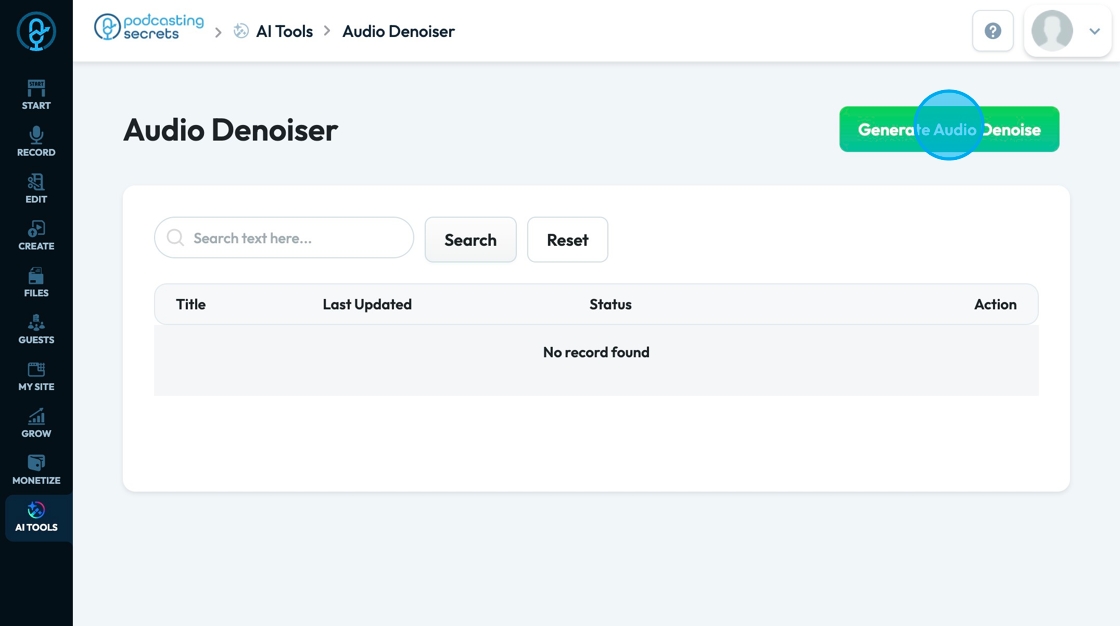
6. Click "Generate Audio Denoise"
7. Click the "Title" field to add a title to the file

8. Click "Choose file" to select which video or audio file you want enhanced

9. A popup will appear and you can choose which video you want to select. A second popup will appear, click "Select" to confirm the episode that you want to enhance

10. Click "Denoise Audio" to start the process

11. This message will appear to show that the process has begun

12. The green checkmark shows you that the audio has been denoised
- It will give you the original file and the enhanced file so you can compare the difference

13. Click the trashcan to delete the denoised audio
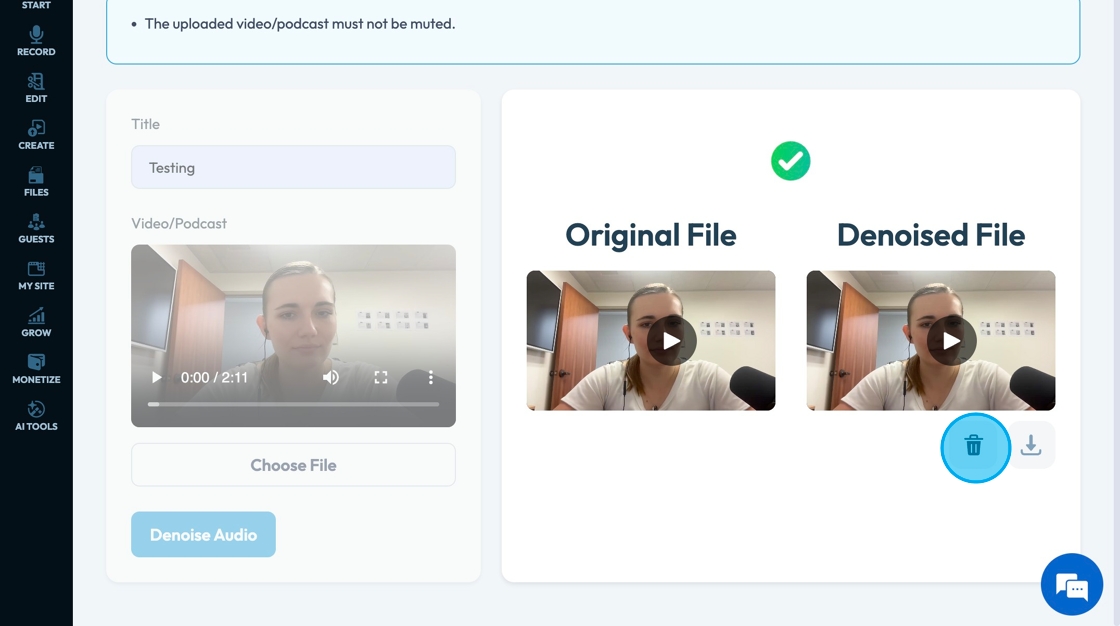
14. Click "Download" to download the denoised audio file to the computer

15. Return to the listing page by selecting the arrow

16. Click "View" to open the denoised audio file

17. As you are viewing the denoised audio file it will give you a comparison of the original file and the enhanced file again

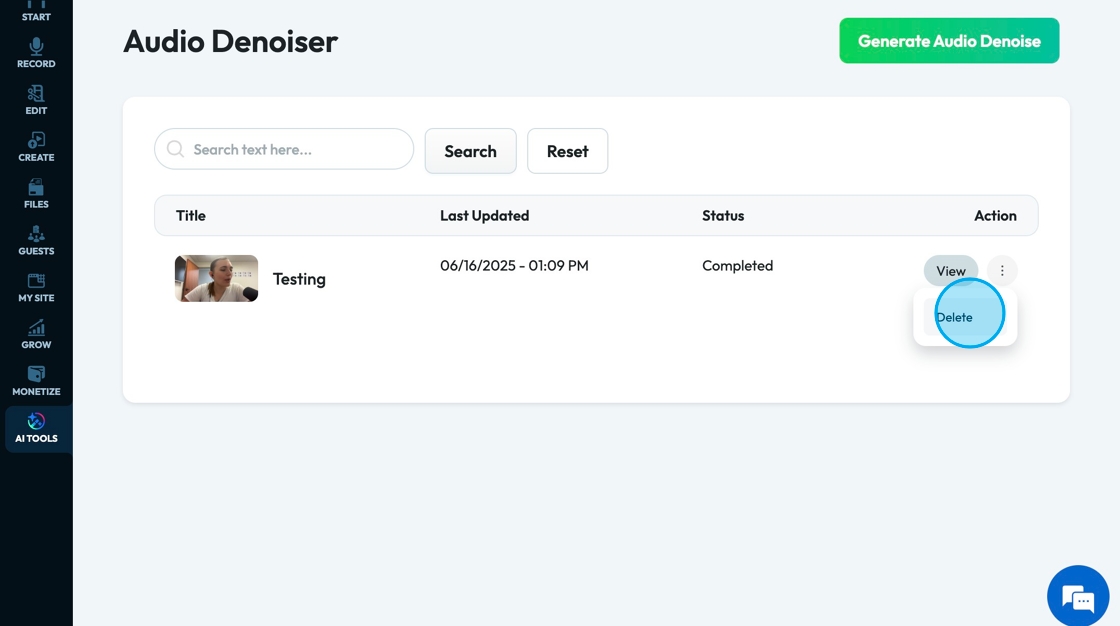
18. Click the 3 dots to open a drop-down menu where you can select "Delete" to permanently delete your file
19. Click the "Search text here" field to search for a particular title or time

20. Click "Search" to run the search
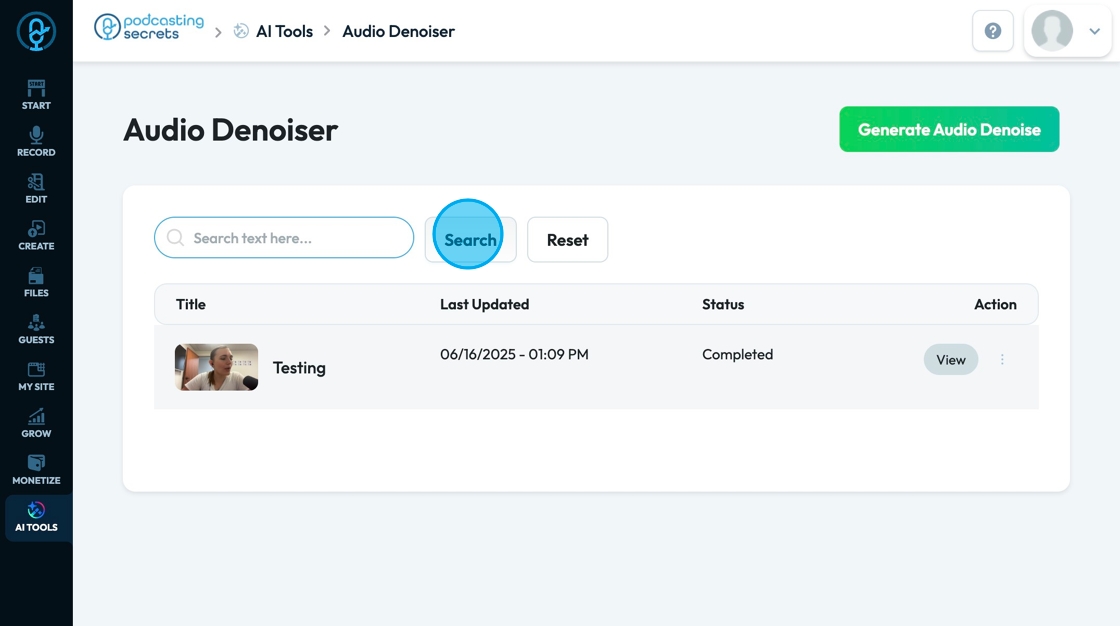
21. Click "Reset" to reset the displayed options

Related Articles
How To Navigate Audio Denoiser (Detailed)
This guide provides a step-by-step approach to using the Audio Denoiser feature on PodUp, ensuring that your audio quality is enhanced efficiently. It simplifies the process, making it accessible even to beginners who may be unfamiliar with audio ...How To Navigate Audio Enhancer (Detailed)
This guide offers a straightforward approach to enhancing audio using PodUp, making it an essential resource for anyone looking to improve their audio quality effectively. It provides step-by-step instructions that simplify the process, ensuring ...How To Navigate Audio Enhancer (Detailed)
This guide offers a straightforward approach to enhancing audio using PodUp, making it an essential resource for anyone looking to improve their audio quality effectively. It provides step-by-step instructions that simplify the process, ensuring ...How To Navigate Editor (Detailed)
This guide is essential for anyone looking to effectively edit audio and video using Podup's Editor. It provides a comprehensive overview of the platform's features, from navigating the interface to utilizing various editing tools and elements. With ...How To Navigate Recorder (Detailed)
This guide gives you clear steps to record and manage a podcast studio. It covers setup, adding guests, recording, and editing. With this easy-to-follow resource, you can improve your podcast quality and work more efficiently. Tip: Words to know ...