How Do I Create a Blog Post
This guide shows you how to create a blog step by step. It covers SEO, categories, and social sharing to help you reach more people and grow your online presence.
1. Click "Create"

2. Click "Blogs"

3. Click "Create Post" to write your own blog or insert a prewritten blog

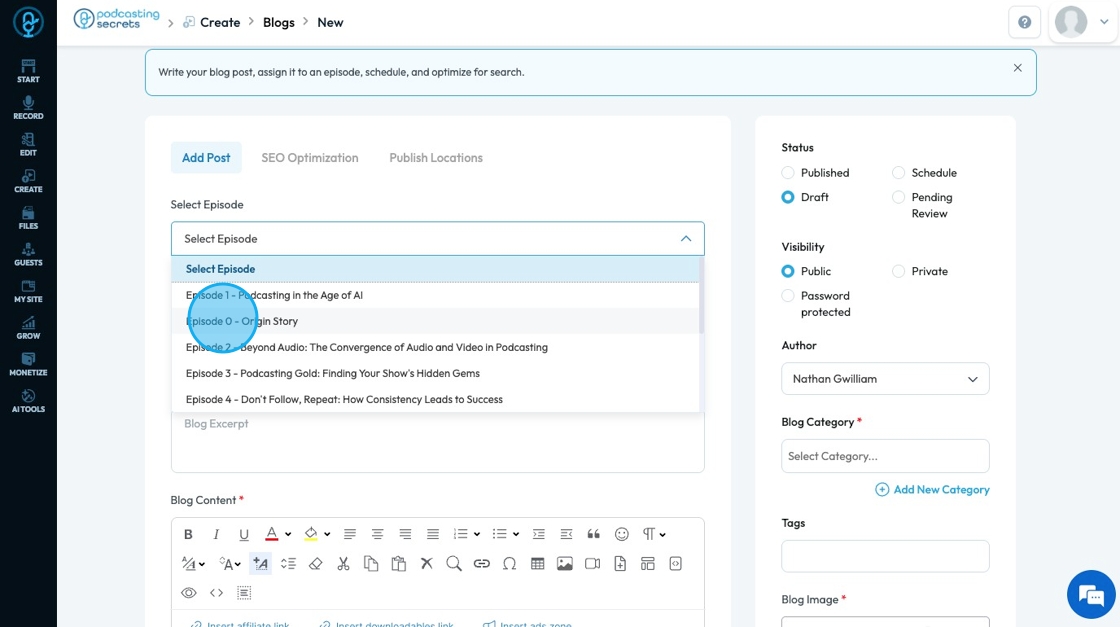
4. "Select Episode" will give you a dropdown menu where you can select the episode associated with the blog
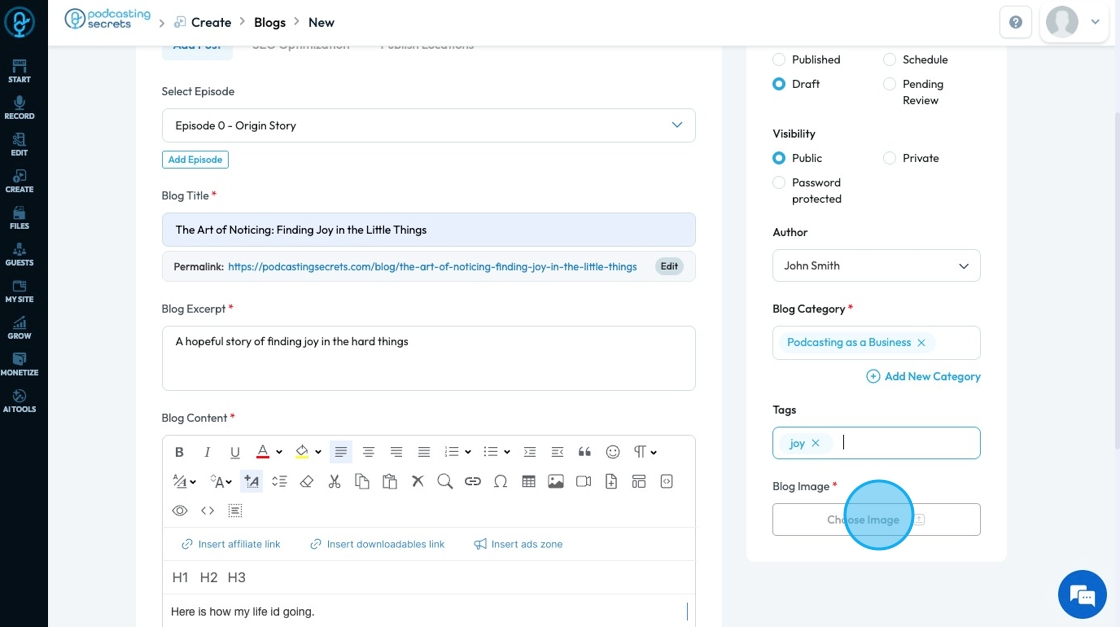
5. Click the "Blog Title" field to add a creative title

6. Click the "Blog Excerpt" field to add a description of your blog

7. Click "Blog Content" to write your blog

8. Select an option under "Status" to state the current stage of publication

9. Click an option under "Visibility" to change who can see the blog post

10. Click "Author" to see a dropdown list of authors

11. Click the "Select Category" to put the blog in a category on your website

12. Click "Tags" to add a tag to your blog post
- A keyword or phrase used to classify and organize a blog post based on it specific topics

13. Click "Choose Image" to add an image to your blog
14. Click "SEO Optimization" to adjust what people see when they search for your show
- SEO: Search Engine Optimization - the process of making your website or content easier to find on Google and other search engines

15. Click the "Title" to add or edit the title of the show
- Select "AI Auto Generate" if you want to have AI create a title for your blog
- It will give you a list of titles and descriptions that you can choose from

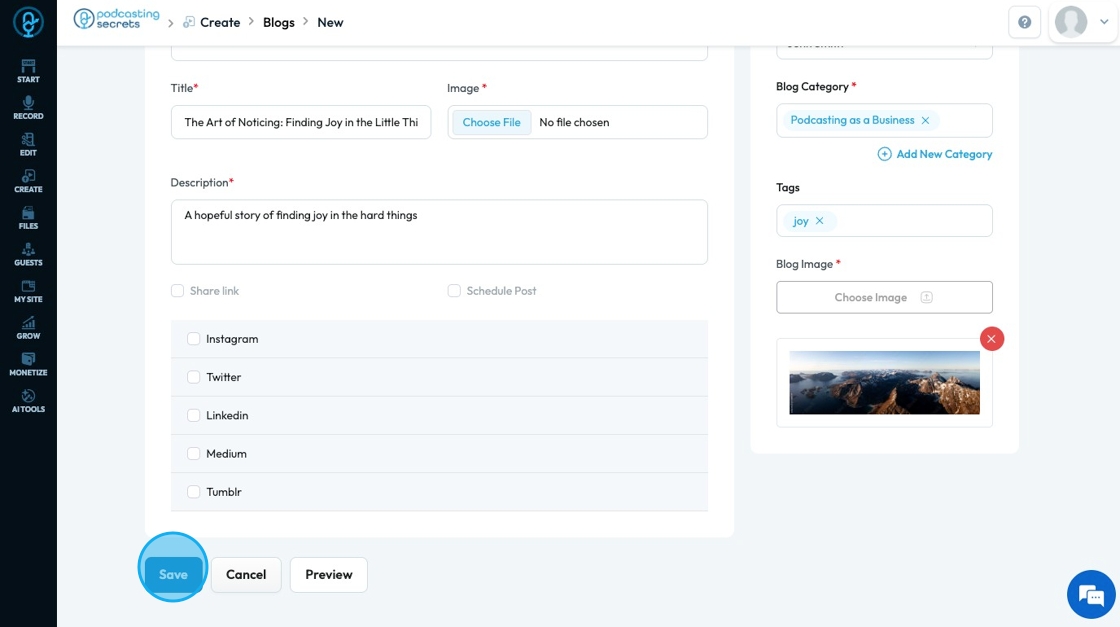
16. Click "Publish Locations" to see a list of integrated social media platforms. You can select which platform you want to publish to and a menu will open for you to edit what will be published to that platform

17. - Fill in the needed information for each of the selected social media platforms
- Each social media platform has different requirements but all will give an option for
- "Description" to add a caption for the post
- "Share Link" to easily share the link
- "Schedule Post" to schedule a detailed time to publish the post

18. Click "Save" to save all the changes that have been made
19. The blog will appear as the first result on your list of blogs. From here, you can change the status or edit the blog if you need to

Related Articles
How to Categorize My Blog Post
This guide provides a straightforward process for categorizing your blog posts, ensuring that your content is organized, easily discoverable, and more user friendly. Tip: Categories make it easier on the readers and the editors to find the blog! 1. ...How to Delete a Blog post
This guide offers a clear, step-by-step process for deleting a blog on PodUp, ensuring users can easily manage their content and quickly remove unwanted posts. 1. Navigate to https://app.podup.com/home 2. Click "Create" 3. Select "Blogs" 4. The ...How to Add a Tag to my Blog Post
This guide makes it easy to create a blog post to enhance the content with relevant tags in PodUp to easily navigate your platform and optimize the blog for greater visibility. 1. Navigate to https://app.podup.com/home 2. Click "Create" 3. Select ...How to Change the Category of my Blog Post
This guide provides a straightforward process for changing the category of your blog post on PodUp, ensuring accurate categorization for better visibility and engagement. By following this guide, you can easily update your blog's organization, making ...How to Publish a Blog
Easily publish your blog with clear steps and tips for a smooth experience 1. Navigate to https://app.podup.com/home 2. Click "Create" 3. Select "Blogs" 4. Click "Create Post" 5. The "Create Post" page will open. Enter the required details for your ...