Confusing workflow
This guide gives you clear steps to record and manage a podcast studio. It covers setup, adding guests, recording, and editing. With this easy-to-follow resource, you can improve your podcast quality and work more efficiently.

Tip: Words to know
Studio: The online recording studio that allows people to record podcasts together in different places
Track: A row in a video editing timeline.
1. Navigate to https://app.podup.com/home
There are 2 ways to navigate to "Recorder"
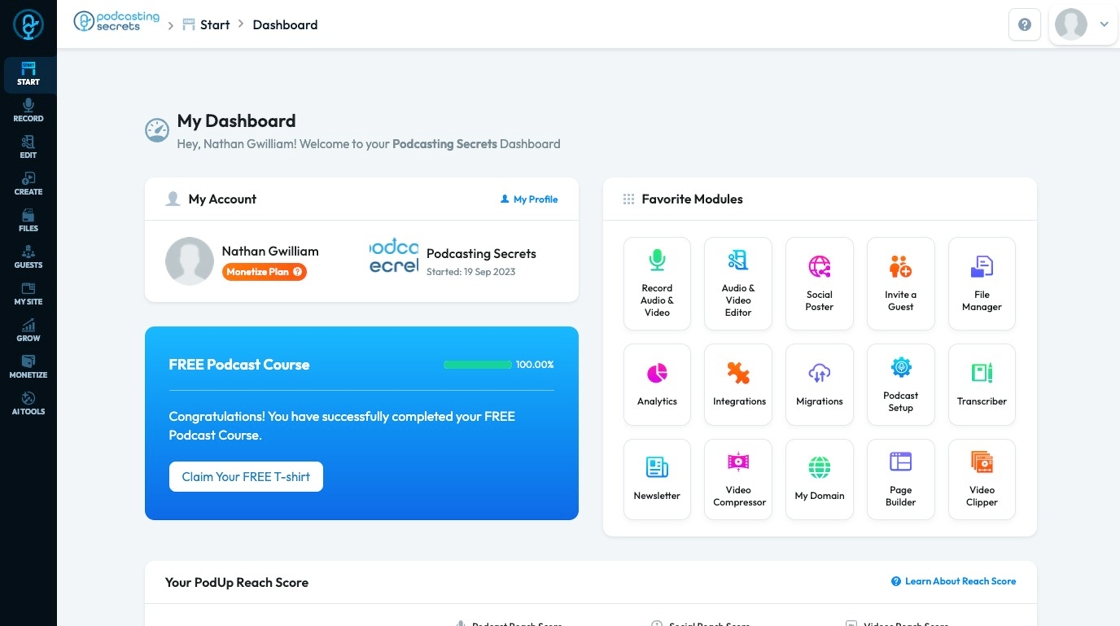
2. 1. Click "Record Audio & Video" in "Favorite Modules" on the Dashboard
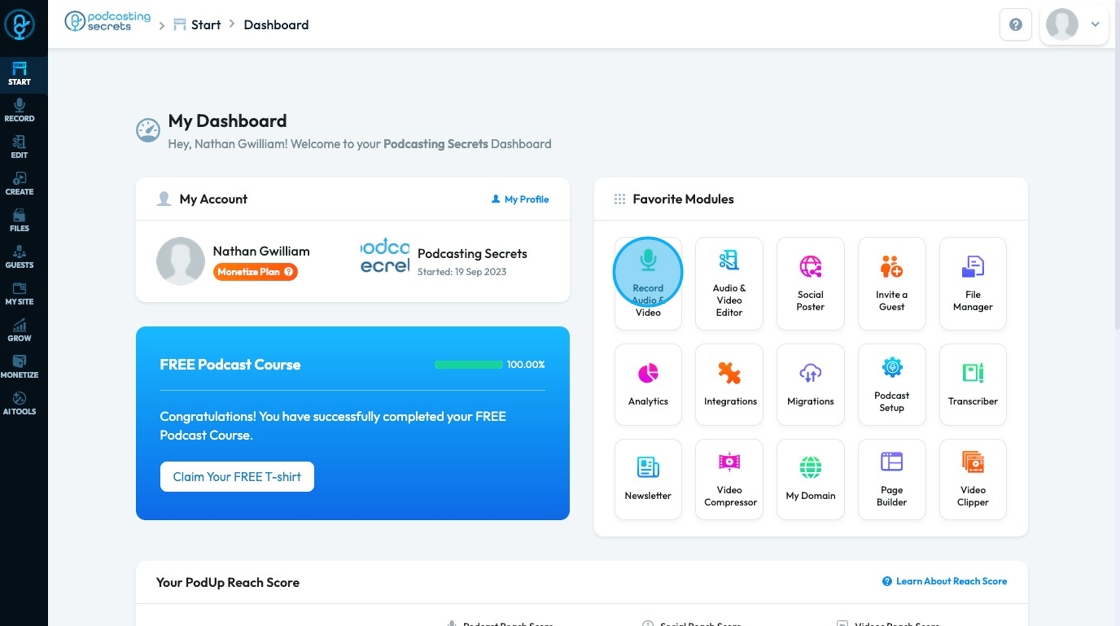
3. 2. Click "Record"
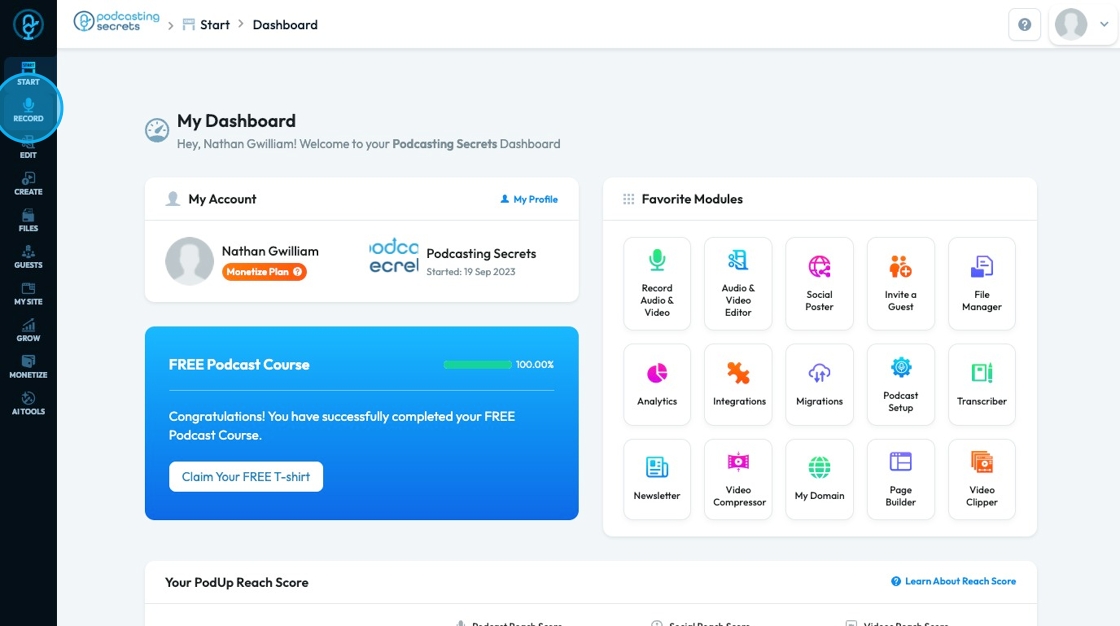
4. Click "Recorder"
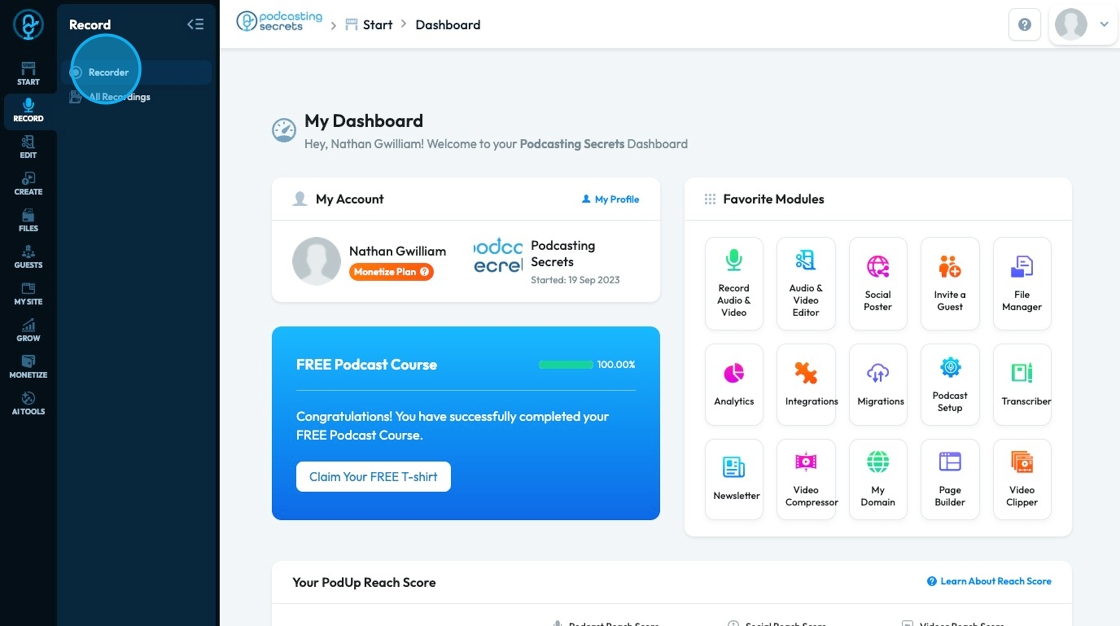
5. "Recorder" will open with a List of Studios. You can search for a specific studio through the "Search Studio" field.
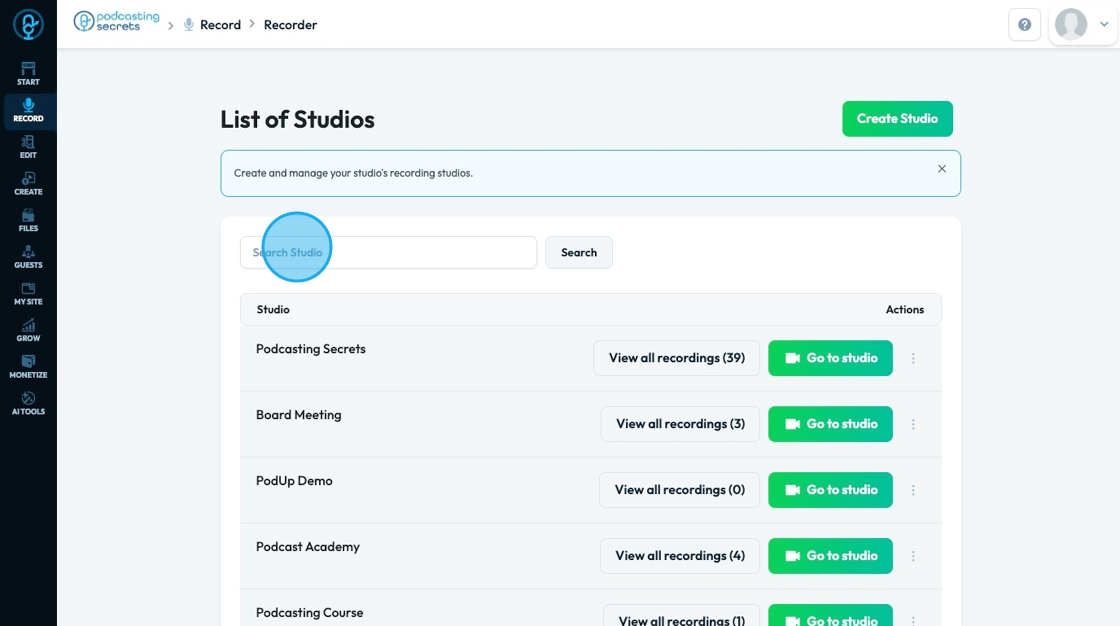
6. Click "Go to studio" to enter the studio or "View all recordings" to view the recordings from that specific studio
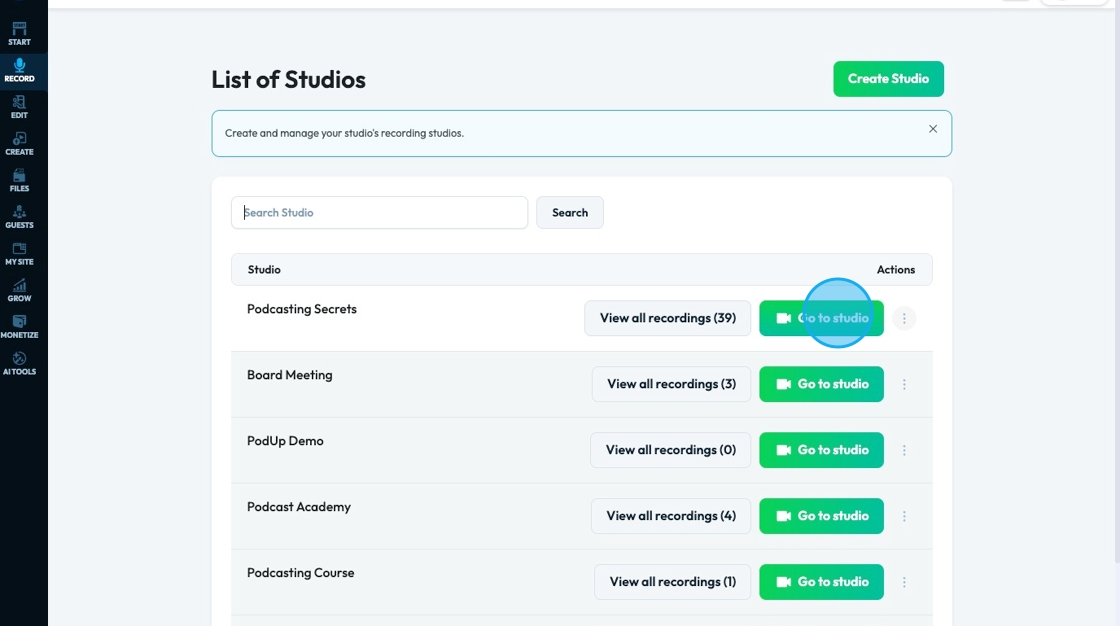
7. The 3 dots under actions will allow you to view all recordings, invite people to the studio, and open settings for that specific studio
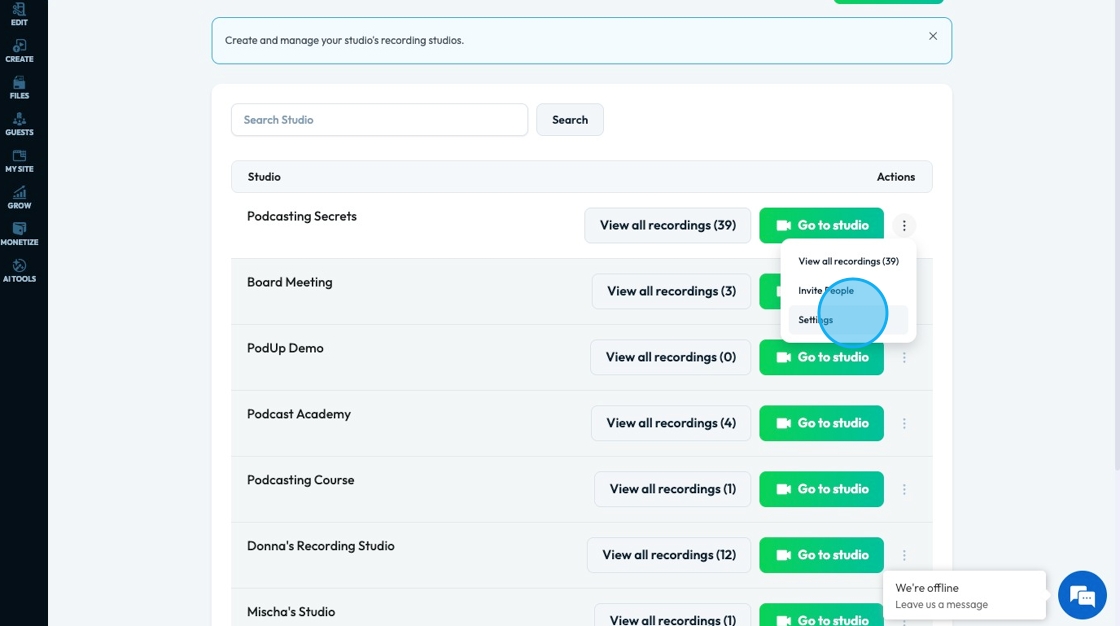
8. "Studio Settings" allows you to change the studio name, adjust the recording type, suppress background noise, and have a waiting room. Click "Save" to keep the changes that you made
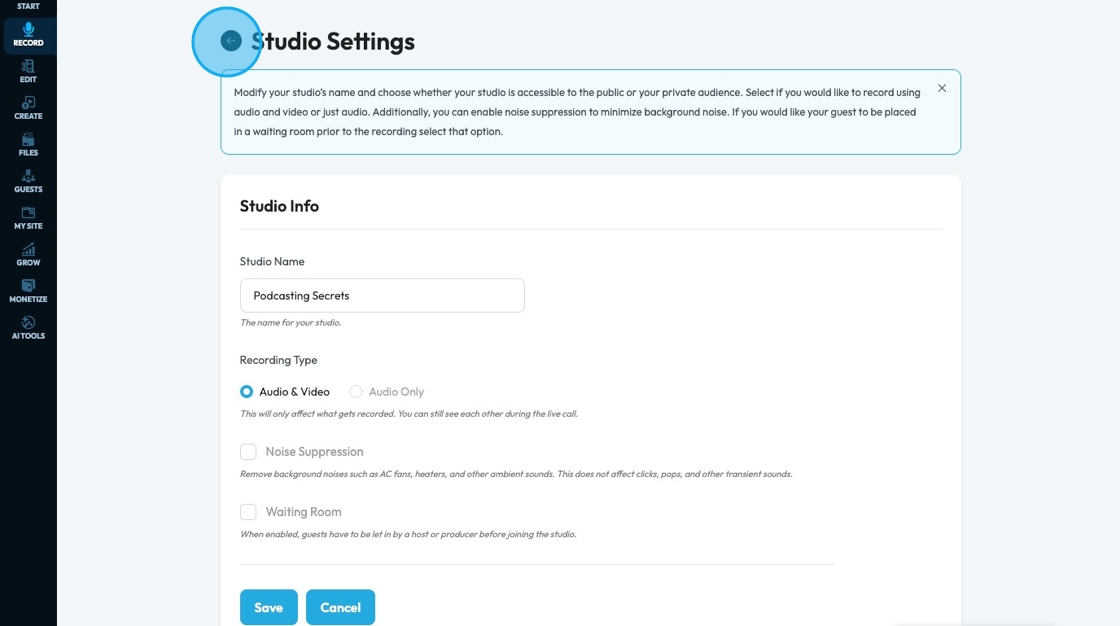
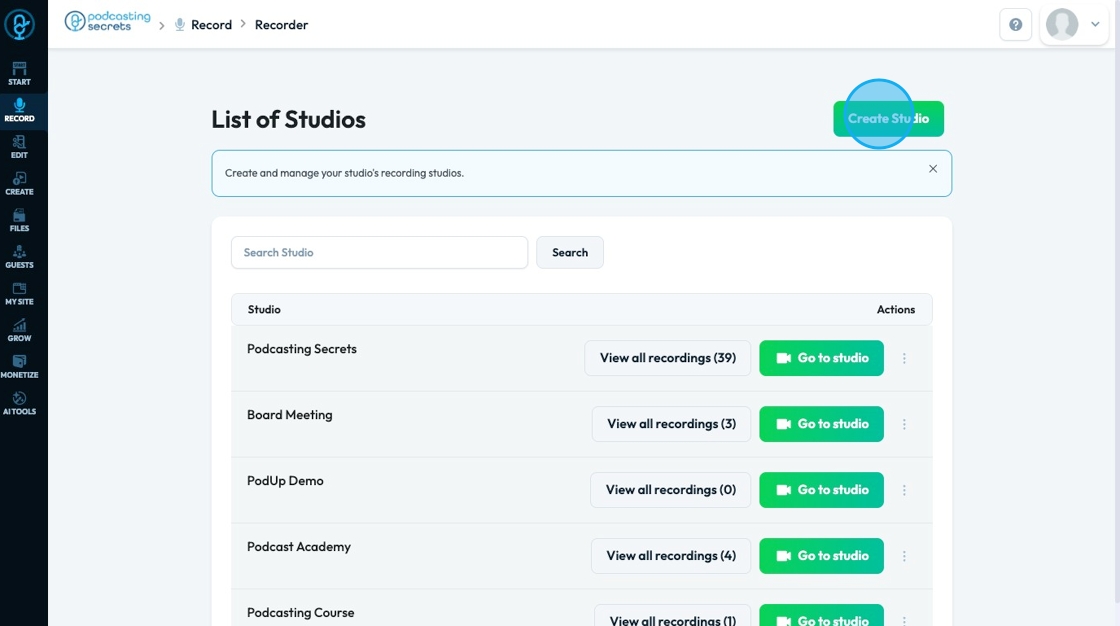
9. To open a new studio, click "Create Studio"
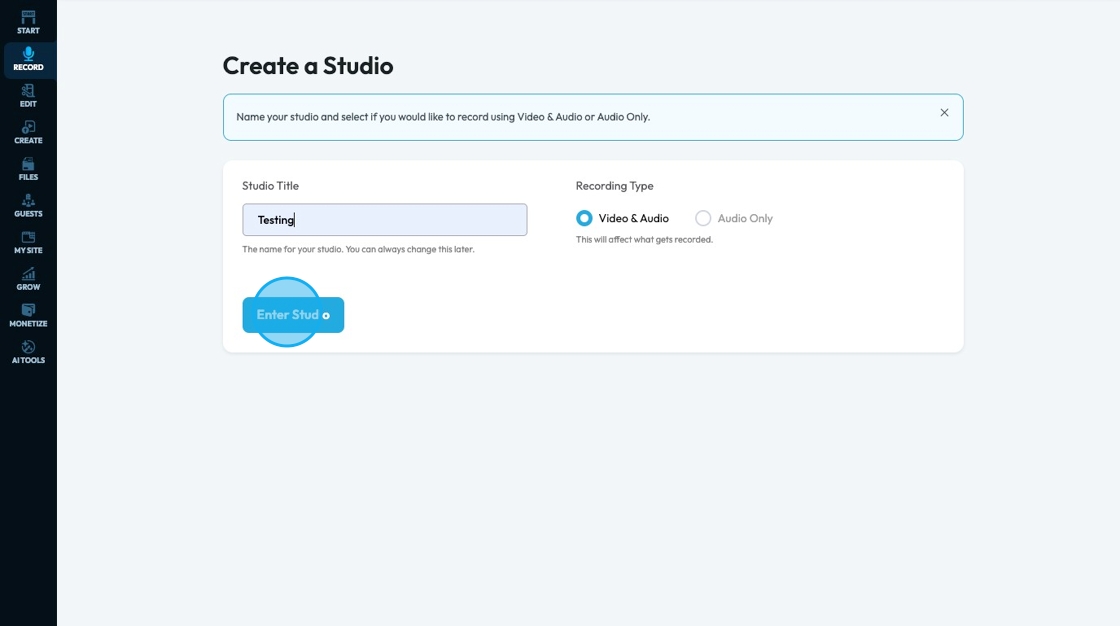
10. To create a studio, add a studio title and select a recording type
You can select "Video & Audio" or "Audio Only". If you select audio only, your studio will not record any video
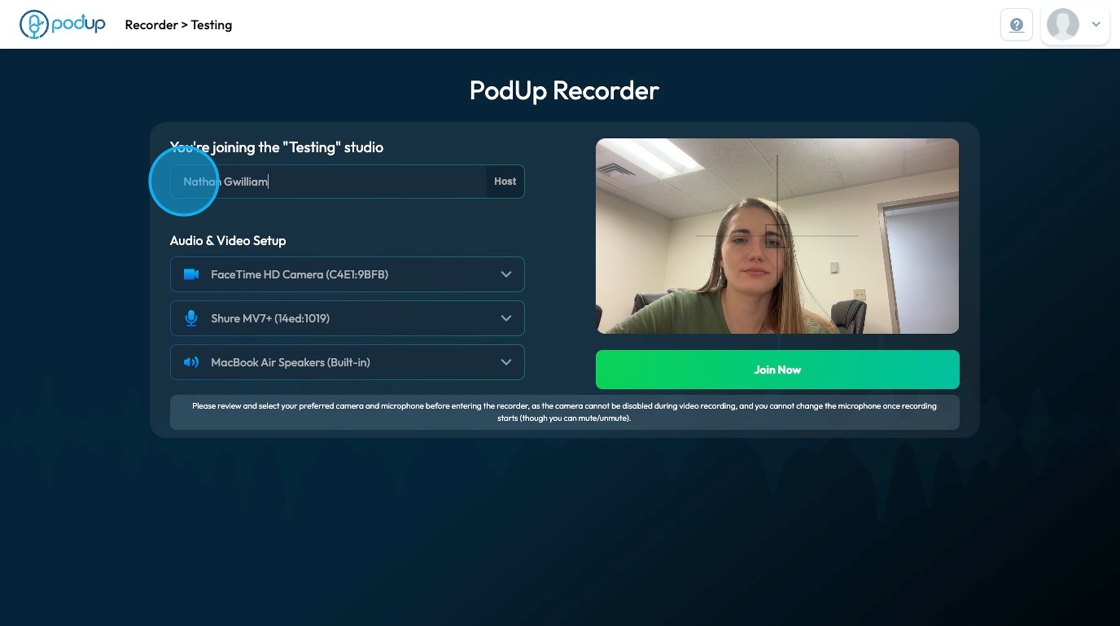
11. Once you enter the studio, you need to add your name and select the camera, microphone, and speaker that you want to use. Click "Join Now" to enter the Recorder
12. Easily start and stop the recording by clicking "Start recording"
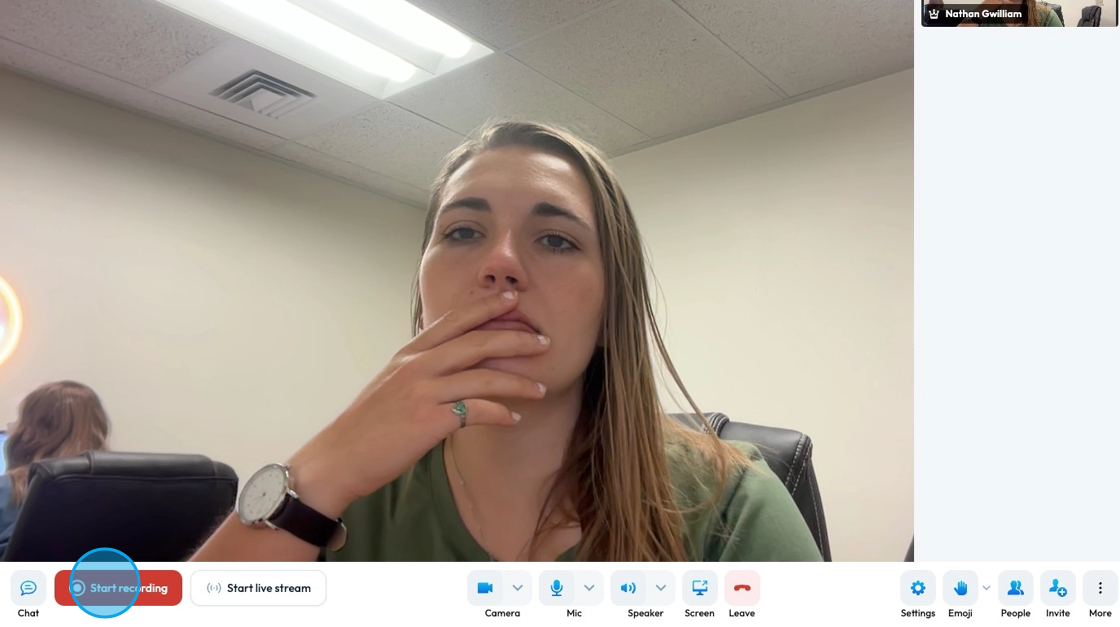
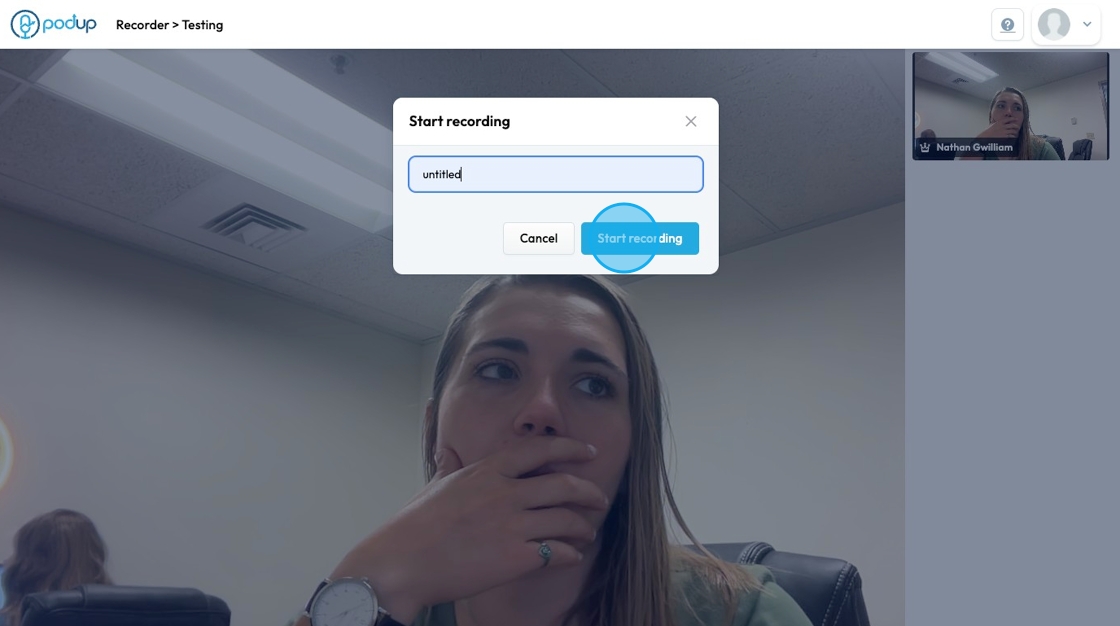
13. Label your recording and start recording by clicking "Start recording"
- You will have 10 seconds from when you click "Start Recording" to when the recording will officially start
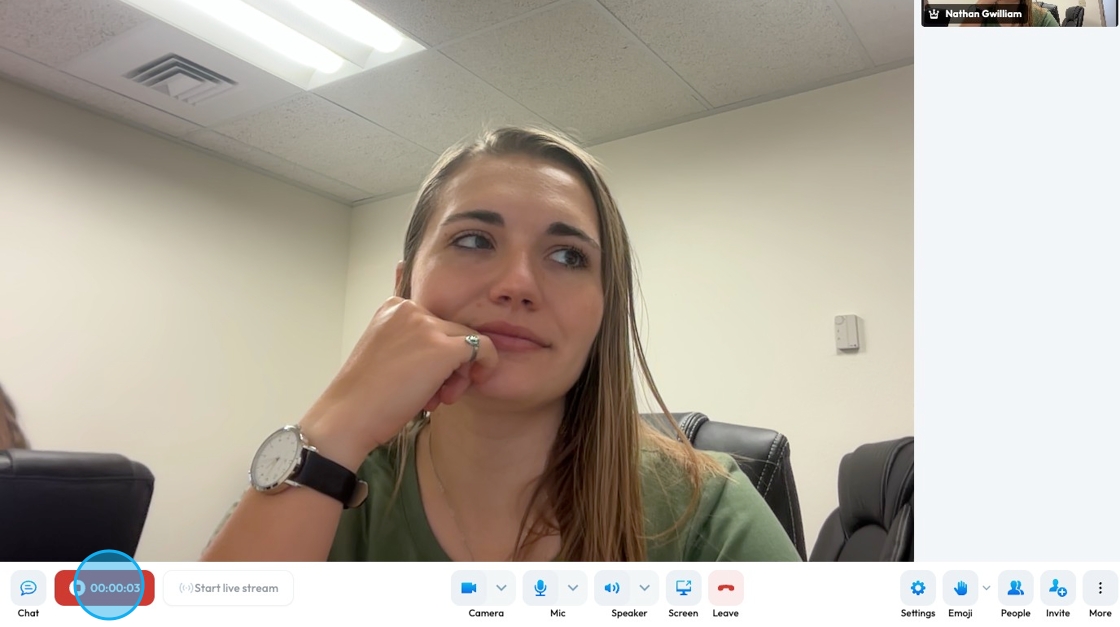
14. Stop the recording by clicking the red timer in the bottom left corner
- Stopping the recording will not end the call. *See step 33 to leave the show
- You can stop and start as many times as you need. A separate recording will be saved every time you start and stop
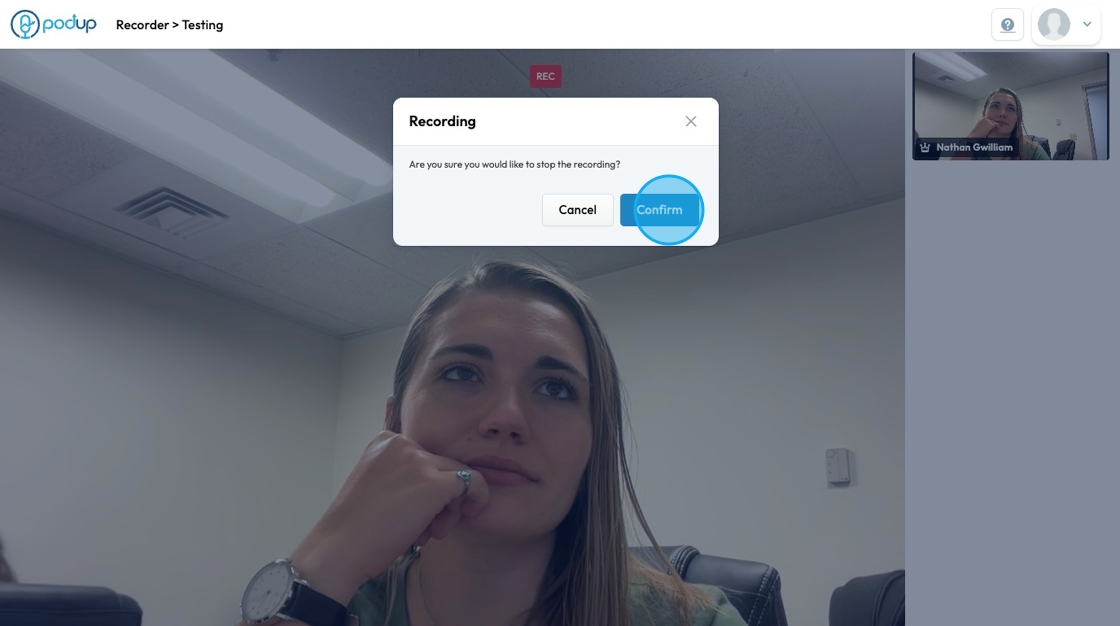
15. Click "Confirm" to save the recording
- You and your guest must stay in the studio until the recording uploads otherwise you risk losing your recording
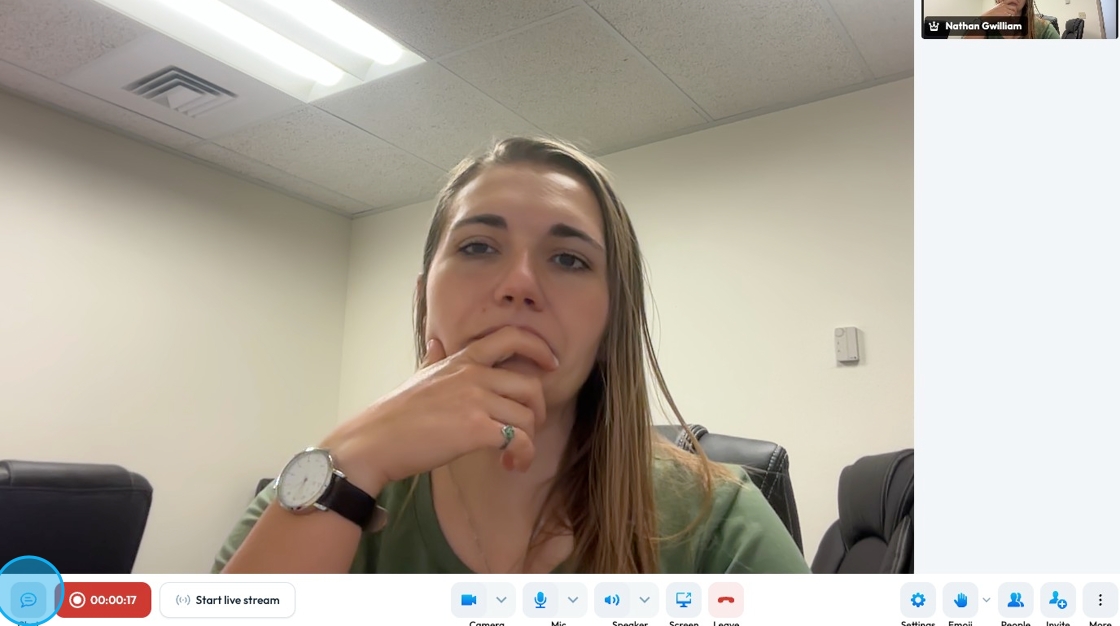
16. Click the chat icon in the bottom left-hand corner to chat with your guest.
- Note: This chat will not appear on your recording
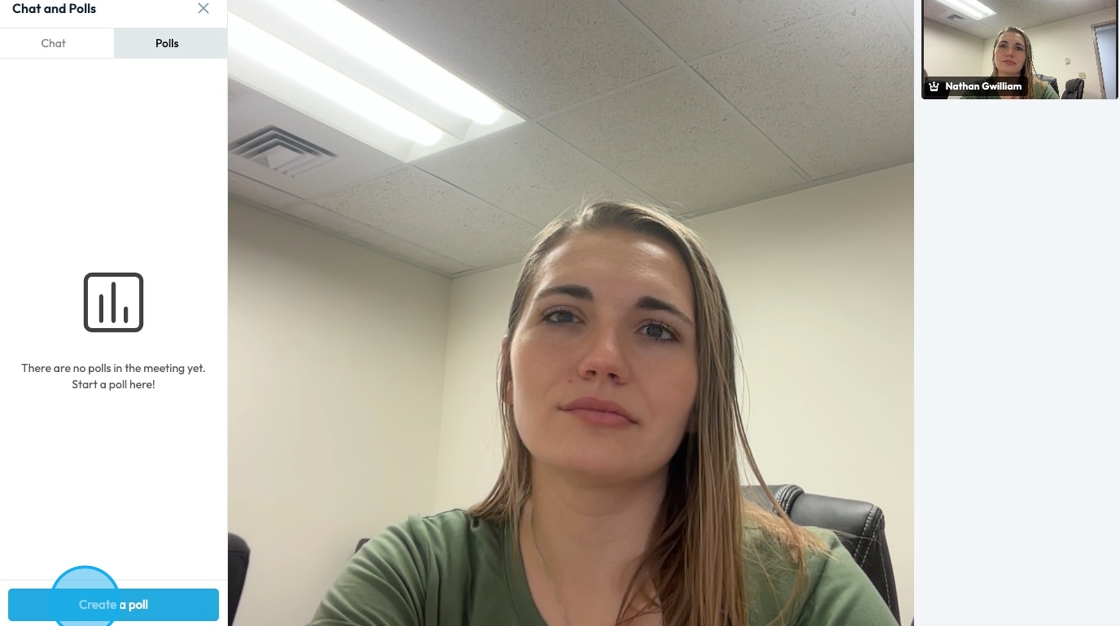
17. In the chat you can also create a poll for your guest by clicking "Polls"
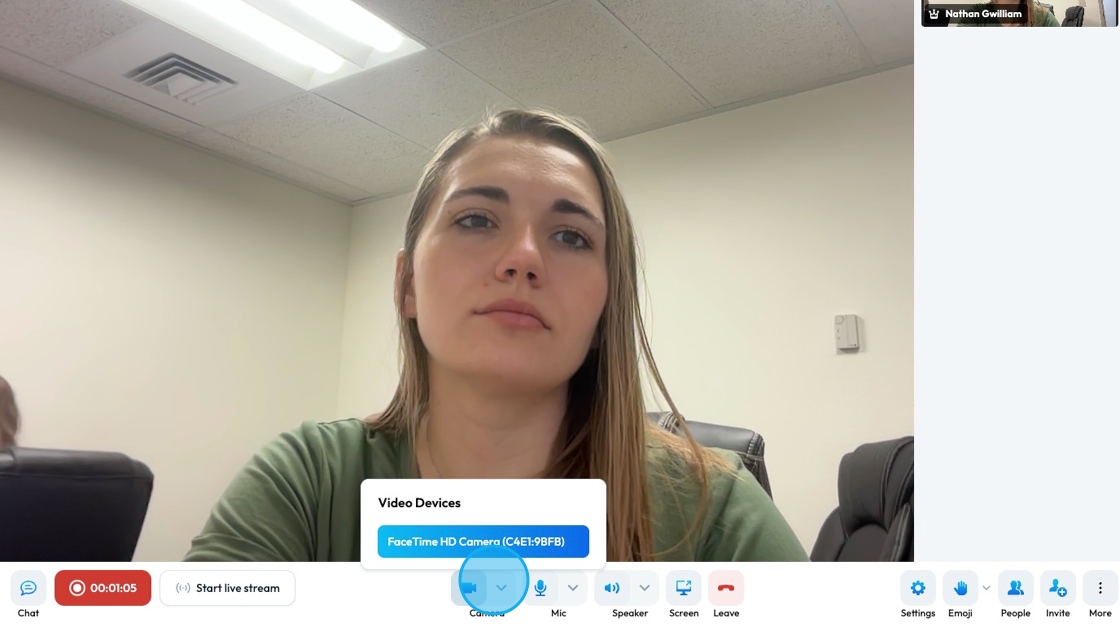
18. The camera icon at the bottom will allow you to change the input for your video recording
- Camera cannot be changed during the recording
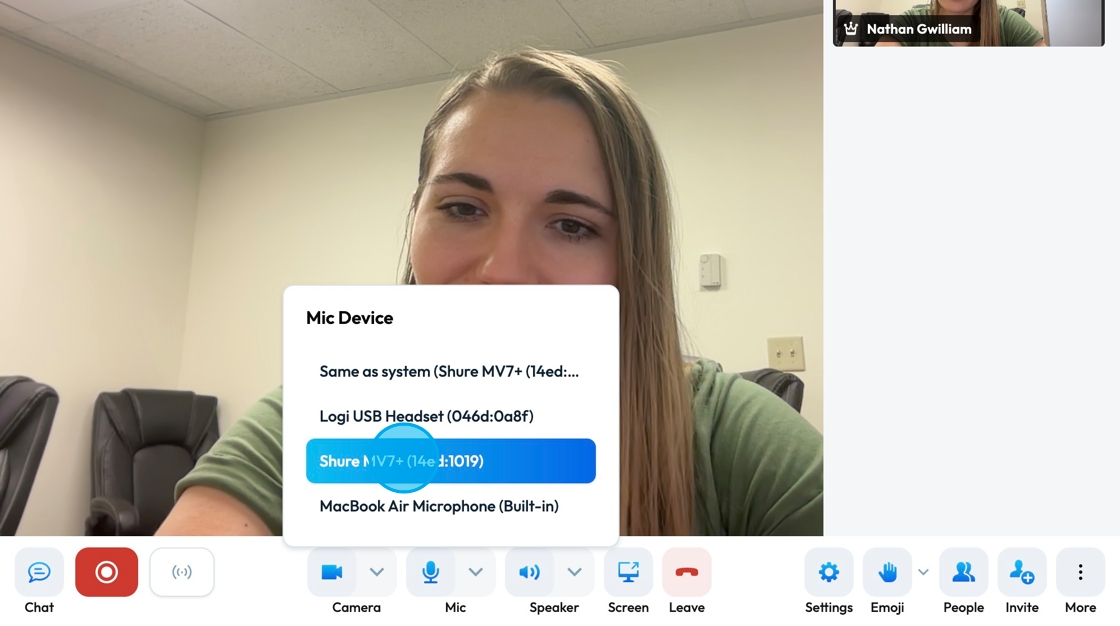
19. The mic icon at the bottom will allow you to change the input for your microphone
- Microphone cannot be changed during the recording
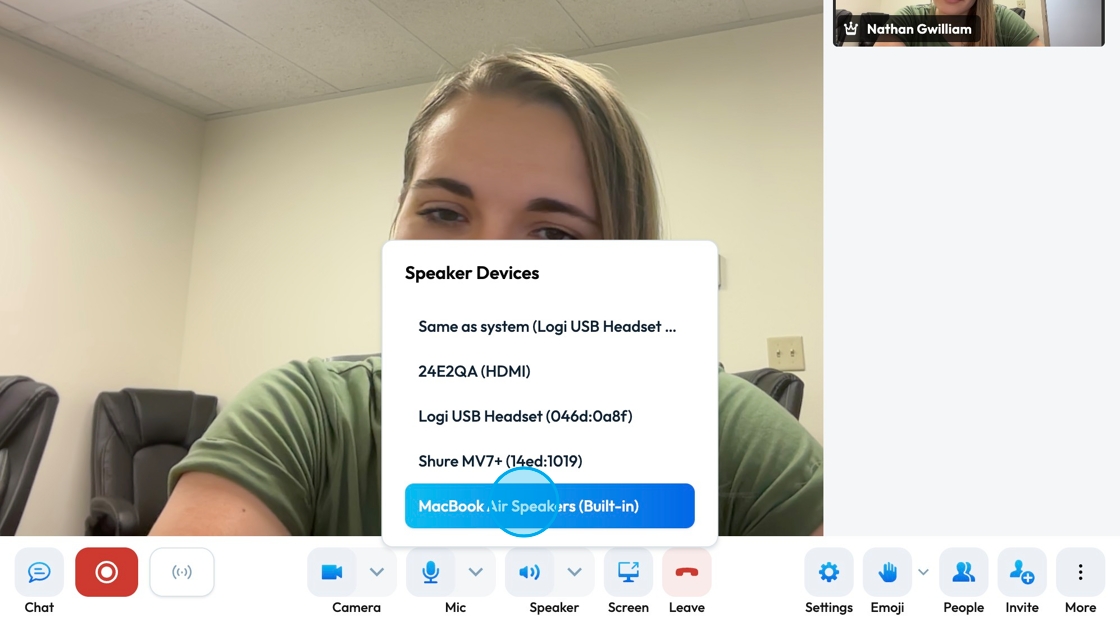
20. The speaker at the bottom will allow you to change your speaker - the output for the audio
- Speaker cannot be changed during the recording
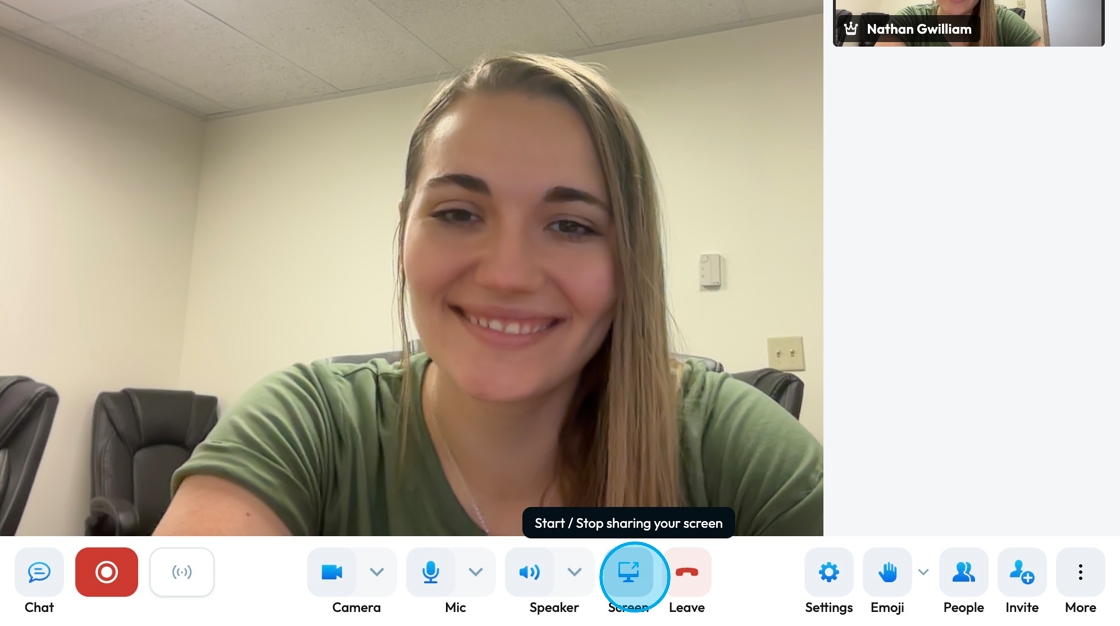
21. Share your screen by selecting the "Screen" icon at the bottom. A pop-up will appear to allow you to select the window you want to share
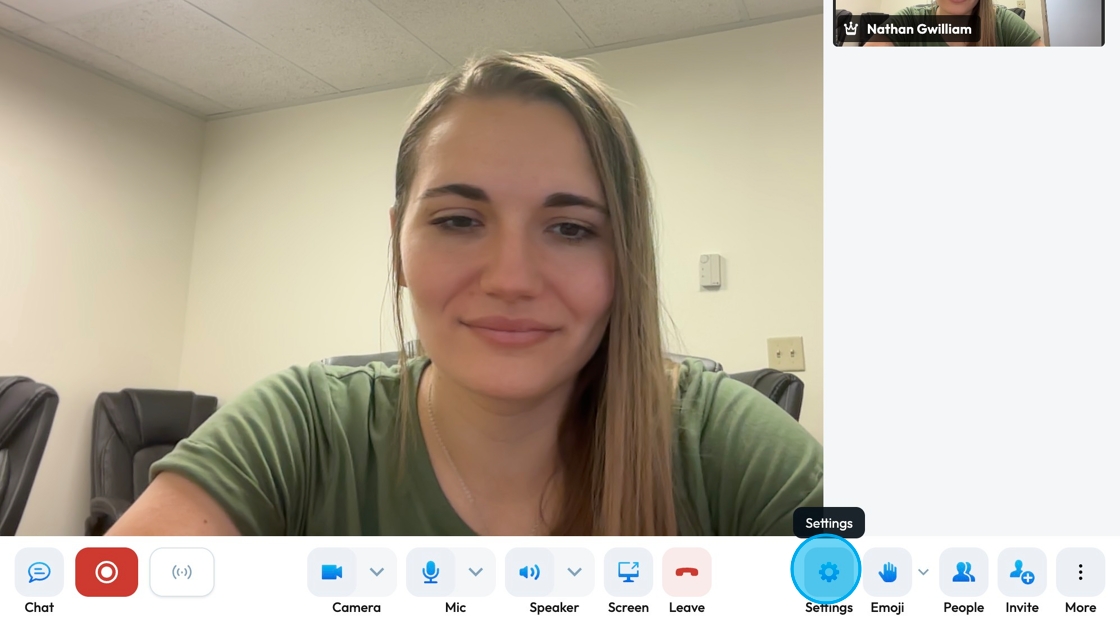
22. Click "Settings" to open the settings. Settings contains
- Devices
- Profile
- Moderator
- Sounds
- More
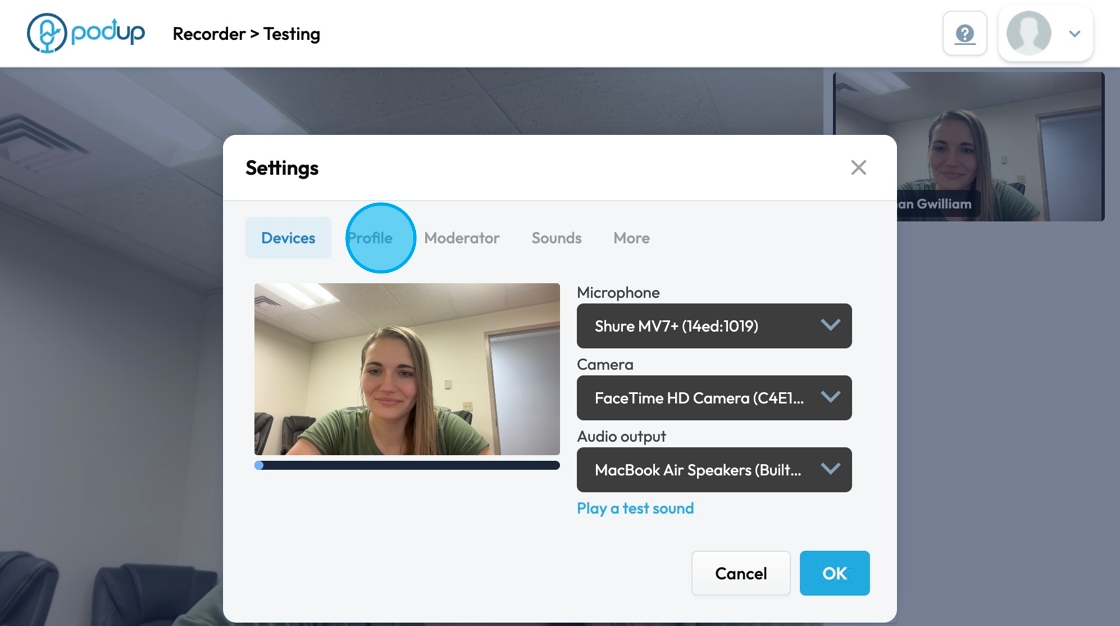
23. "Devices" shows you your current microphone, camera, audio output, and a thumbnail of what your image looks like. The drop-down bar for each category can be selected to change the setting. Select "OK" to save changes.
- The black bar under your image shows the audio being picked up by your microphone
- The audio output can be tested by selecting the blue "Play a sound test". If you cannot hear the sounds, adjust your audio output
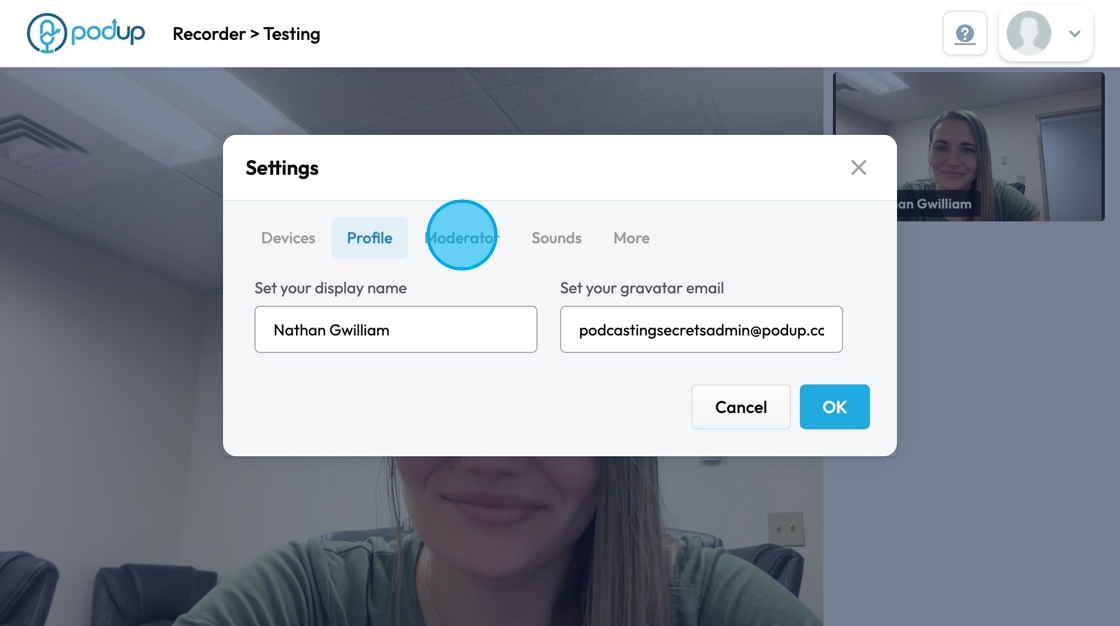
24. "Profile" shows your display name and your gravatar email. You can change both by selecting the desired field and typing in your preferred name and email. Select "OK" to save changes
- Gravatar: "Globally Recognized Avatar" - a service that shows your profile picture automatically on websites when you use your email address
25. "Moderator" allows you to adjust the settings of the studio. Click "Ok" to save changes
- Everyone starts muted
- Everyone starts hidden
- Everyone follows me: When the host scrolls or plays an audio, the screen follows their movement
- Mute reaction sounds for everyone: The emojis make noises so this will mute the sounds of the emoji or reaction for everyone
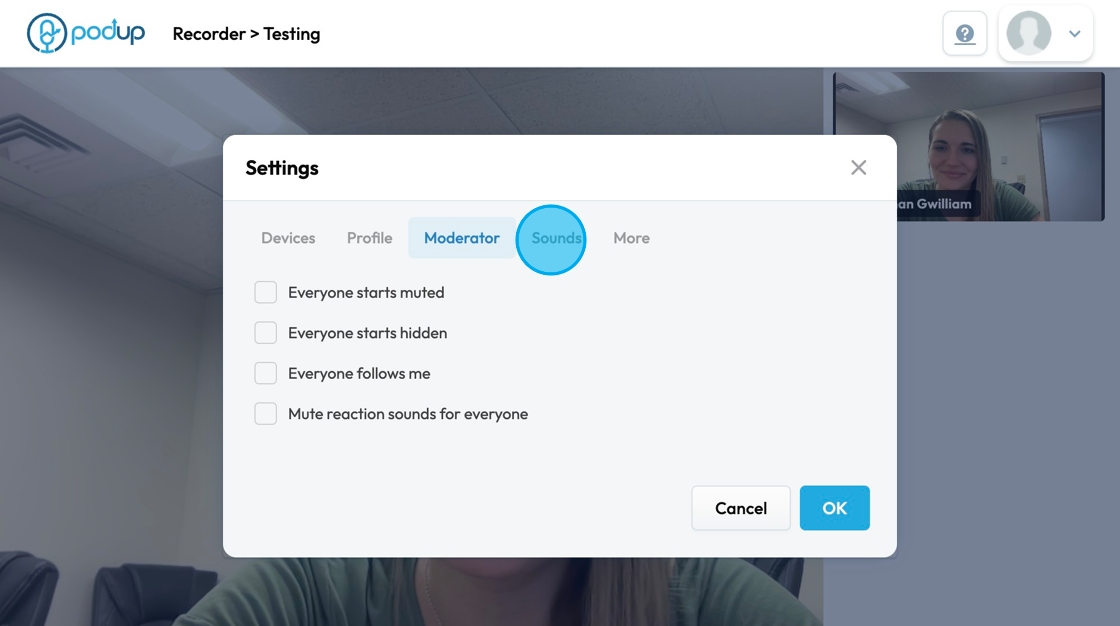
26. "Sounds" will let you adjust when you want sounds to play. Select "OK" to save changes
- Meeting reactions
- Incoming message
- Participant Joined
- Participant Left
- Talk while muted
- Participant entered lobby
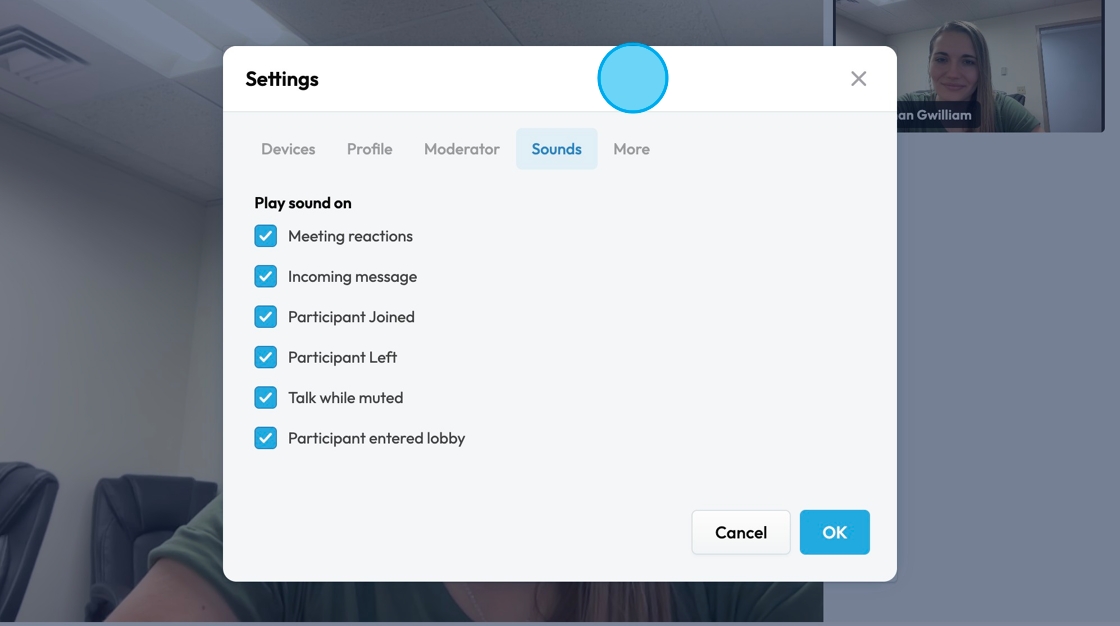
27. "More" allows you to adjust the pre-meeting screen, display notifications, keyboard shortcuts, self view, language of the recorder, and desktop sharing frame rate. Select "OK" to save changes
- The recorder can be translated into more than 50 languages
- Desktop sharing frame rate can be 5, 15, or 30 frames-per-second
- [[What is optimal desktop sharing frame rate?]]
[[It’s how many times per second your screen updates when you share it during a video call or presentation.]]
[[What do 5, 15, and 30 mean?]]
[[5 fps: Low frame rate, screen updates slowly. Good for static content like slides or documents. Saves bandwidth but can look choppy.]]
[[15 fps: Medium frame rate, smoother than 5. Good balance for most uses—text, browsing, and some movement.]]
[[30 fps: High frame rate, very smooth and clear, best for fast motion like videos or gaming but uses more bandwidth.]]
[[Optimal choice: Usually 15 fps is enough for desktop sharing—smooth enough without heavy bandwidth use.]]
- [[What is optimal desktop sharing frame rate?]]
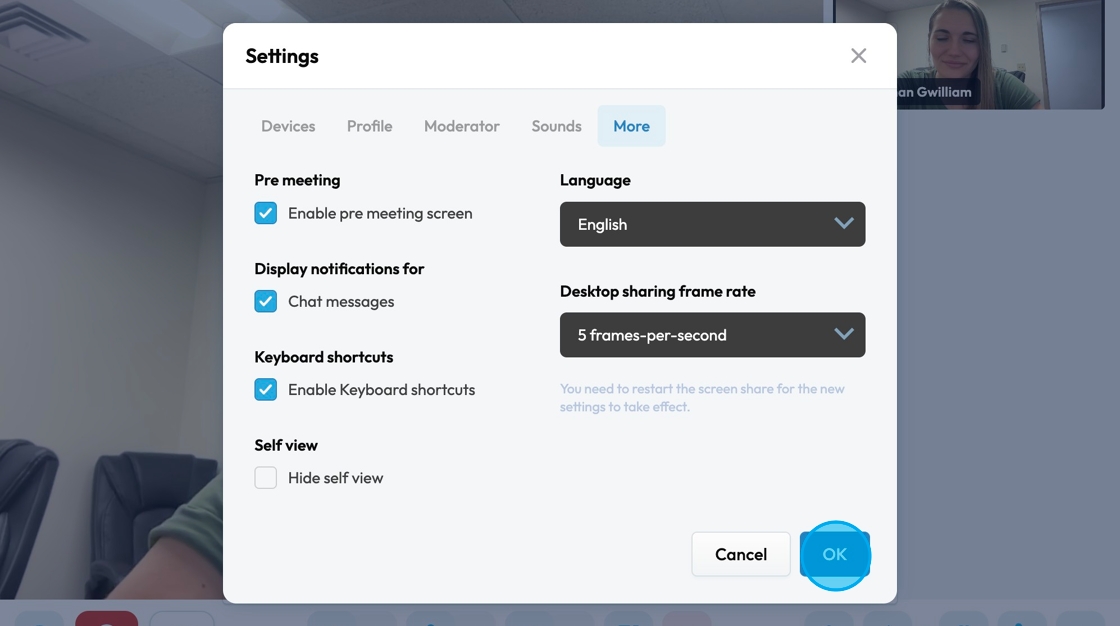
28. Click "Emoji" to send a hand raise or reaction to your guest in the studio
- These will not show up on your final recording
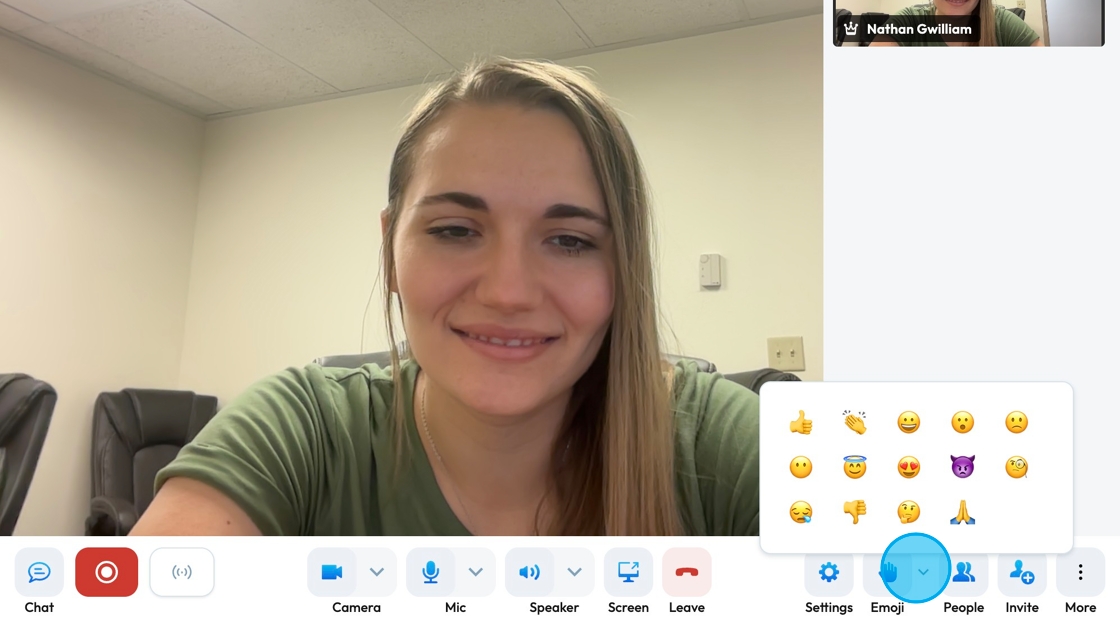
29. "People" will show the current meeting participants and allow you to invite someone to the show
- You can use the search bar to find a participant
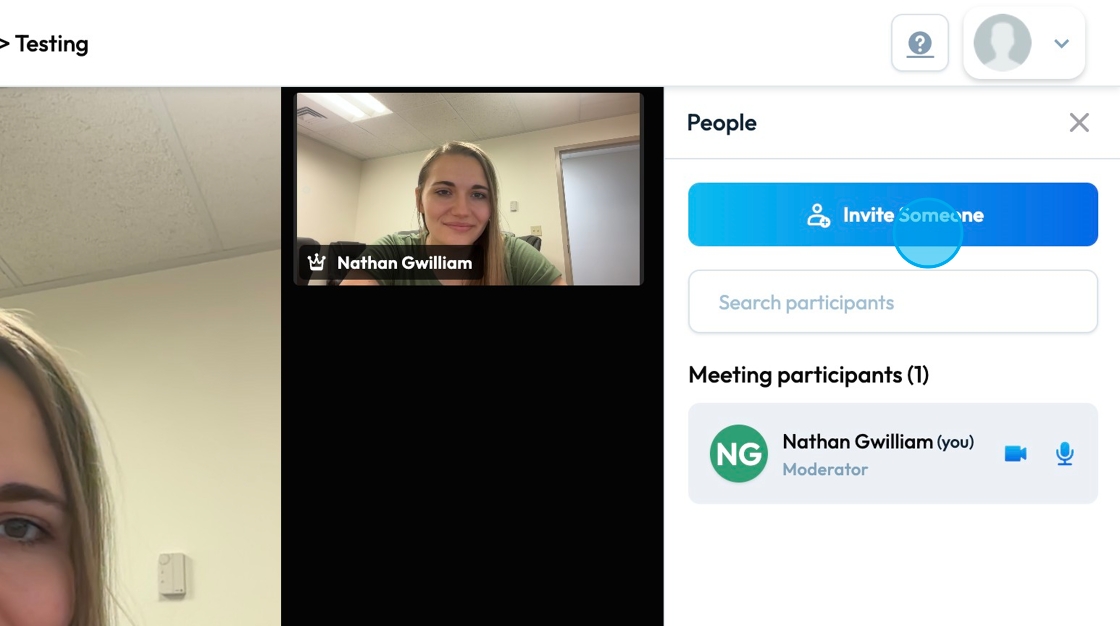
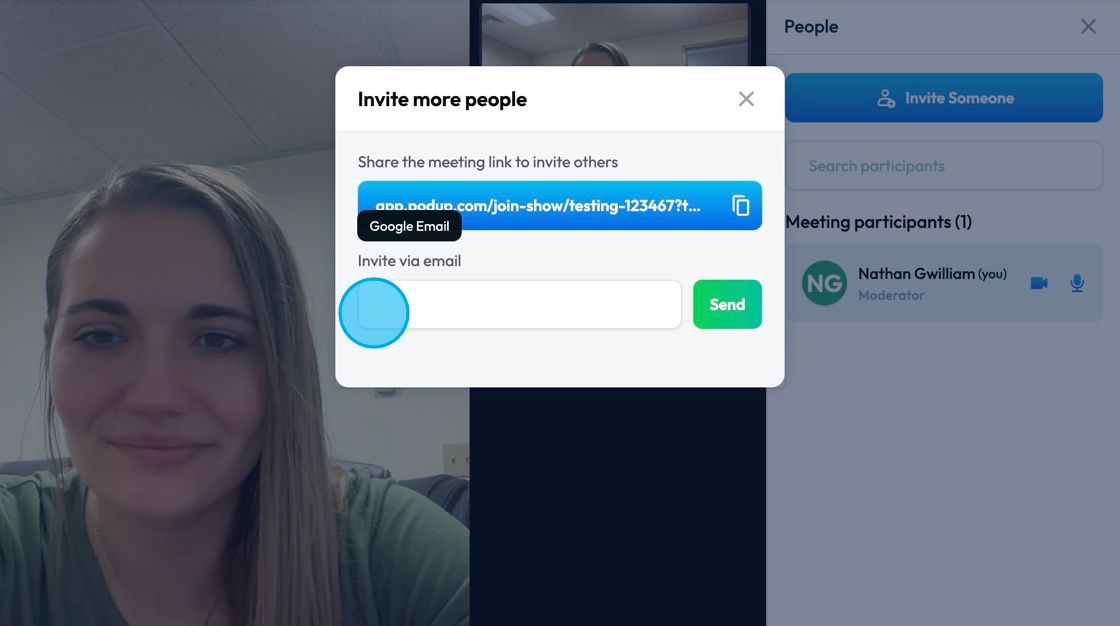
30. Invite people easily by sending them the show URL or emailing them an invitation
This can be accessed by
- The blue button labeled "Invite Someone" in the "People" tab
- The "Invite" tab
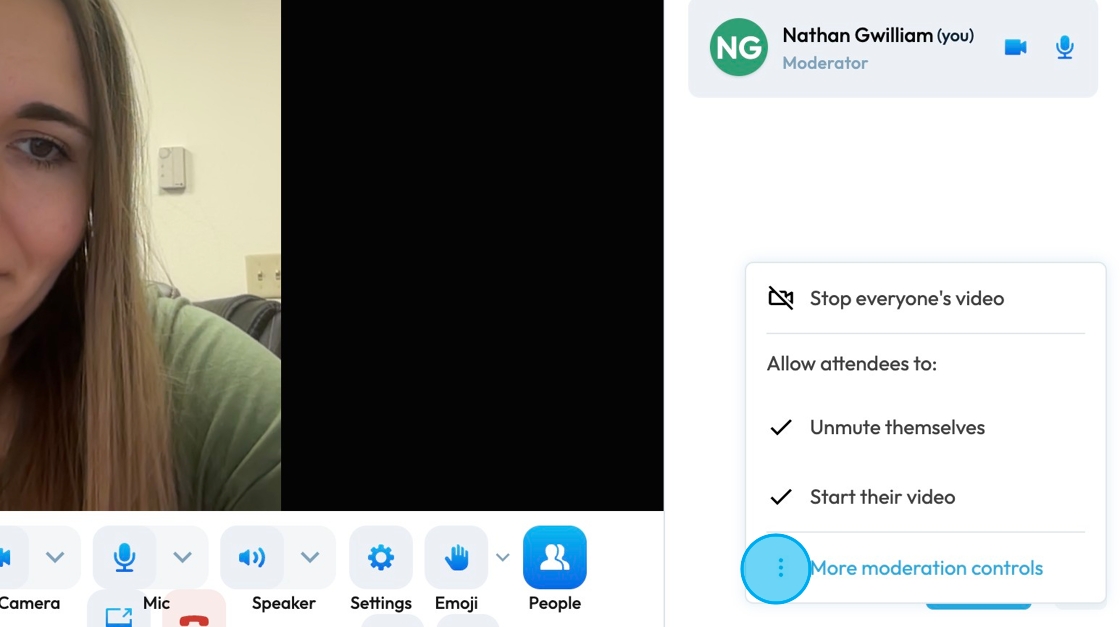
31. You can mute all participants by selecting "Mute all" in the bottom right-hand corner.
The 3 dots in the bottom right-hand corner allow you to stop everyone's video as well as authorize the attendees to unmute themselves and start their video. The "More moderation controls" will lead you to the "Moderator" section of "Settings" *See step 25
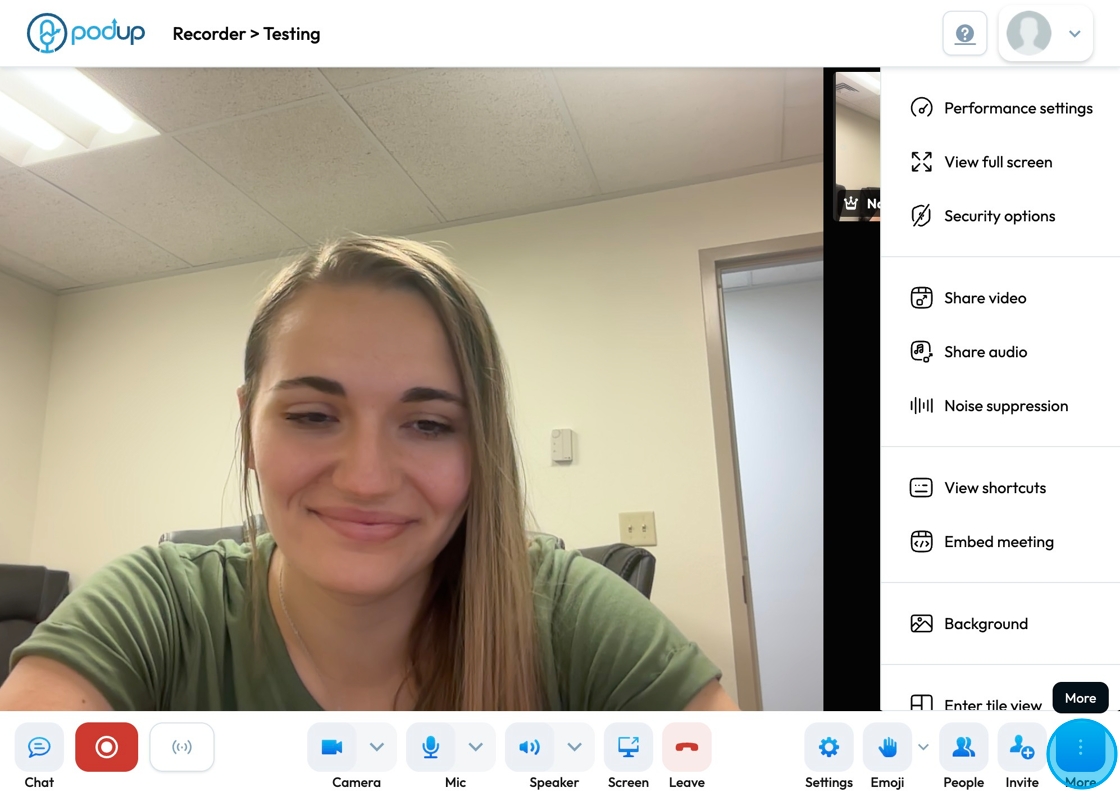
32. Click "More" for a list of 10 other setting
- Performance settings: Adjust the recording to what looks best ("Best performance" and what is the best quality ("Highest Quality")
- View fullscreen: Make the image big enough to fill the full-screen
- Security options: Create a password for your Show
- Share video: Share a video through it's URL
- Share audio: Watch a tutorial on how to share audio then a popup will prompt you to share audio
- Noise suppression: Will enable suppression of background noise like a vacuum or a loud car
- View shortcuts: View all the keyboard tricks to help make navigation in the recorder easier
- Embed meeting: Copy the code into a website to embed this meeting link
- Background: Change your background easily with a pre-provided image, a blur, or inserting your own image
- Enter tile view: Display all the guest of the show at one time
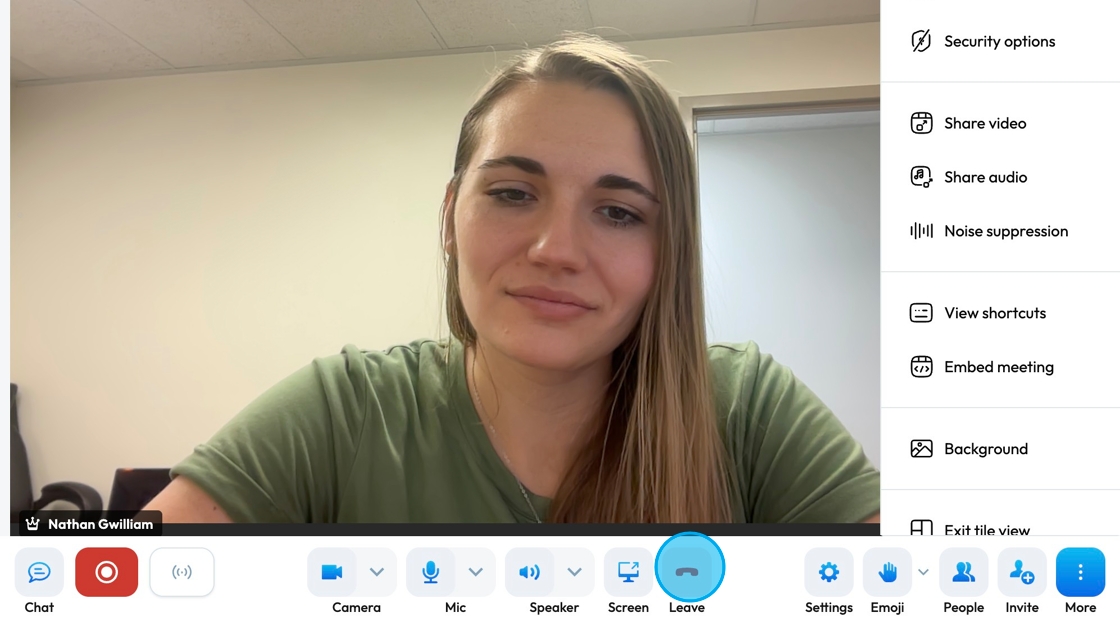
33. Click "Leave" to exit the recording studio
- This does not end the recording. Make sure to save your recording before leaving the call.
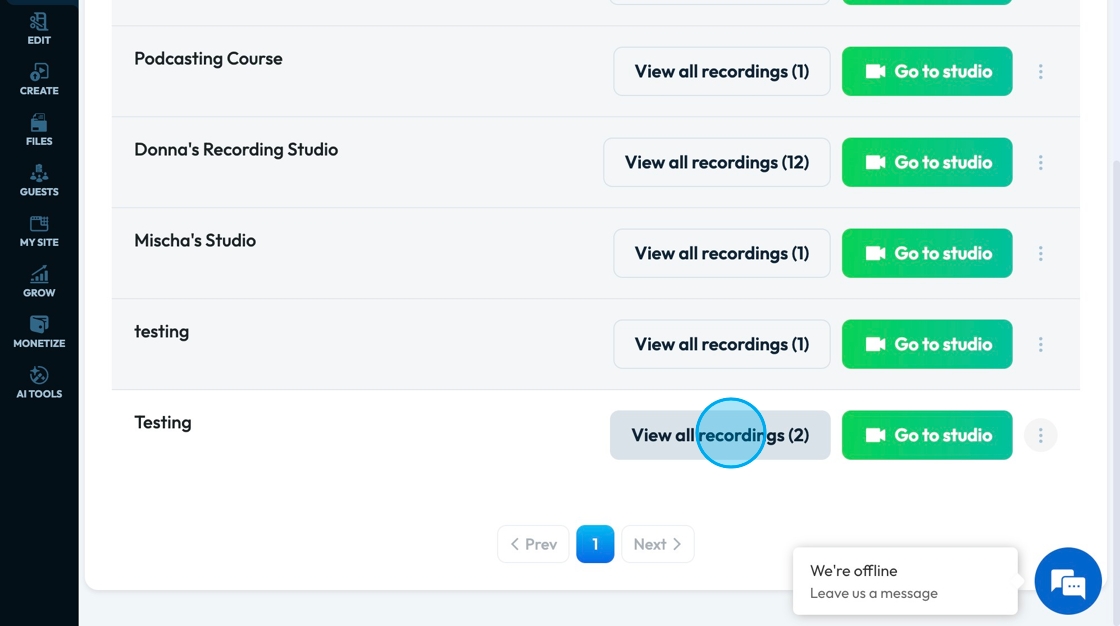
34. Your recording can be viewed under the studio name in "View all recordings"
- The number indicates how many recordings are currently in that studio
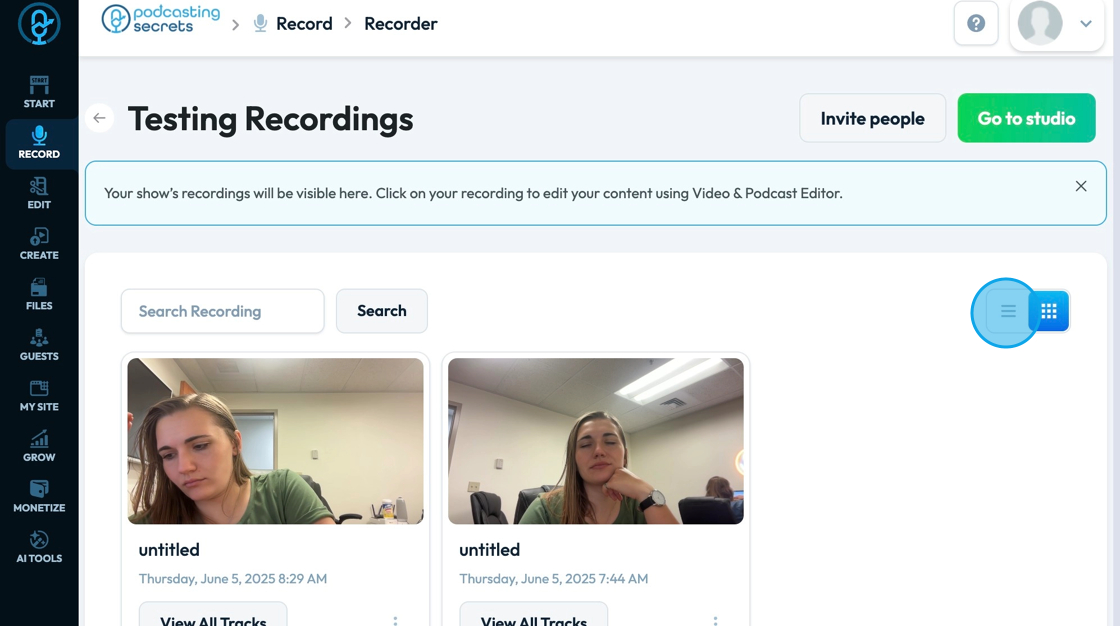
35. The recordings will be displayed in on the main page.
- You can search the recording using the search bar located above the recordings
- The view can be adjusted from grid view to list view using the toggle on the right side
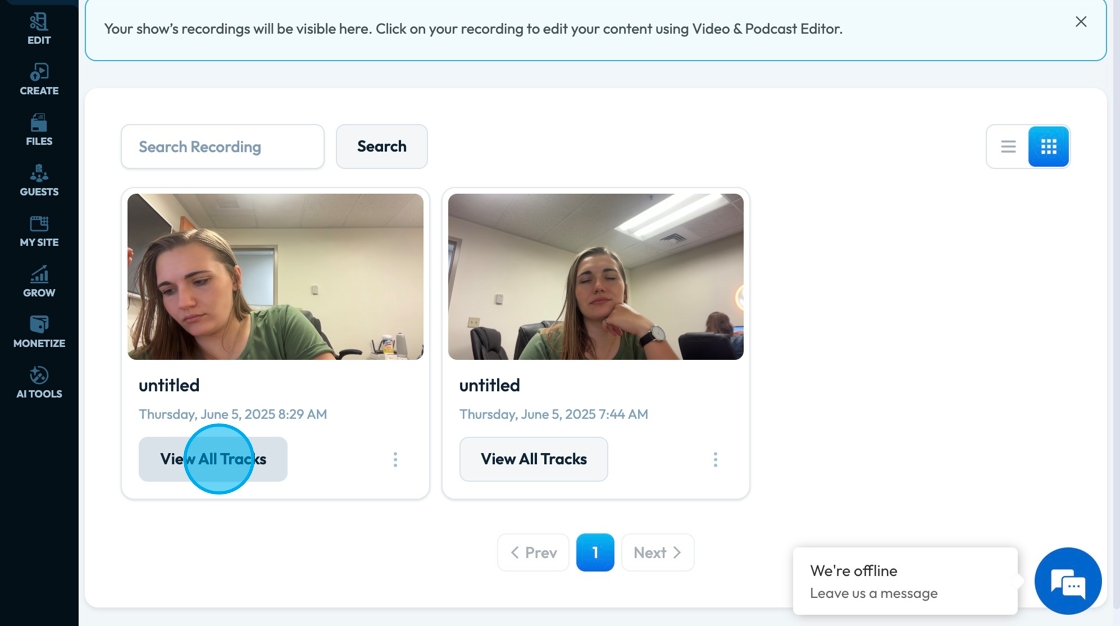
36. Click "View All Tracks" to view the individual tracks of the recording
37. Once in the recording, you can download the video by clicking "Download" or edit the track by selecting "Open in Editor"
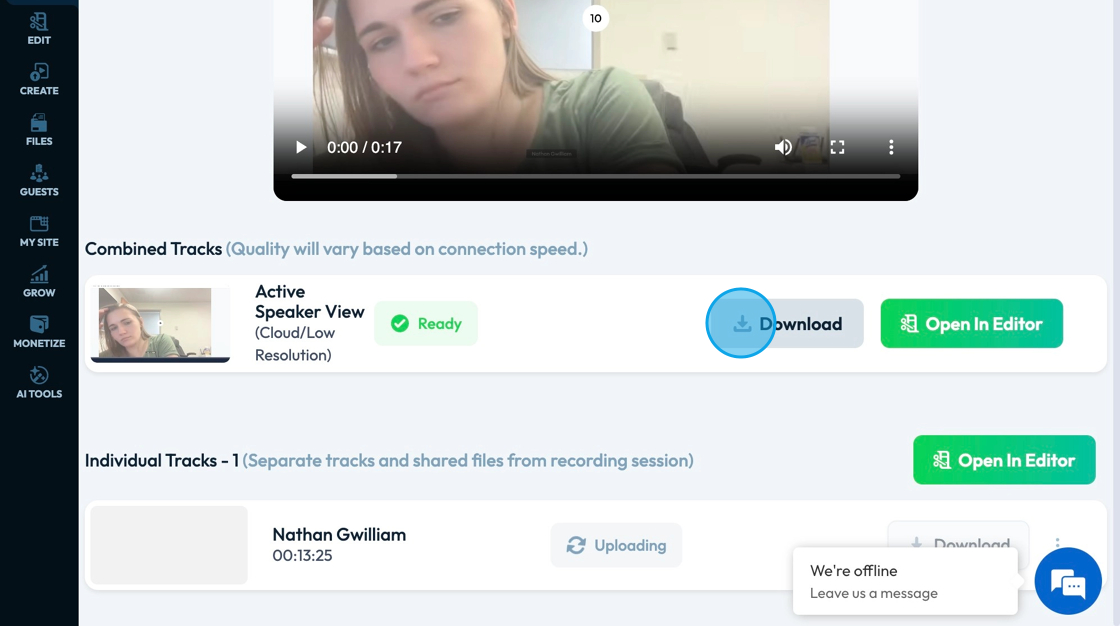
38. Combined tracks will show the video of all the tracks together
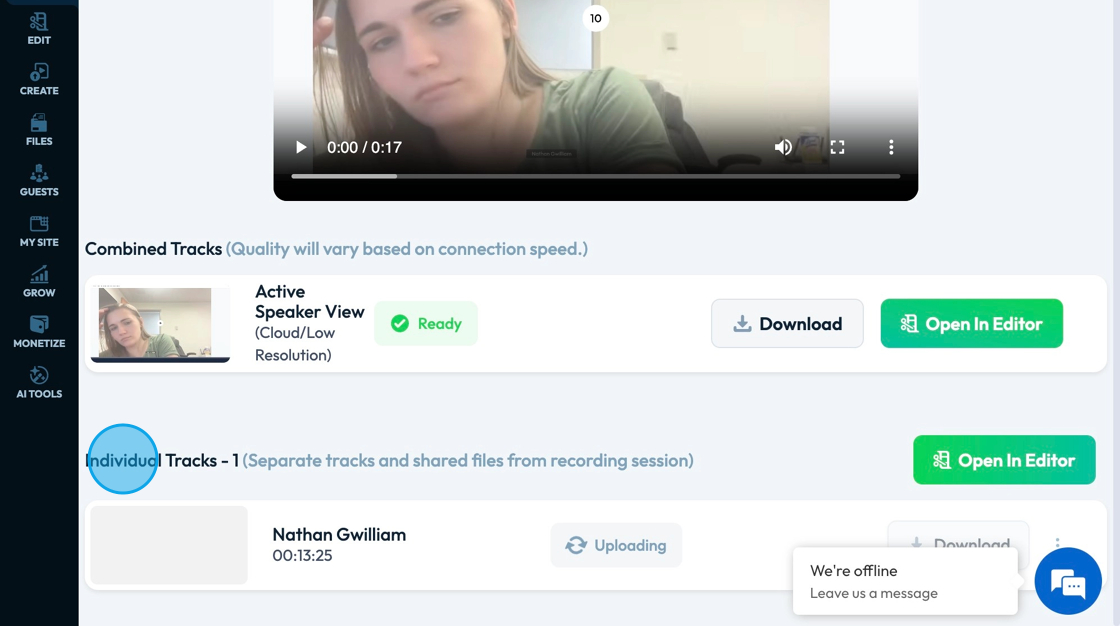
Individual Tacks will show each participant's video separately
- Individual tracks can be helpful for editing out any background noise or fixing problems with the video of 1 person. This can save you from needing to redo the whole video
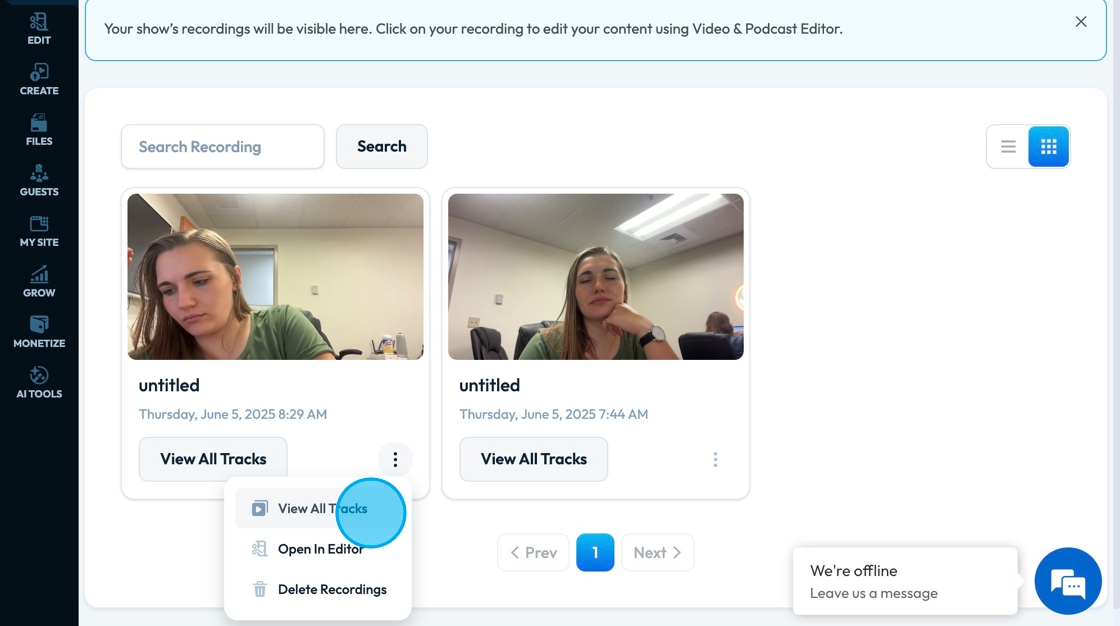
39. The 3 dots icon allows you to view all tracks, open in Editor, and delete recordings
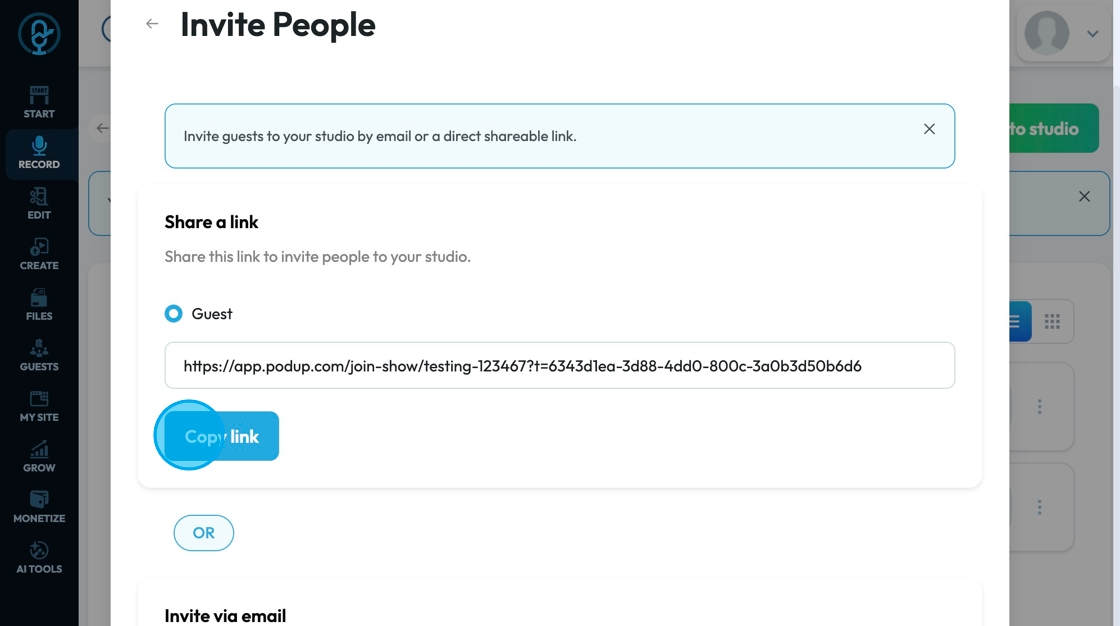
40. From "Recordings" you can invite people to join your studio
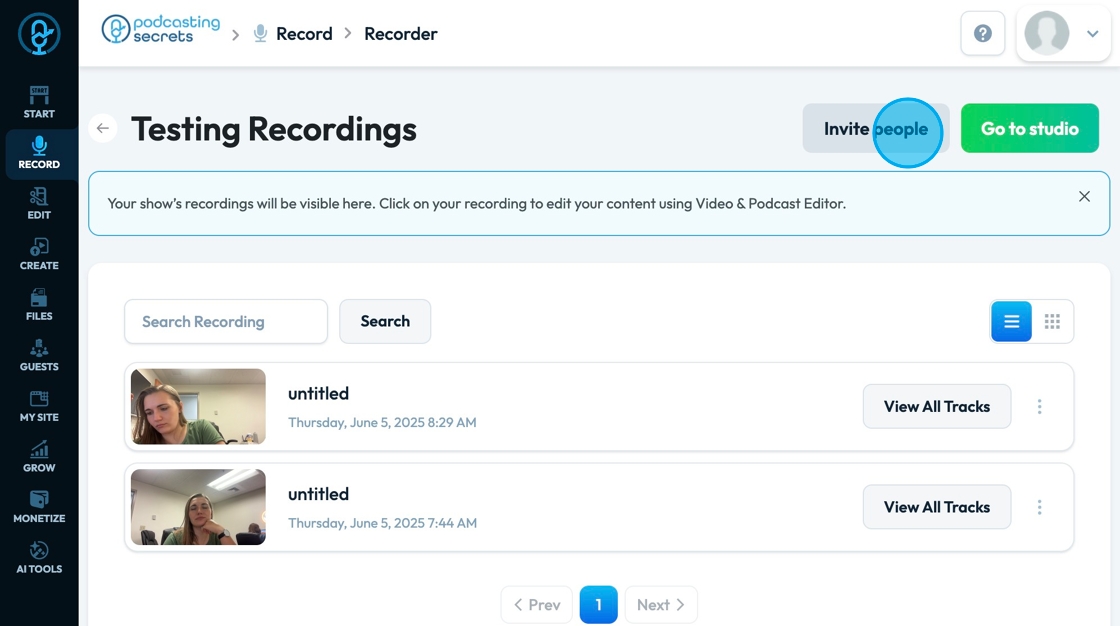
41. Invite guests by sharing a link or inviting them via their email
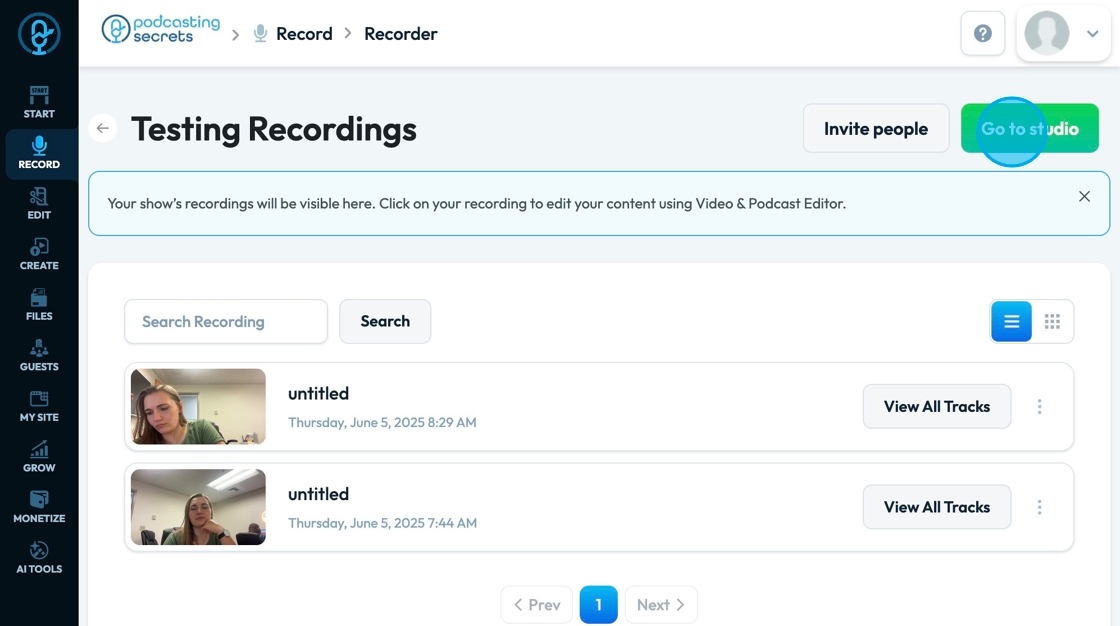
42. Click "Go to studio" to enter the studio directly from "Recordings"
This guide shows you how to connect your podcast and social media to PodUp to boost your reach. It walks through each step—from adding your podcast info to linking social accounts and analytics—so you can easily manage and promote your show across platforms.
1. Navigate to https://app.podup.com/home
There are 2 ways to access integrations
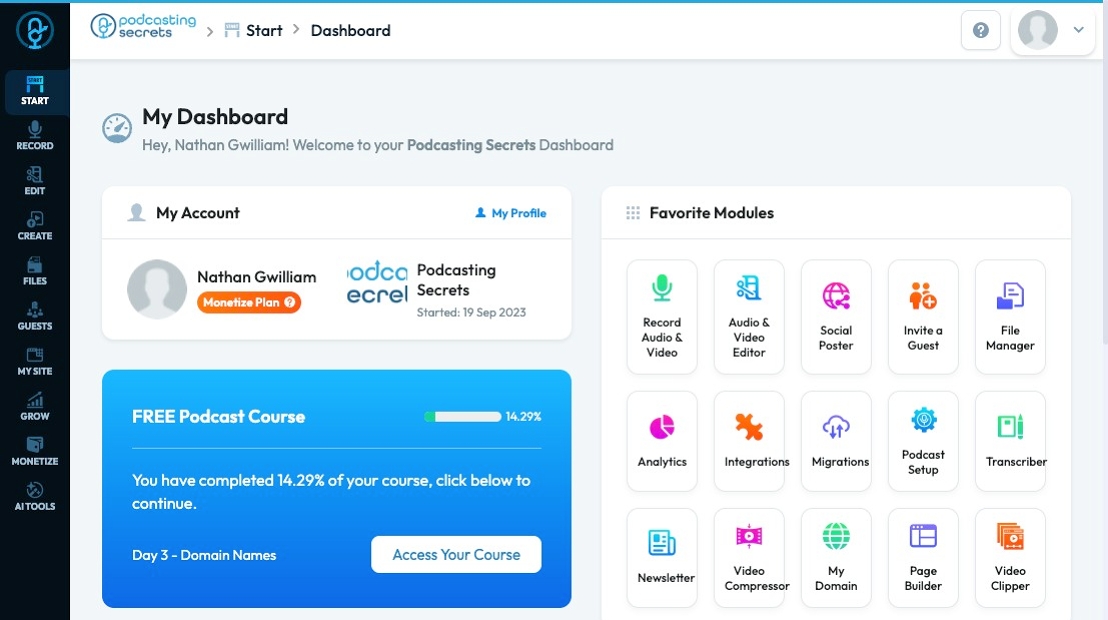
2. 1) Click "Integrations" in "Favorite Modules" on the Dashboard
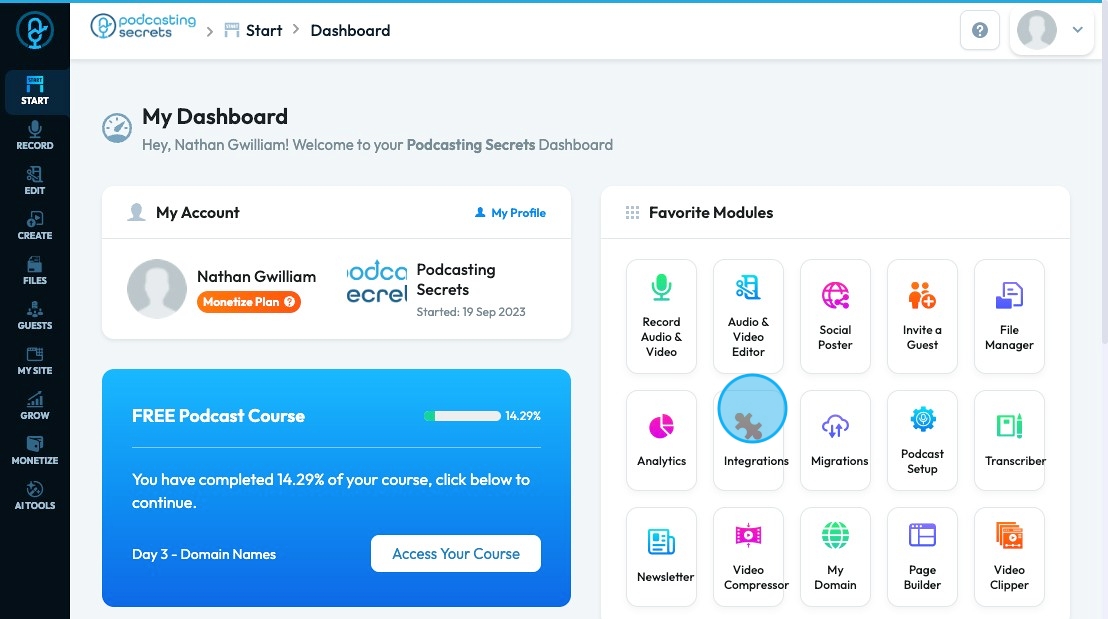
3. 2. Click "Start"
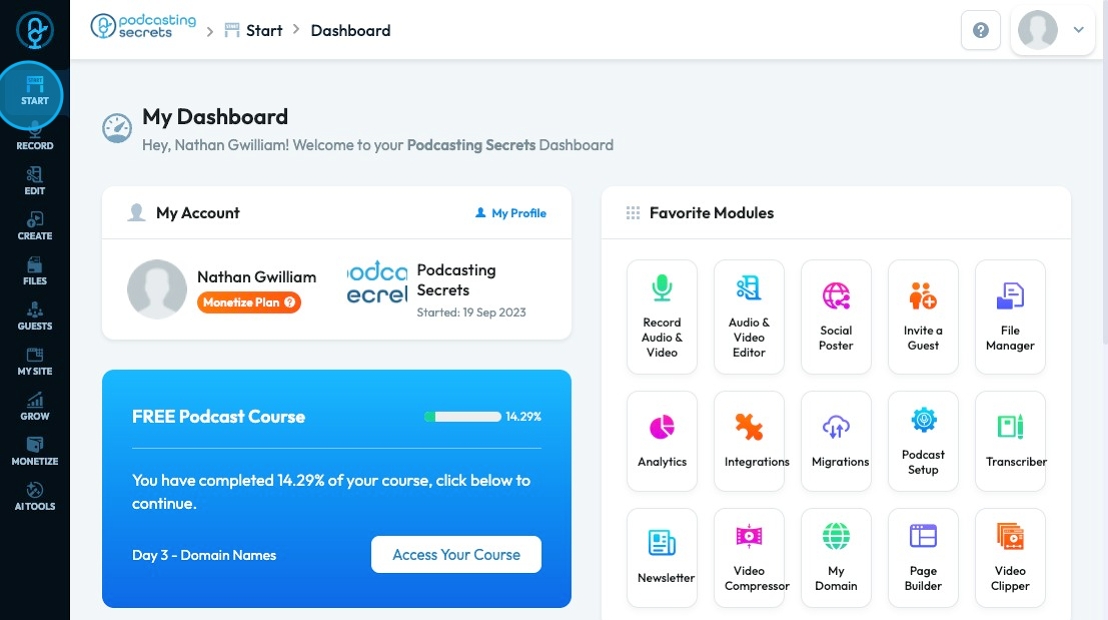
4. Click "Integrations"
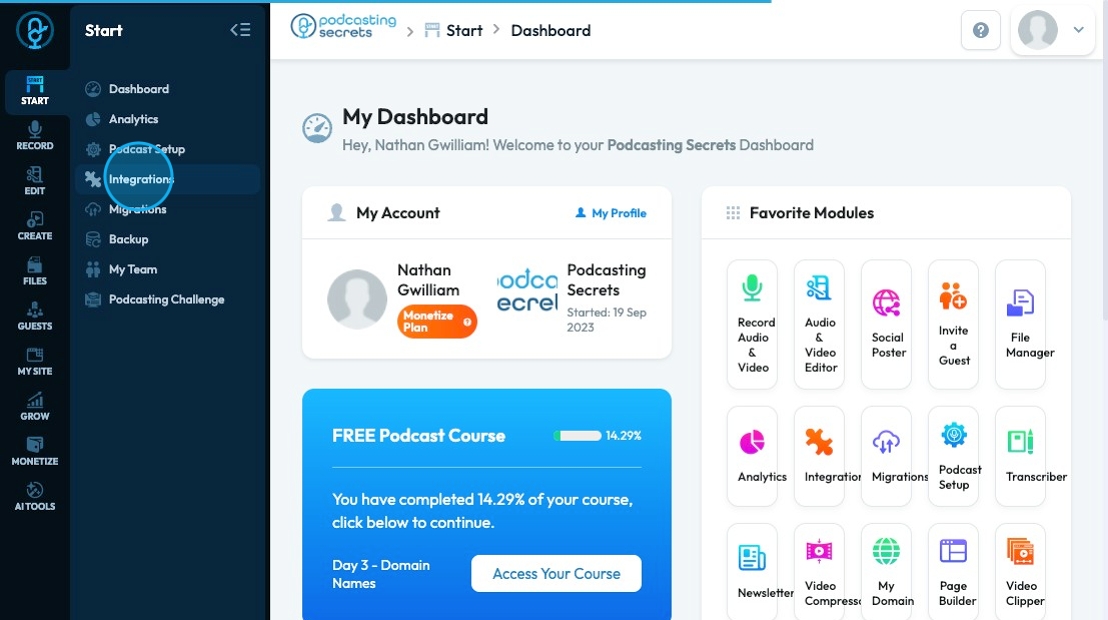
5. The "Podcast Integrations" page will open to Podcast so you can edit your podcast info before integrating all of your social media accounts
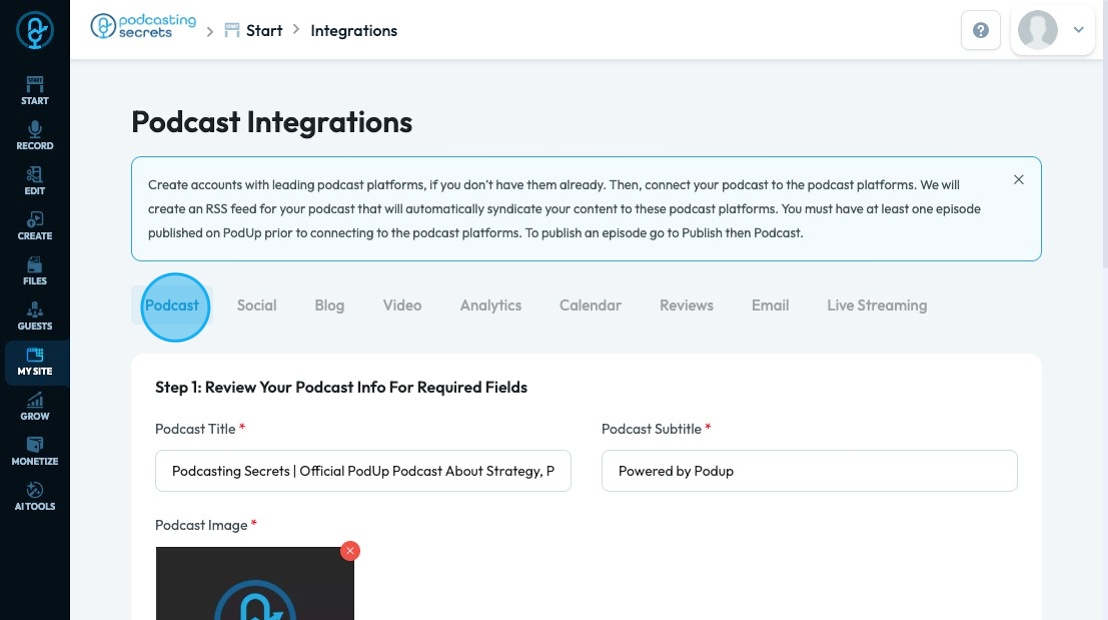
6. Click "Podcast Title " to enter your unique podcast title
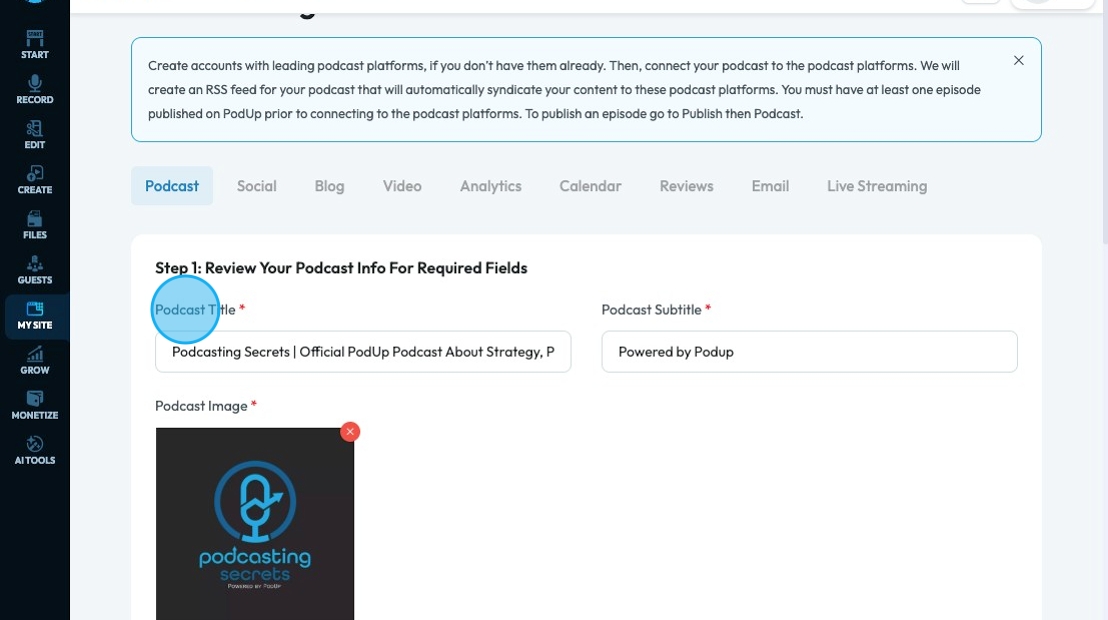
7. Click "Podcast Subtitle " to add a short phrase that gives more information about your podcast
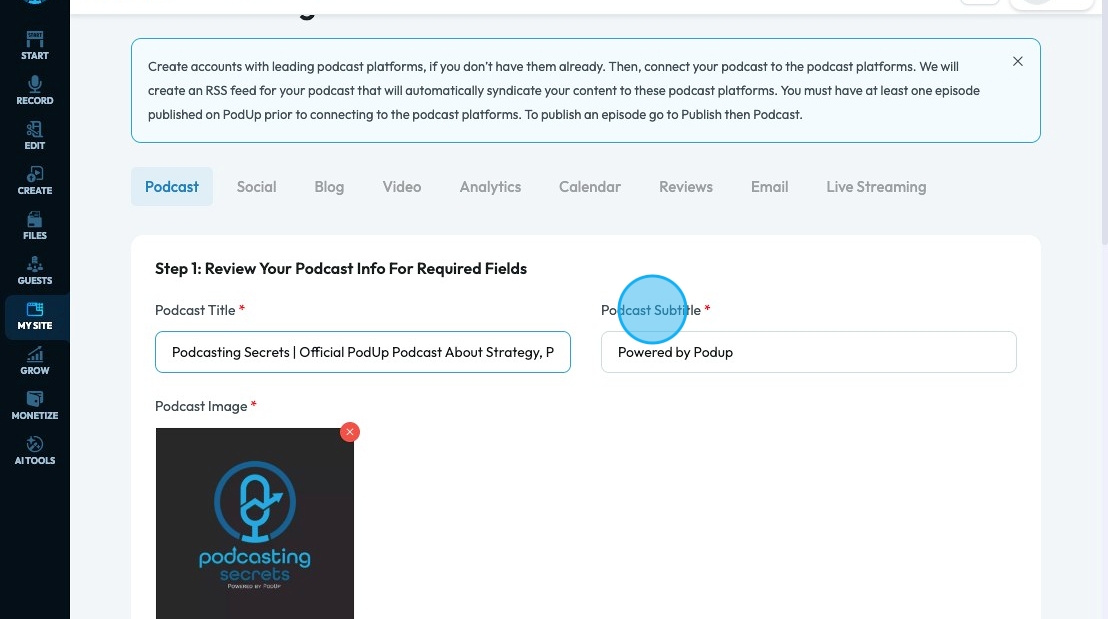
8. Click "Podcast Image " to upload the podcast image that will be displayed on each of your platforms
- It should be a square image that is 3000 x 3000 pixels
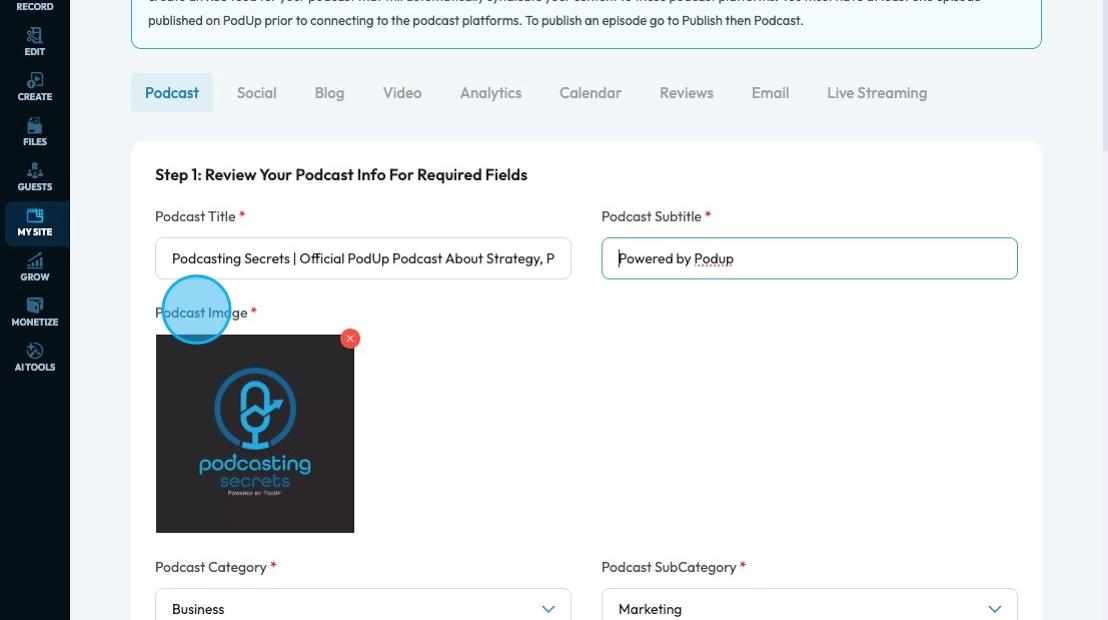
9. Click "Podcast Category " to select the topic category of your podcast from a drop-down menu
- Arts: Podcasts exploring various forms of creative expression, including visual arts, performing arts, literature, and design.
- Business: Podcasts focusing on entrepreneurship, finance, marketing, career development, and economic trends.
- Comedy: Podcasts designed to entertain and amuse, featuring stand-up, improv, comedic interviews, or humorous discussions.
- Education: Podcasts offering structured learning, academic insights, skill development, or informational content on a wide range of subjects.
- Fiction: Podcasts presenting original stories, audio dramas, serialized narratives, or readings of fictional works.
- Government: Podcasts discussing politics, public policy, civic engagement, and the workings of local, national, and international governance.
- History: Podcasts recounting past events, examining historical figures, exploring societal evolution, or diving into specific historical periods.
- Health & Fitness: Podcasts providing information, advice, and motivation related to physical health, mental well-being, nutrition, exercise, and lifestyle.
- Kids & Family: Podcasts producing content suitable and engaging for children, or offering resources and discussions for parents and families.
- Leisure: Podcasts about hobbies, recreation, travel, games, personal interests, and activities pursued for relaxation and enjoyment.
- Music: Podcasts featuring discussions about music, artist interviews, genre explorations, music history, or original musical content.
- News: Podcasts delivering current events, breaking stories, in-depth reports, analyses of daily happenings, or journalistic investigations.
- Religion & Spirituality: Podcasts exploring various faiths, spiritual practices, philosophical concepts, and personal journeys of belief.
- Science: Podcasts delving into scientific discoveries, research, theories, technological advancements, and the natural world.
- Society & Culture: Podcasts examining social trends, cultural phenomena, human behavior, community issues, and diverse perspectives.
- Sport: Podcasts covering athletic events, team analyses, athlete interviews, sports news, and discussions across various sports.
- Technology: Podcasts discussing innovation, gadgets, software, artificial intelligence, digital trends, and the impact of technology on society.
- True Crime: Podcasts investigating real-life criminal cases, unsolved mysteries, forensic science, and the psychological aspects of crime.
- TV & Film: Podcasts reviewing movies and television shows, discussing the entertainment industry, interviewing actors/directors, or analyzing cinematic art.
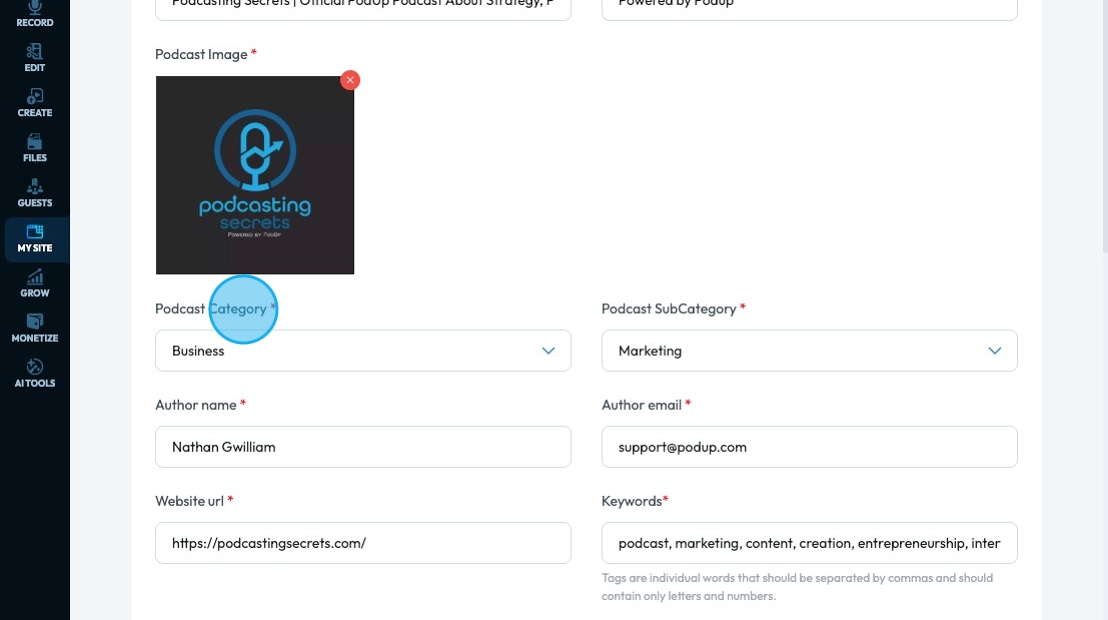
10. Click "Podcast SubCategory " to select a specific category in the broader podcast category
- For example, if I selected a business category, my subcategory could be marketing or finance
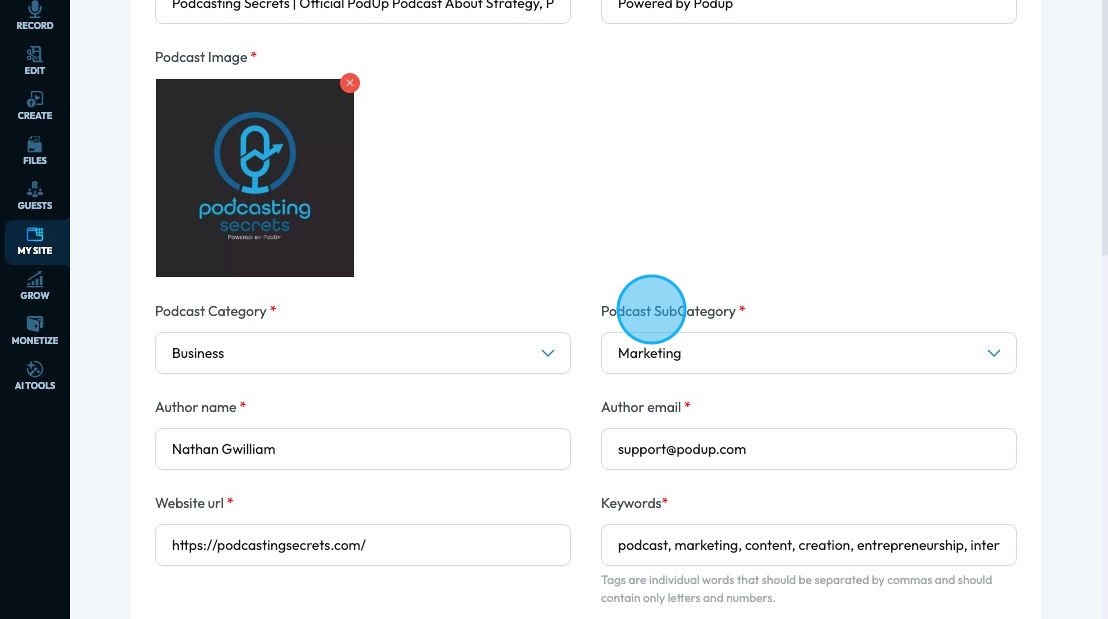
11. Click "Author name " to add the name of the host or the creator of the show
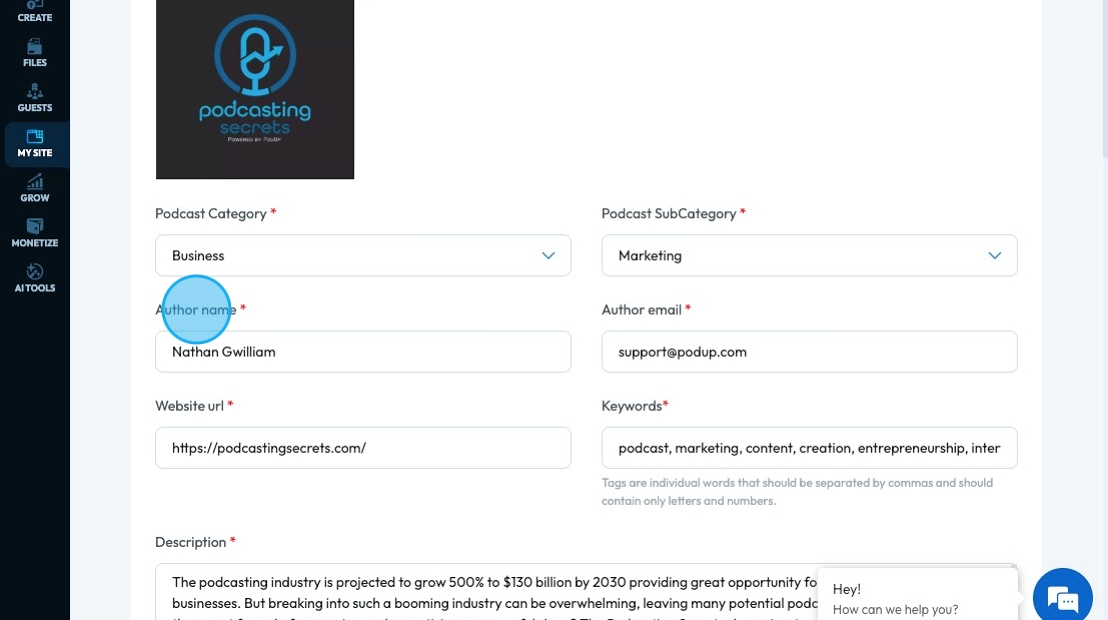
12. Click "Author email " to add the email address for your podcast
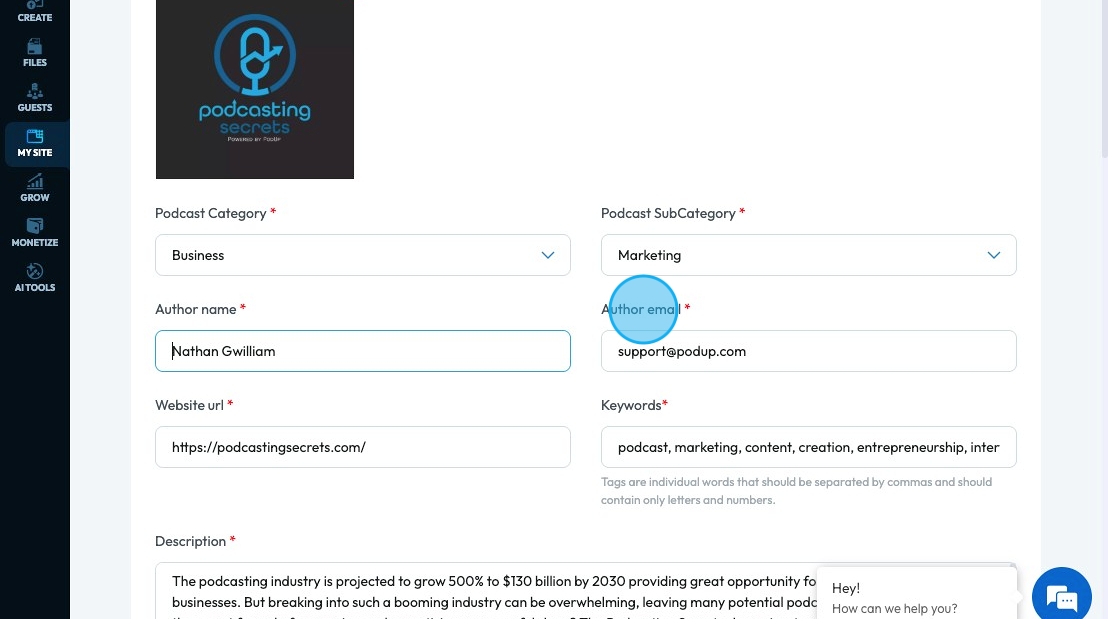
13. Click "Website url " to insert the url of the podcast
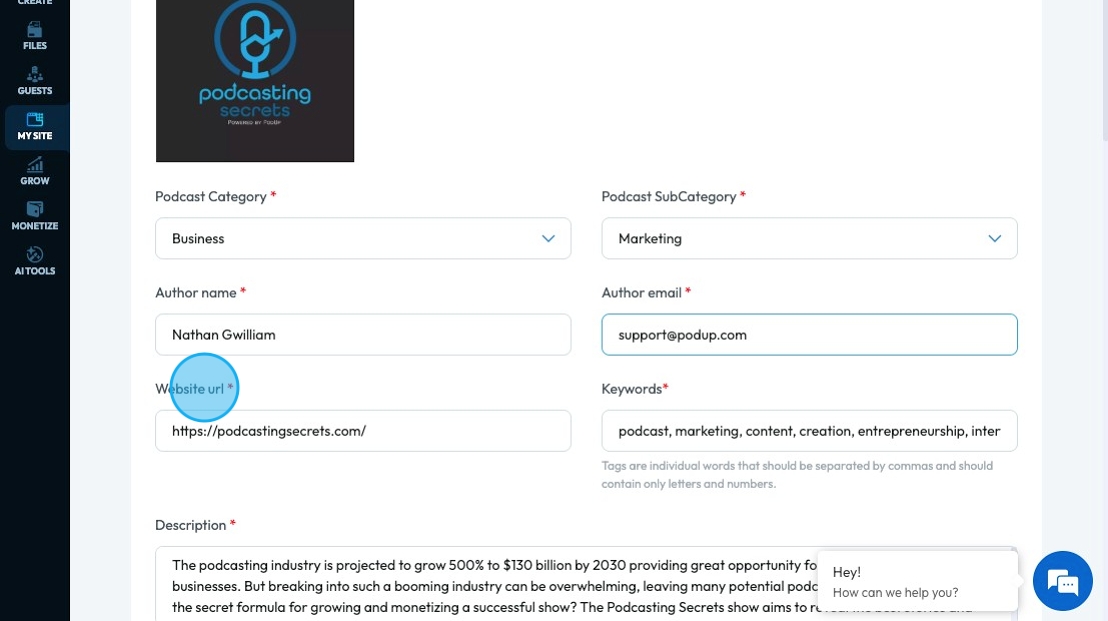
14. Click "Keywords" to add important keywords for your podcast
- Separate the tags by commas
- Keywords: Words or phrases that describe your show to help people find your show
- For example, if I am looking for a podcast on marketing, this podcast would come up because marketing is a keyword I added
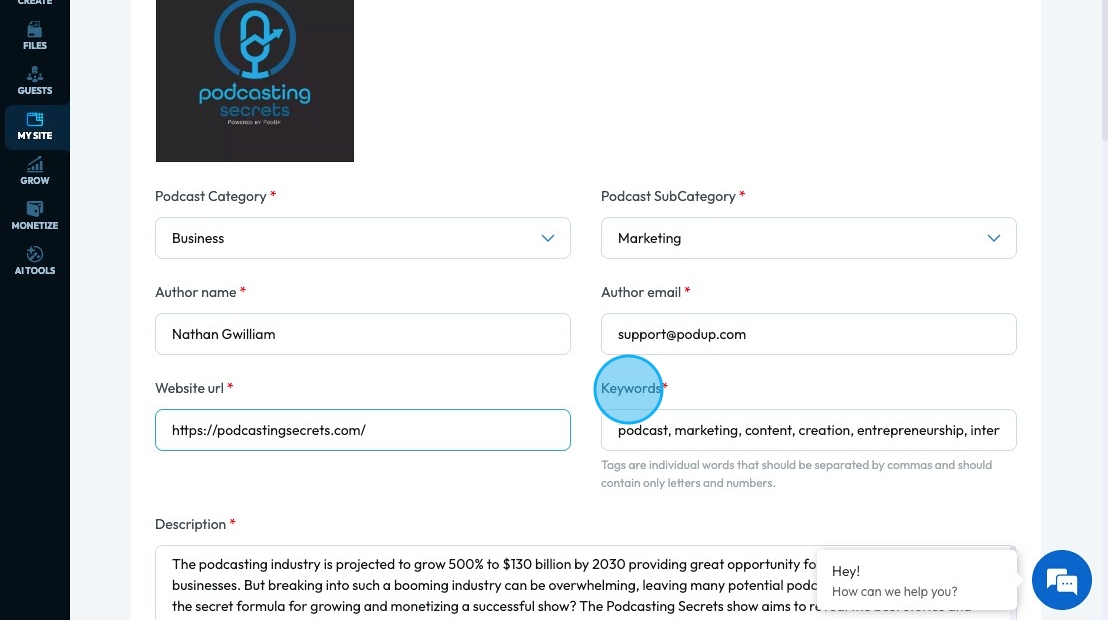
15. Click "Description " to write a short description of your podcast. This will allow viewers to understand the focus of your podcast.
- This can be used to draw readers in so make it interesting for your target audience. Use words and phrases that will be meaningful for your target audience
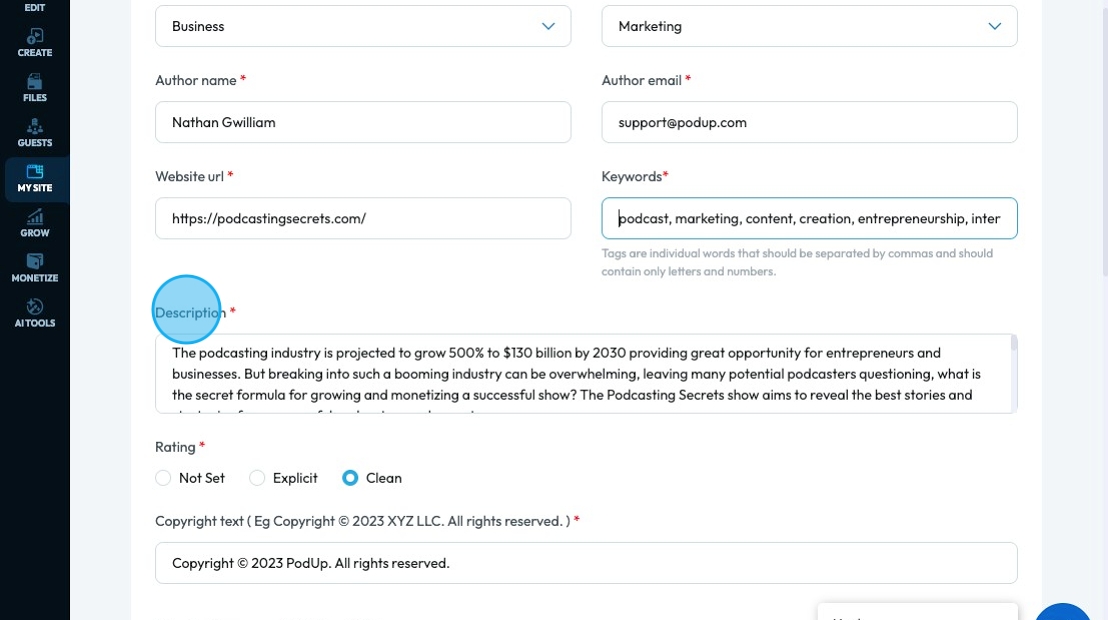
16. Under "Description" you will have "Rating" with 3 Options:
- Not Set: Indicates that the content rating (whether explicit or clean) for the podcast has not yet been specified or determined. (This is selected by Default)
- Explicit: Podcasts that may contain strong language, adult themes, or graphic content that some listeners might find offensive or inappropriate for younger audiences.
- Clean: Podcasts that contain no strong language, sexual content, or graphic violence, making them suitable for all audiences, including children.
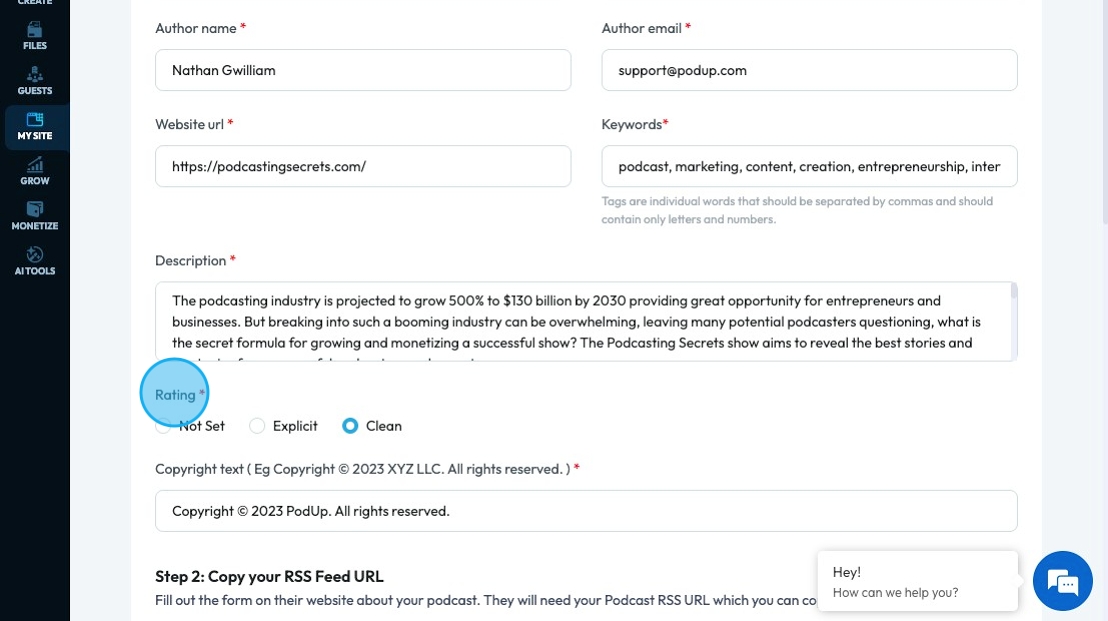
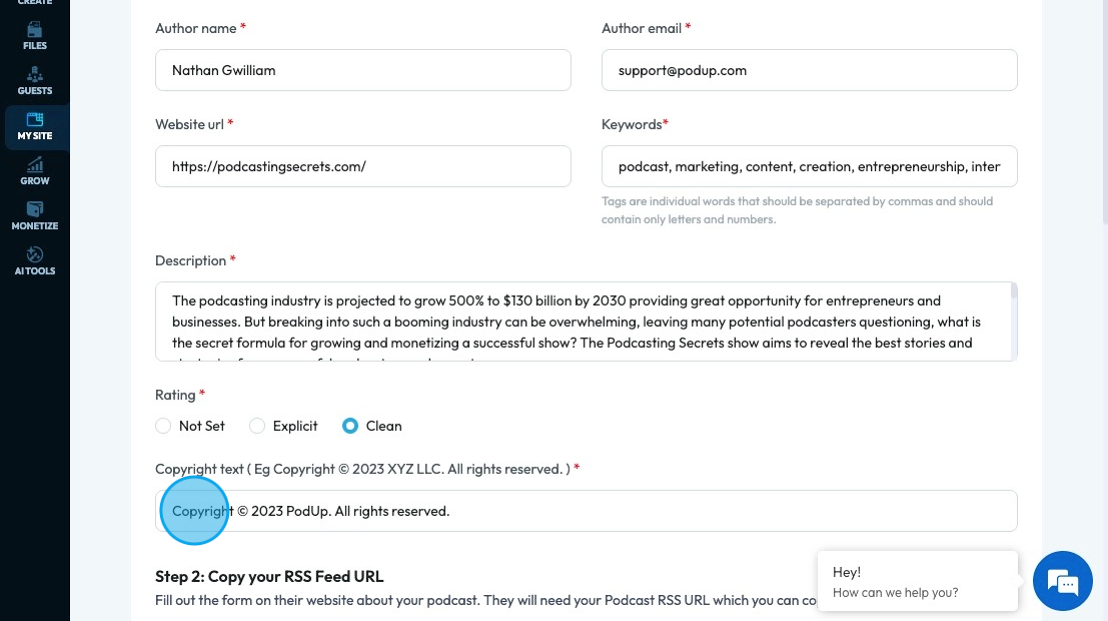
17. Click the "Copyright text" field and enter Copyright Statement.
A podcast copyright statement shows who owns the content and stops copying without permission. It includes the owner, year, and usage rules:
- © symbol
- Year
- Owner’s name
- “All rights reserved”
- No copying or sharing without permission
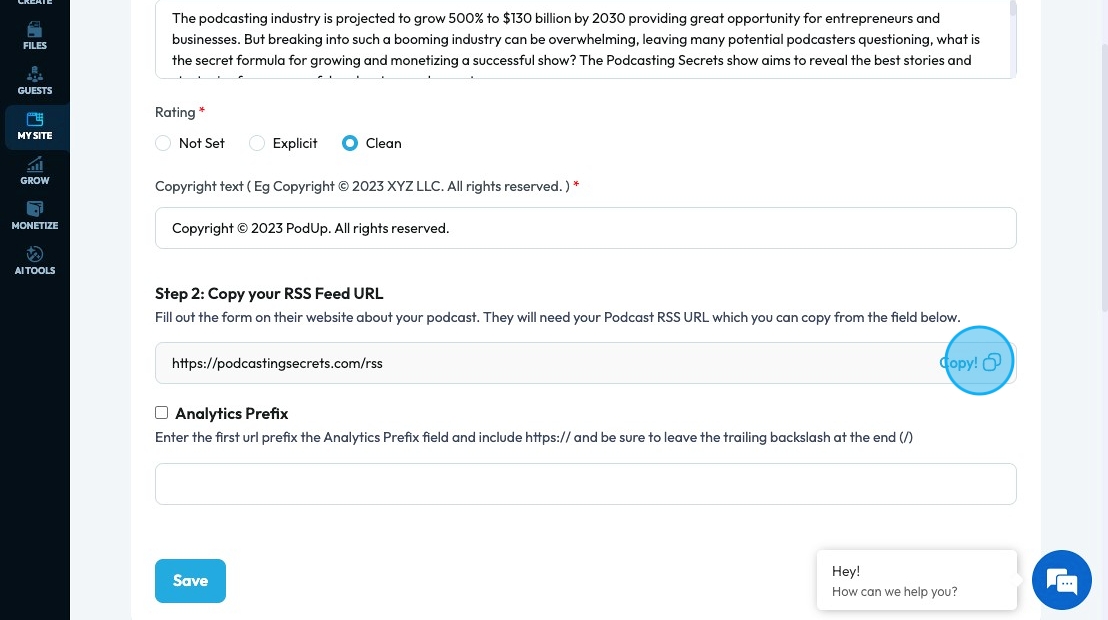
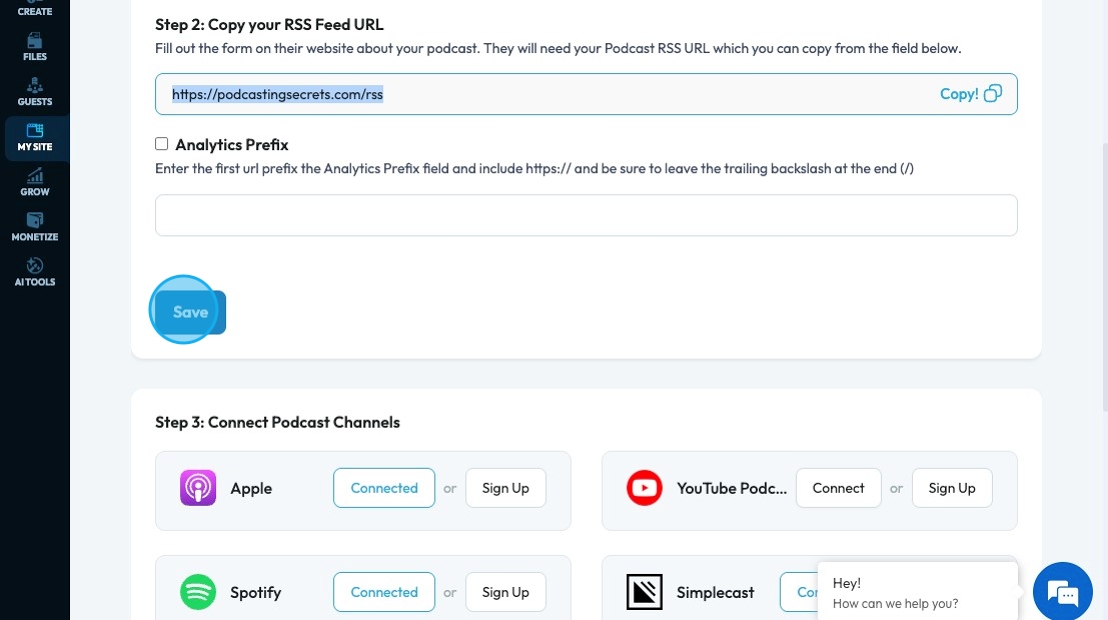
18. Click "Copy" to copy your RSS Feed URL which can then be used to integrate your podcast
- RSS Feed: A web link that can be connected to podcasting softwares (Amazon, Apple Podcast, etc.) to automatically communicate information like new episodes. It contains
- The title and description of your podcast.
- Links to your cover art.
- Details for every single episode (title, description, audio file link, duration, release date, etc.).
- Podcast platforms (like Apple Podcasts, Spotify, Google Podcasts, etc.) "read" this RSS feed to get all the updates for your show. When you publish a new episode, it gets added to this feed, and the platforms then see it and make it available to listeners.
19. Next is Analytics Prefix:
Analytics prefix is the main part of your website URL that you enter so analytics knows which site to track
It's the "prefix" because all the individual pages you want to track will start with this exact string.
"Enter the first url prefix the Analytics Prefix field":
- You need to type the beginning part of your website's address into this specific input box.
"include https://":
This is crucial for security and accuracy. It means you must start the URL with
https://.HTTPS(Hypertext Transfer Protocol Secure) is the secure version ofHTTP, where communication between your browser and the website is encrypted. Most modern websites useHTTPS.Example: Don't just type
yourwebsite.com. You must typehttps://yourwebsite.com.
"be sure to leave the trailing backslash at the end (/)":
A "trailing backslash" (it's actually a forward slash,
/, but the term "trailing slash" is common) is the slash character at the very end of the URL.This is very important because some analytics systems treat
https://yourwebsite.comandhttps://yourwebsite.com/as two different entities.
By including the trailing slash, you ensure that all pages under that root (e.g.,https://yourwebsite.com/about,https://yourwebsite.com/contact) are correctly associated with this single prefix for tracking.
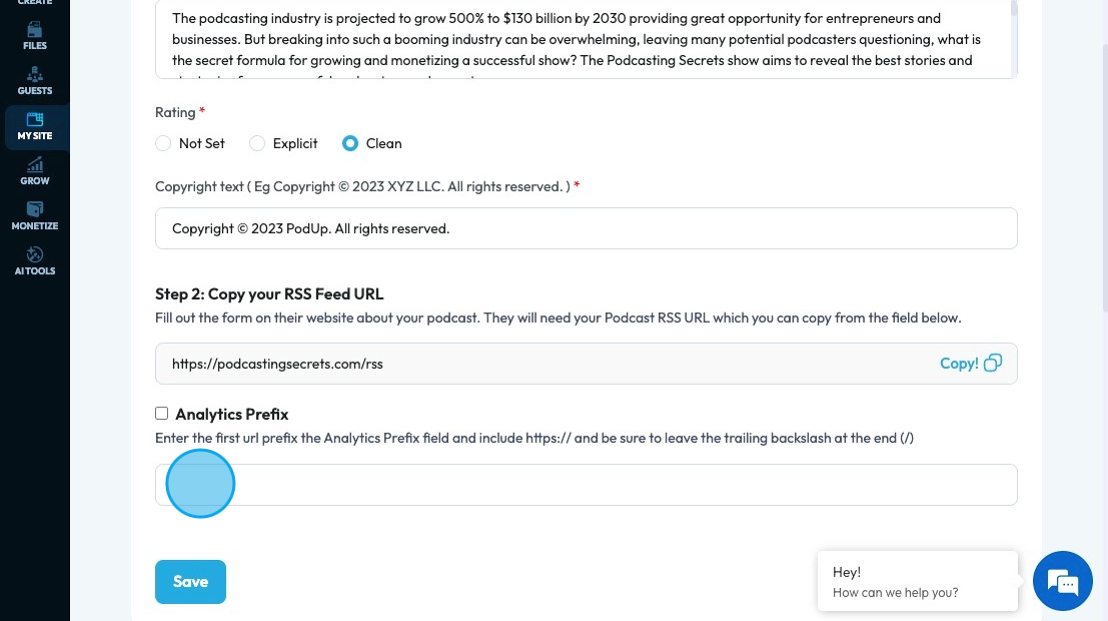
20. Click "Save" to save all the changes you have made
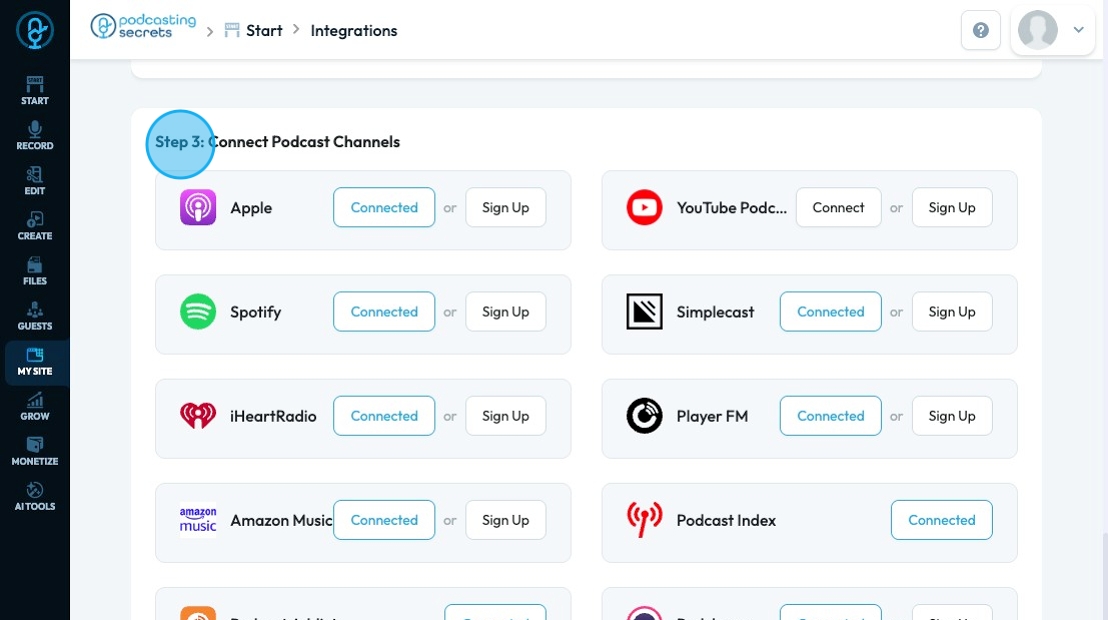
21. Connect Podcast Channels in step 3. PodUp currently offers 15 different channels. This can be done in 1 of 2 ways
Once you have created your show on a platform (like Apple) you copy the show URL of your podcast. In PodUp, select "Connect" and it will give you a pop-up menu to insert that URL then it will be connected
You can add your RSS feed to the particular platform by selecting the link below
- Apple
- Spotify
- iHeart Radio
- Amazon music
- Podcast Addict
- Pocket Casts
- PodBean
- JioSaavn
- YouTube Podcast
- Simplecast
- Player FM
- Podcast Index
- Podchaser
- Overcast
- Gaana
- Once you have integrated your RSS to your platform, copy your podcast URL in that platform (ex. your Apple Podcast URL) and paste into PodUp by selecting "Connect" and inserting the link
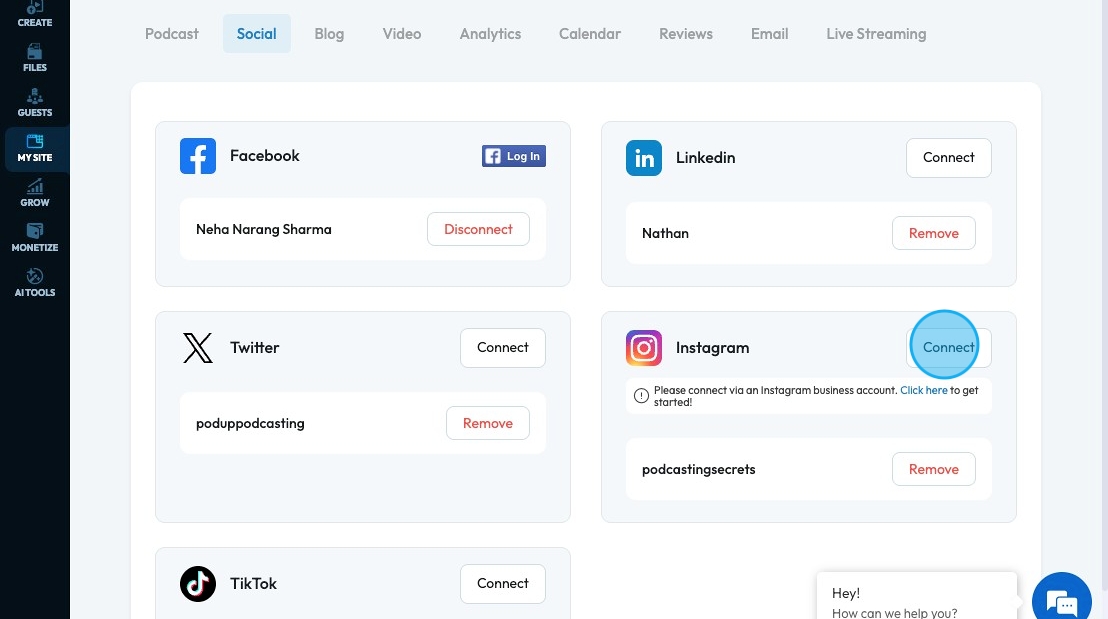
22. Connect Social Channels under the "Social" tab. PodUp currently offers 5 social Channels. Click "Connect" to open a pop-up menu to connect your social media account to your PodUp account
- TikTok
Click here to create a Facebook business page
Click here to create an Instagram business account - PodUp can only connect to an Instagram business page, not a personal page
23. Connect blog platforms under the "Blog" tab. PodUp currently offers 2 blog platforms. Click "Connect" for detailed instructions on how to connect PodUp to these platforms.
- Medium
- Tumblr
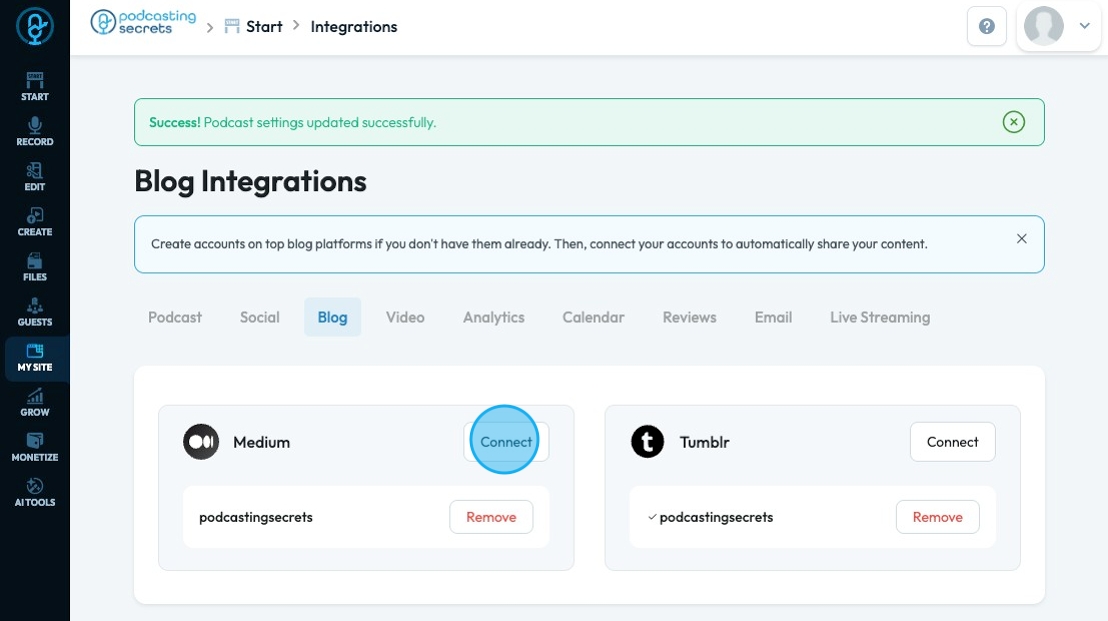
24. Connect video platforms under the "Video" tab. PodUp currently offers 2 video platforms. Click "Connect" to be led to a popup that will guide you through logging in to your account.
- YouTube
- Vimeo
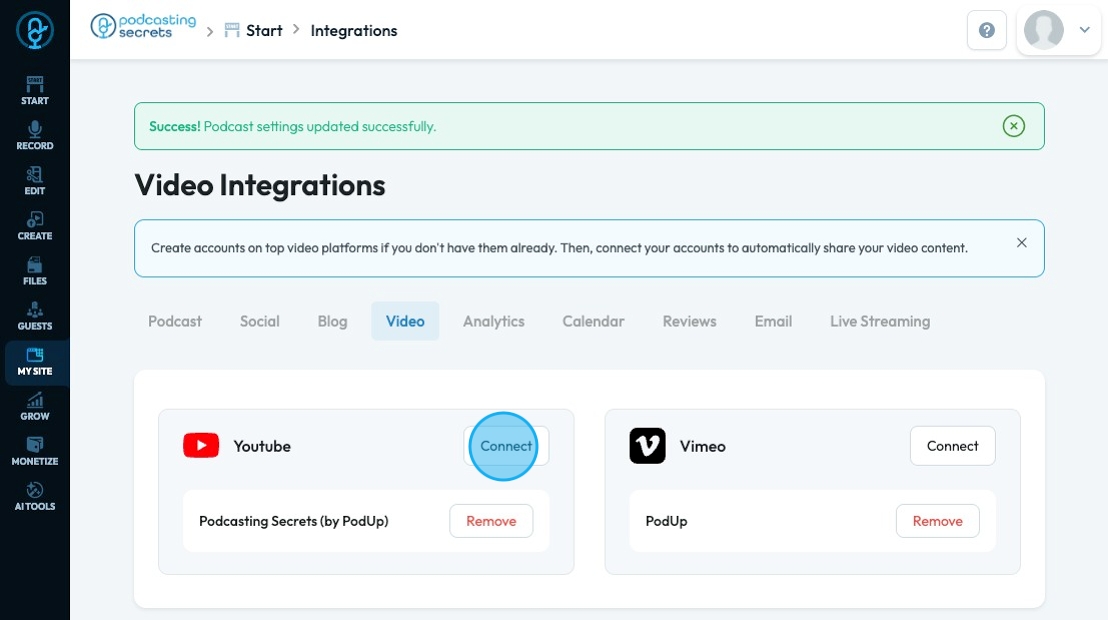
25. Connect Analytics under the "Analytics" tab. PodUp currently integrates with Google Analytics. Click "Connect" to connect with Google Analytics.
Once you have connected, insert the "Property ID" and the "Measurement ID" and click "Save" to save all the information you have added
Click here for more information about Property ID
Click here for help with the measurement ID
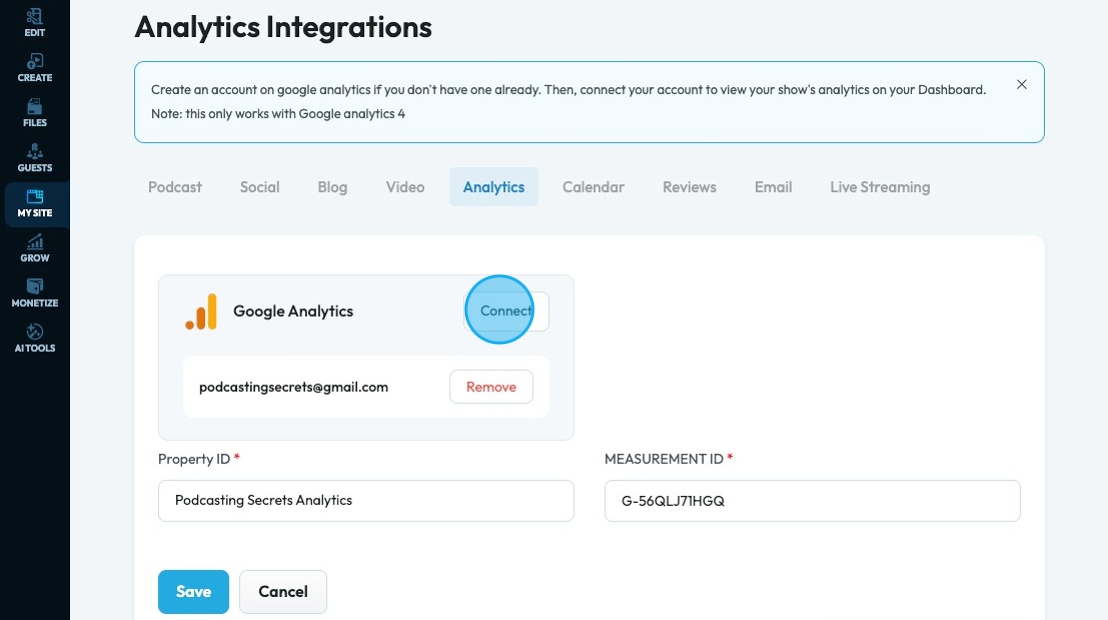
26. Connect calendars under the "Calendar" tab. PodUp currently offers 2 calendar accounts. Click "Connect" to be led to a popup that will guide you through logging in to your account.
- Google Calendar
- iCloud Calendar
Connecting your calendar means that things you input in your PodUp calendar like a scheduled recording will be put in your Google or iCloud calendar
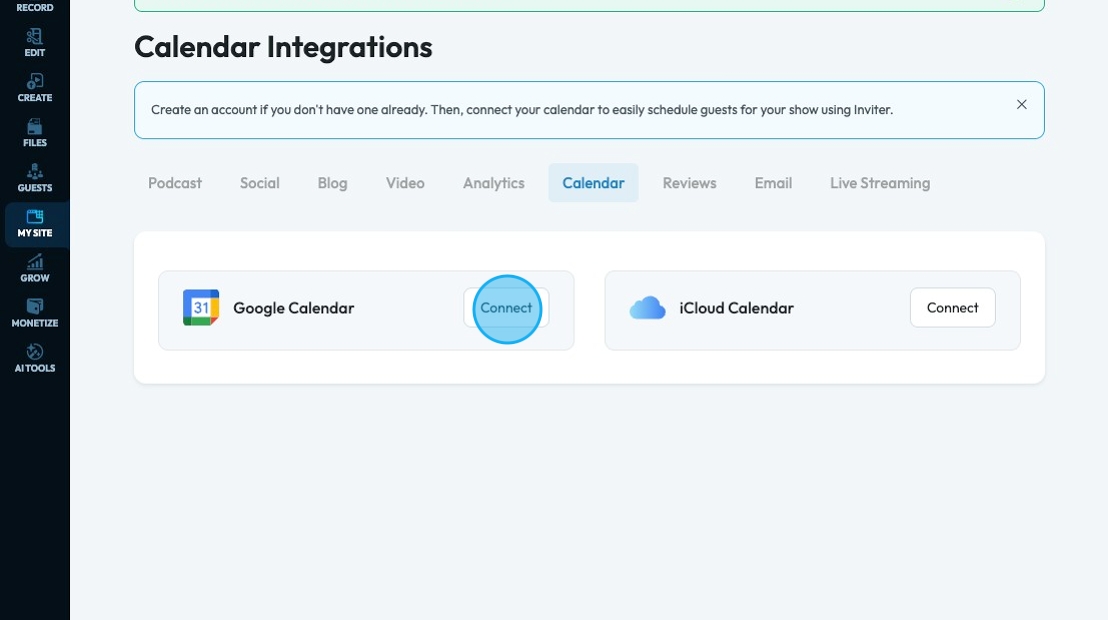
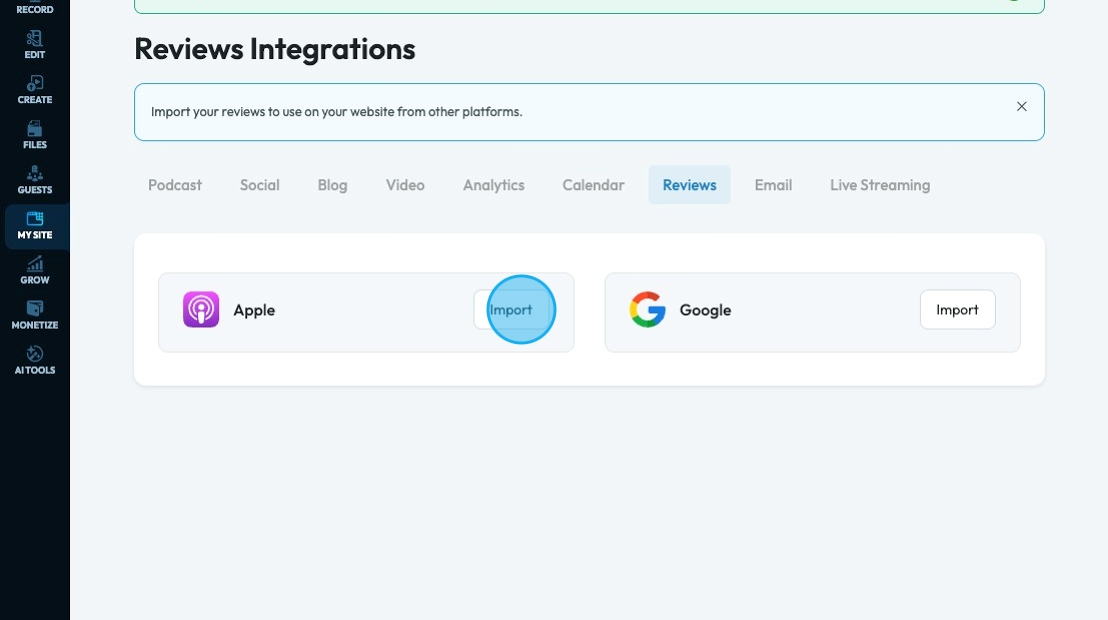
27. Connect your reviews under the "Reviews" tab. PodUp currently offers 2 review platforms. Click "Import" to be led to a popup that will guide you through the import. Once you have finished click "Save".
- Apple
- Requires the Apple Podcast URL
- Google
- Requires the name of your business
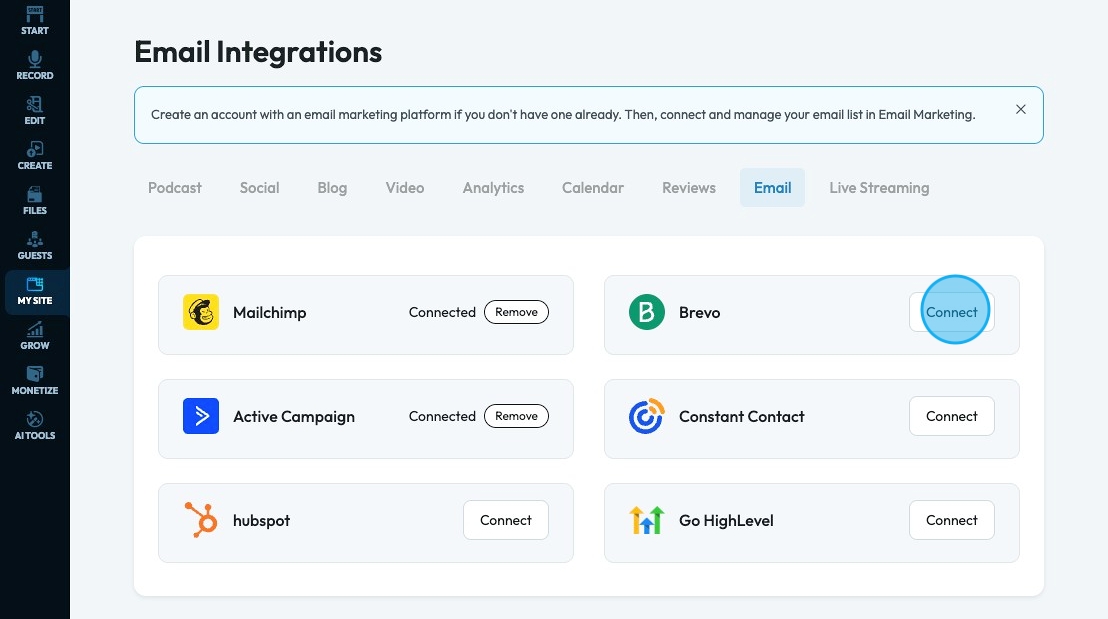
28. Connect email marketing platforms under the "Email" tab. PodUp currently offers 6 email marketing platforms. Click "Connect" to be led to a popup that will guide you through logging in to your account.
- Mailchimp
- Active Campaign
- Hubspot
- Brevo
- Constant Contact
- Go HighLevel
Click here for more information about Brevo keys
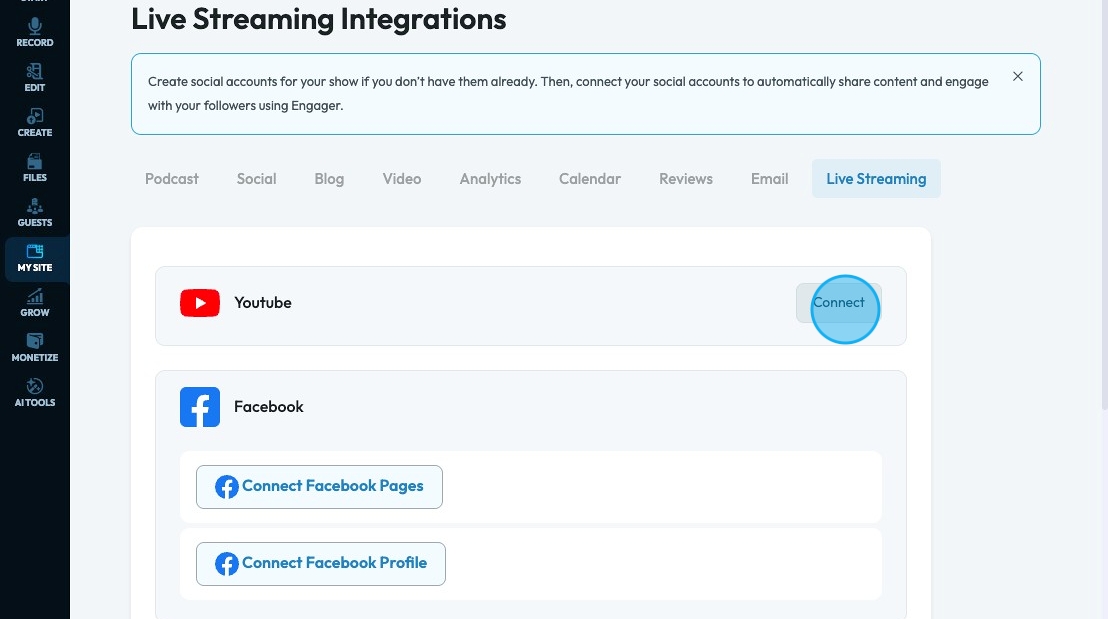
29. Connect social accounts with live stream capacity under the "Live Streaming" tab. PodUp currently offers 8 social accounts with live stream capacity. Click "Connect" to be led to a popup that will guide you through logging in to your account.
- YouTube
- Twitch
- TikTok
- Vimeo
You can ask for a custom account at the bottom of the list
By following this guide, you can easily create a new project in PodUp Editor and begin your video editing workflow smoothly and efficiently.
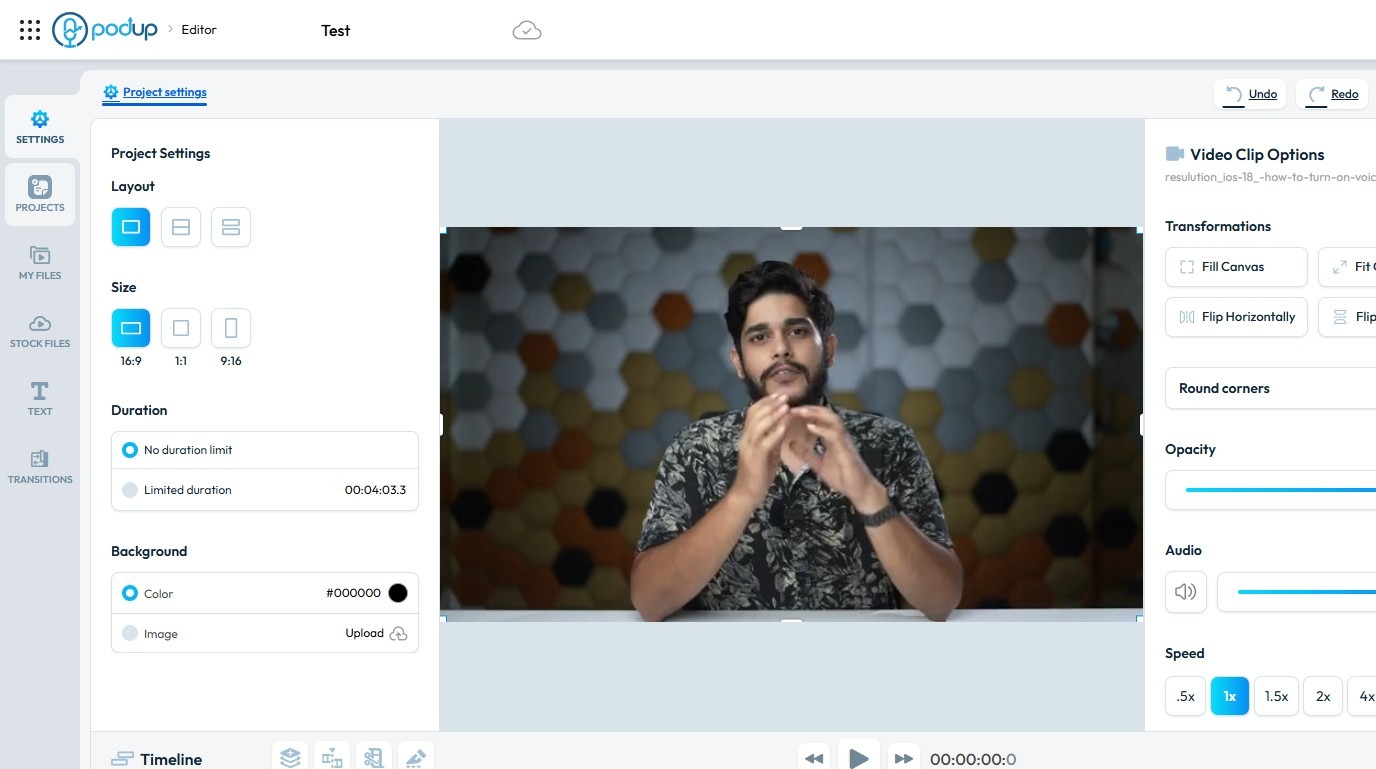
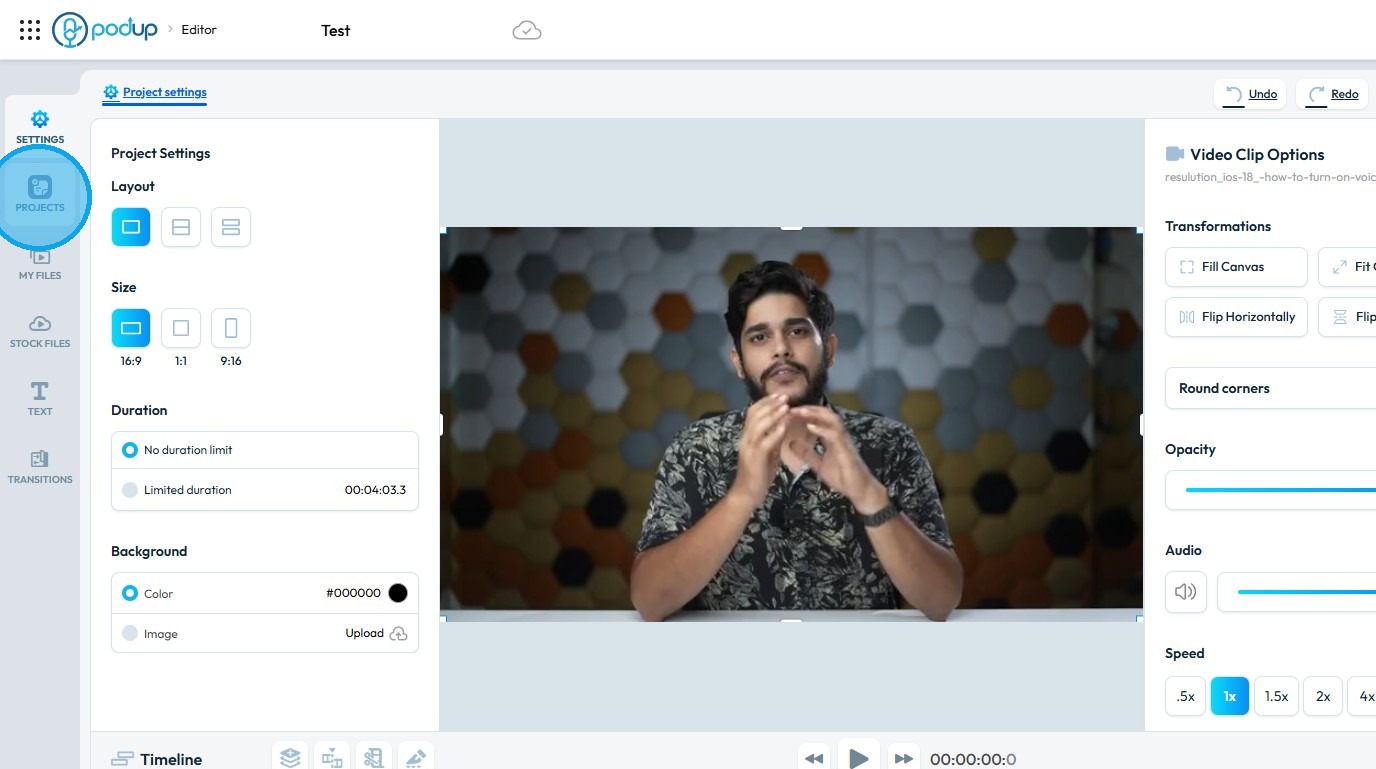
2. Click "Projects".
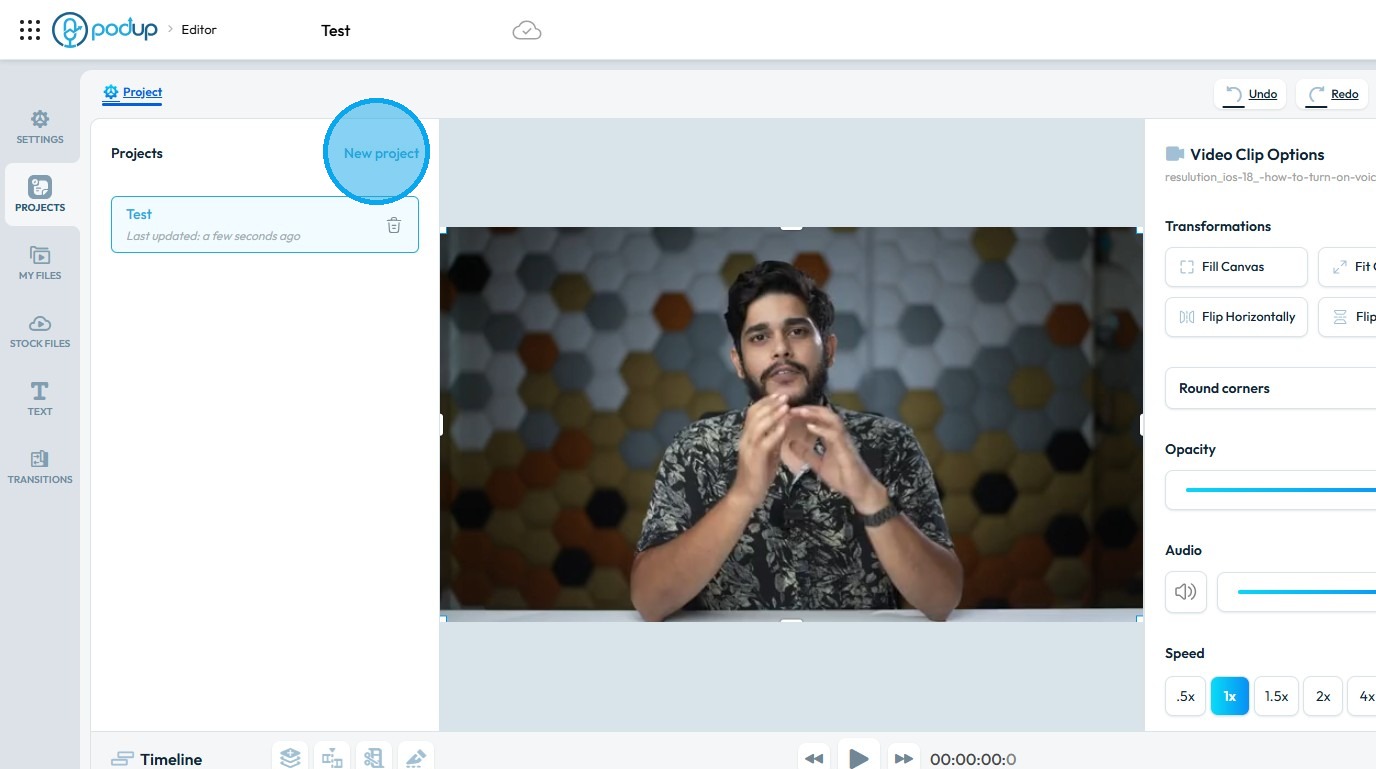
3. Select "New project"
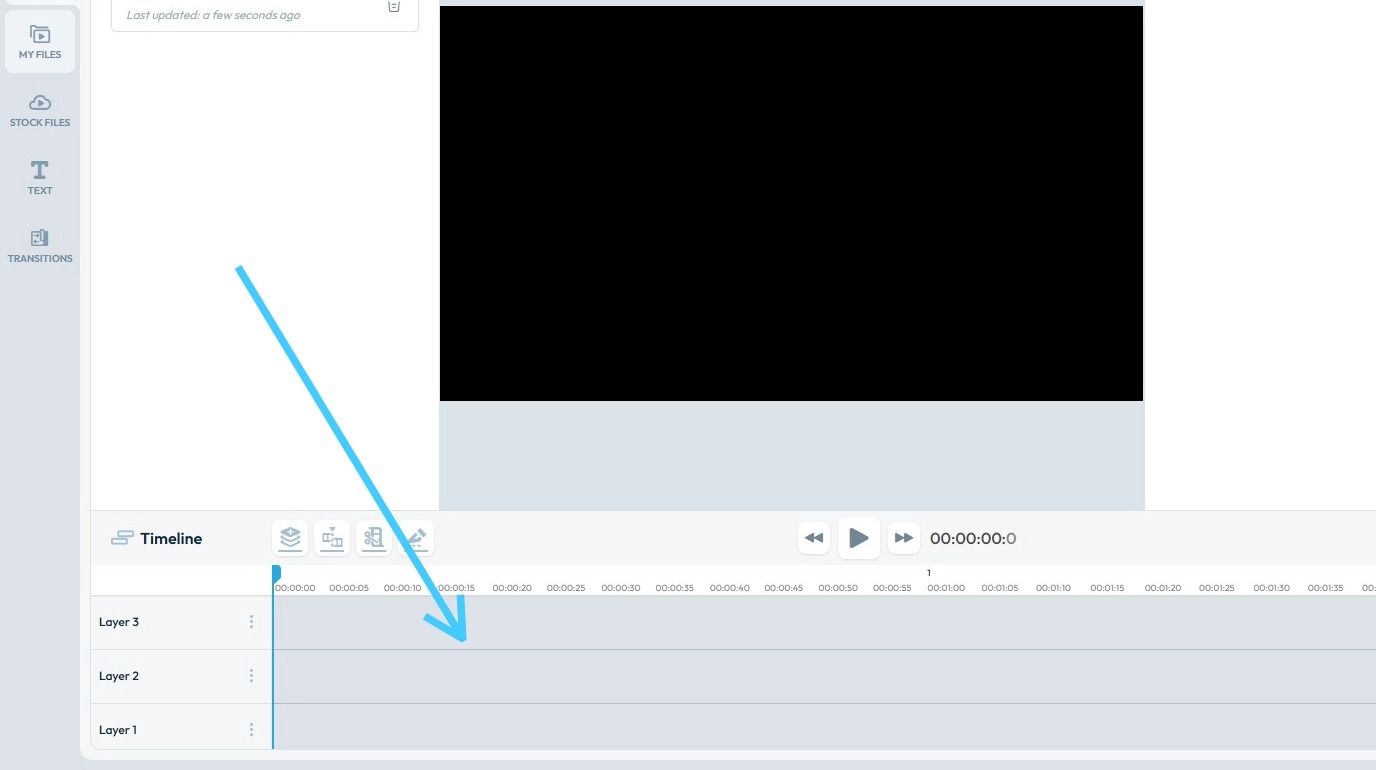
4. A new project will be created and loaded, closing the previous one
5. Click "My Files"
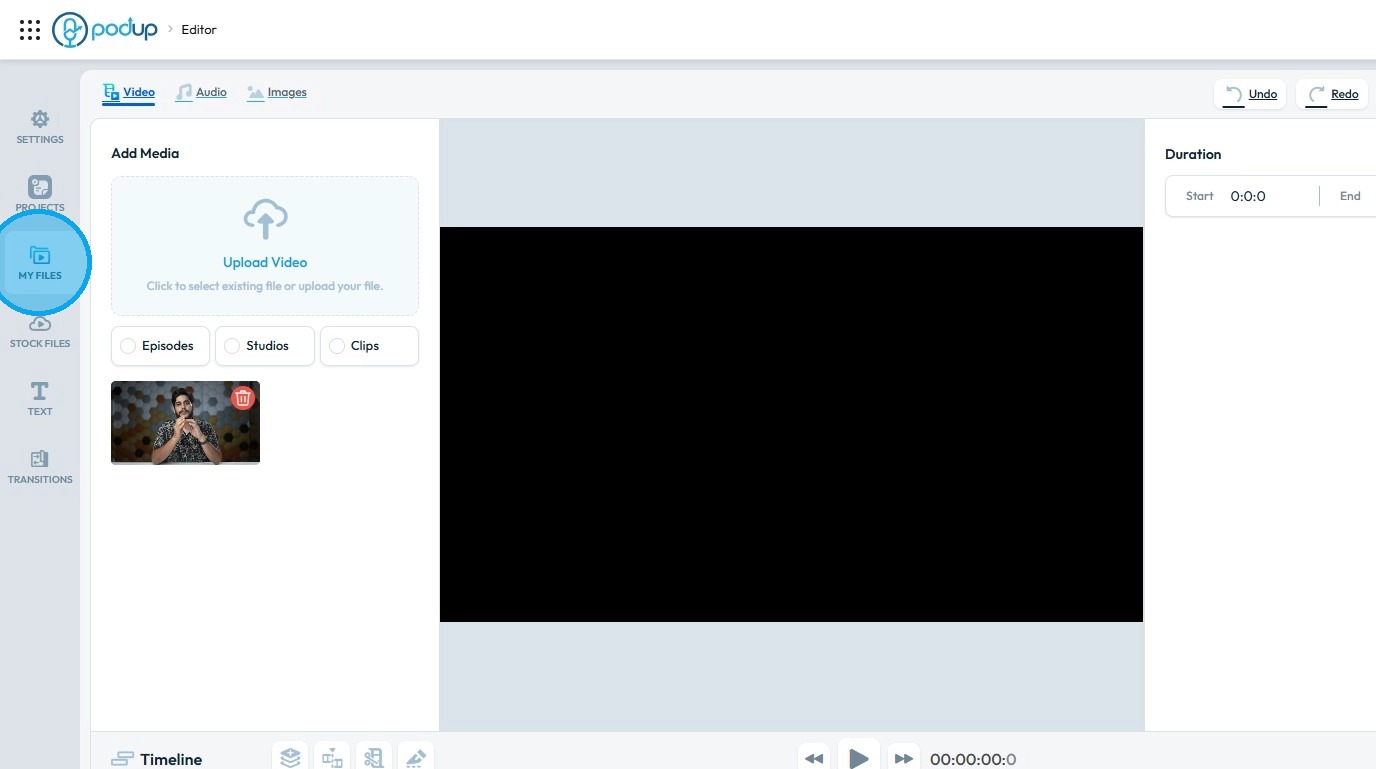
6. Click "Upload Video"
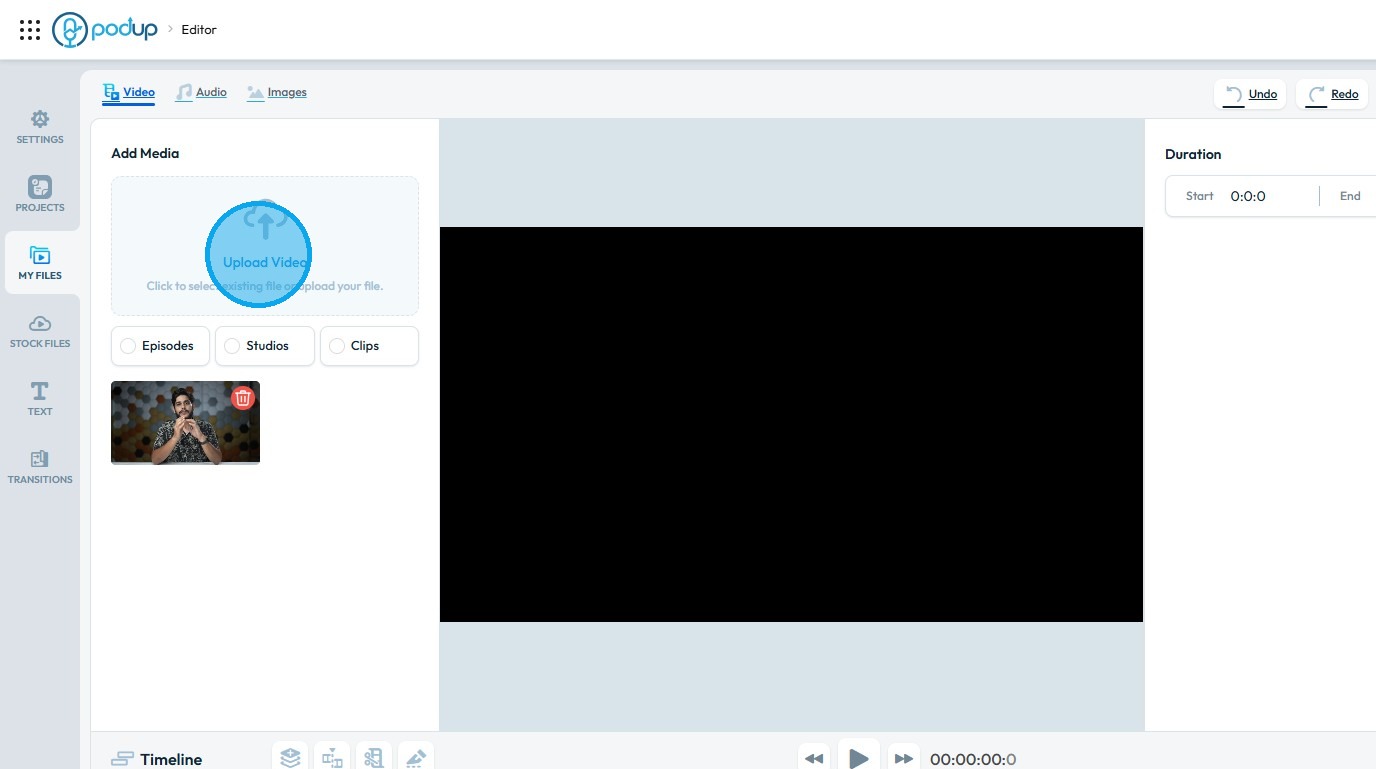
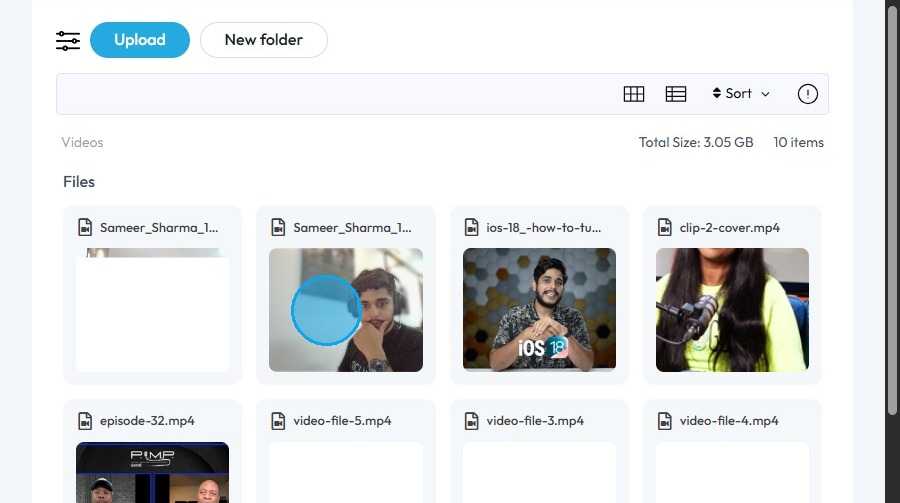
7. Click on the video you wish to import into the Editor
8. Click "Select"
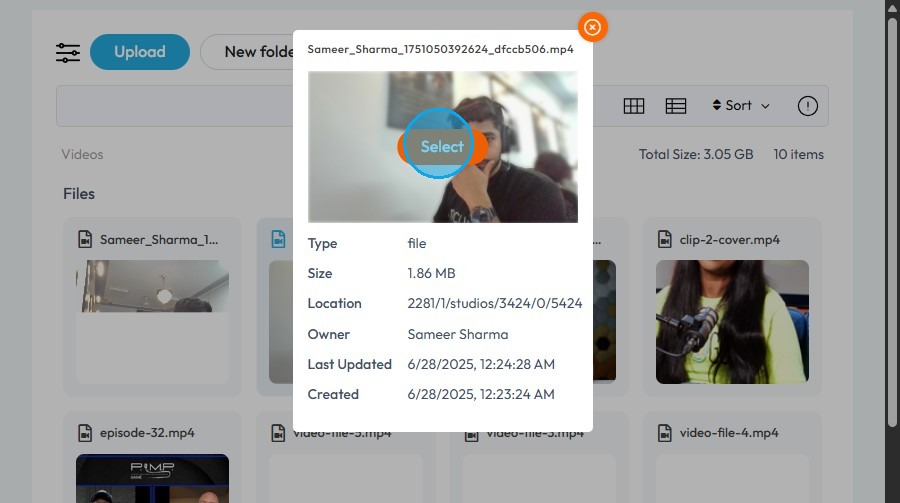
9. The video file will be loaded into the New Project